BGEE+BG2EE Solo No-Reload Run/Video Guide
 Tisamon
Member Posts: 209
Tisamon
Member Posts: 209
The main purpose of this post is to serve as a text supplement to my video BGEE/BG2EE solo no-reload playthrough on Insane difficulty. It is, first and foremost, an exercise in careful long-term planning, an attempt to create a character that will retain maximum efficiency throughout both parts of the saga.
Please note: It probably goes without saying, but this is not a role-playing playthrough (very few, if any, solo no-reload runs are). My goals are efficiency and optimization, not being true to the alignment/doing things that make sense from the RP point of view. It’s important to stress that I do not force my approach on the potential reader/viewer, and some reciprocity would be greatly appreciated in this respect.
I. Preliminary remarks.
Over the course of the past year, I have completed and recorded solo no-reload BGEE runs with a Blackguard ( an Avenger ( and an Assassin/Fighter ( Some more (Half-Orc Cleric of Thalos and Half-Elf Totemic Druid spring to mind immediately) were left unfinished, for various reasons. In other words, as you can guess, at this point, I can solo the critical path of BGEE in my sleep. As far as BG2 is concerned, some solo no-reload attempts have been made by me as well ( but since the game was so goddamn buggy even with the latest G3 Fixpack plus TobEx, I’ve never considered it seriously, lest it turns into something like this: http://speeddemosarchive.com/BaldursGate2.html. However, the advent of BG2EE made me reconsider: after all, with the infamous ‘potion swap’ bug out of the picture, BG2 could have become fairly playable for a hardcore soloist, not to mention all of the interesting shiny new stuff, et caetera.
Deciding on a character for such a double run was a difficult task. If my numerous BGEE playthroughs taught me anything, it was that without a slightest doubt, a dual-wielding Poison Weapon user with warrior ApR is the most damage-intensive character in the whole saga. Thus, I was left with two possibilities that do not drop utility/survivability for pure damage: an Assassin/Fighter, and a Blackguard. Then came the other considerations. Both fare great in BGEE, yet overall, Blackguard, to the best of my judgment, should be considered a stronger option. That said, to take maximum advantage of the best (best DpR, plus available the earliest, if you know exactly what & how to do) dual-weapon combination in BG2 - Usuno/Belm, one has to achieve scimitar/wakizashi grandmastery. Only Assassin/Fighter is capable of achieving it. Now, I could have settled for a simple Celestial Fury/Belm Blackguard, but... meh. You see, I have never been a fan of conventional wisdom (“Just equip that fantastic katana, it’s the best main-hand weapon in the whole game”). Not to mention the conventional wisdom is often imprecise, or altogether incorrect: Usuno/Belm does ~10% more damage than Fury/Belm at equal proficiency level – do the math, if you don’t trust me; besides, Usuno/Belm setup starts to benefit from grandmastery as early as level 9 (assuming two stars in two-weapon style), while Fury/Belm only becomes fully grandmastery-eligible at... level 18!
So, Assassin/Fighter it is. My plan is to dual-class into Fighter at Assassin level 6 (20,000 xp), in order to have both 95% pickpocket necessary to steal Drizzt’scimitars, and 50% set traps with 2 traps/day that will definitely help to successfully ambush Elminster (and not die of boredom in the process). Obviously, our Assassin should be NG or CG to be able to equip Twinkle.
II. The annotated walkthrough.
This section will get updated (steadily and regularly, I hope), as I progress through the saga.
A note regarding the videos: Since I have recorded numerous solo no-reload runs, I don’t feel I have to prove anything anymore. Therefore, this particular run won’t be recorded in its entirety – the time/effort investment is simply too much, and no sane person watches those videos from the beginning to the end anyway. I will omit all the by-and-large uneventful travel parts, and record only when I’m actually doing something. If that will make a potential viewer think I am secretely saving the game during those travel episodes, then re-loading like crazy, so be it.
The rules: Ironman (no re-rolls at creation screen, no-reload), solo (NPC interaction possible as long as one doesn’t use them to complete an in-game task such as picking a lock; accepting them into the party to take their items is acceptable, and, in fact, highly recommended), Insane difficulty (no slider down at level-up for max hp), one save per chapter (at chapter’s start) allowed for technical reasons.
(1) Assassin leveling up phase.
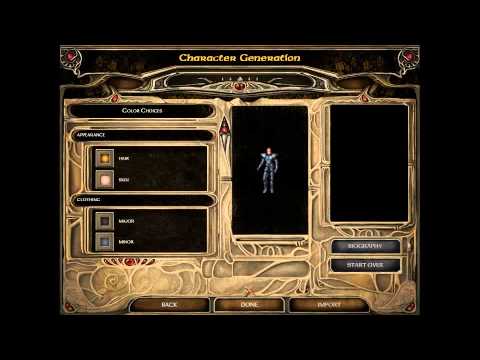
At character creation screen, I leave 12 points unused on a roll of 75, as I can get by with just 63 ability points (Str 18/Dex 18/Con 18/Int 3/Wis 3/Cha 3). In Candlekeep, it’s highly recommended to buy a helm and a sling with some bullets.
 http://youtu.be/sbHfrFq9vdo
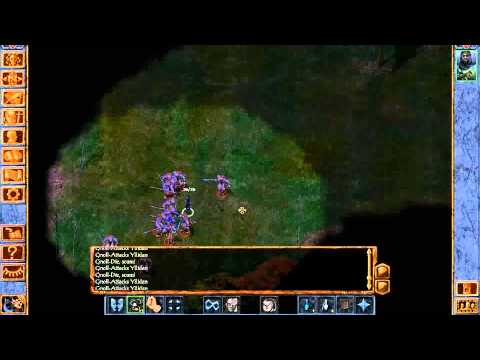
After chapter I begins, accept Imoen, then Xzar and Montaron into a party to take their potions (most notably, Oil of Speed). Head to Mutamin’s Garden via High Hedge, do not enter Coast Way. Our goal at Mutamin’s Garden is to kill 20,000 xp worth of Basilisks. Involving Korax, it’s a completely safe process. The only opponent that can give you some trouble is, unsurprisingly, Mutamin himself. Below I demonstrate how to deal with him safely with a thief character. Note the Greater Basilisk’s script breaks when this method is used, and he never goes hostile when attacked.
 http://youtu.be/x105qll20Ao
After reaching level 6 with the Assassin (Pick Pockets 95%, Set Traps 50%, + Long Sword, + Shortbow, + Sling), return to Beregost, and proceed to Nashkel to obtain Ankheg Plate Mail and to start chapter II. Head to Fisherman’s Lake. Here we pickpocket Drizzt for both scimitars. Nothing much to add, except technically, it’s always preferable to move through this map stealthed.
 http://youtu.be/KcSkN6r4fCw
(2) Fighter leveling up phase.
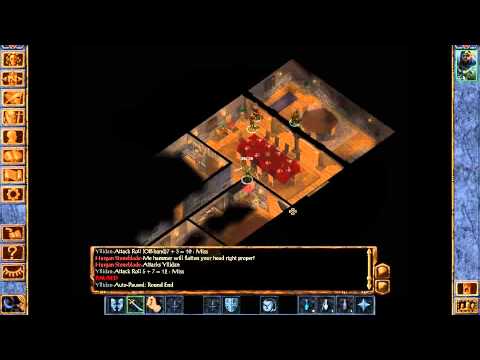
Return to Lion’s Way, and move eastwards to Coast Way. We are going to ambush Elminster. The precise technique is demonstrated in the video. In a nutshell, first you set 7 traps, then dual-class into Fighter, and, finally, attack Elminster with the sling. 26,000 xp is a nice bonus.
 http://youtu.be/1BkkOzpsV5w
Be sure to pick up Ring of Protection +1 and Girdle of Piercing en route to the Friendly Arm Inn. At FAI, there are lots of small things to do: pick up Ring of Wizardry, kill Tarnesh, identify your loot, kill Dorn for Rancor (no reputation penalty), and, very importantly, get Potion of Invisibility from Jaheira. With all those tasks completed, head to Ulgoth’s Beard. At the inn, buy the Greenstone Amulet first, while your reputation is still high enough. Next, kill Hurgan for 5,000 xp and some sellable magical loot.
 http://youtu.be/IH5IexmuntE
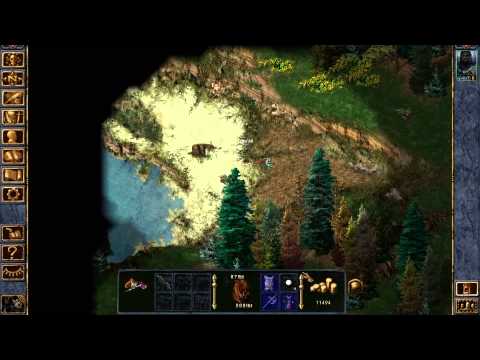
Go back to High Hedge, kill Thalantyr (very trivial, 3,000 xp, no reputation penalty). Proceed to the Shipwreck’s Coast, kill Shoal the Nereid (5,000 xp, sling her while kiting carefully, as if she ever catches up with you and initiates dialogue – she can do that even if hostile - your game is over automatically).
 http://youtu.be/TCeTKmJqFBA
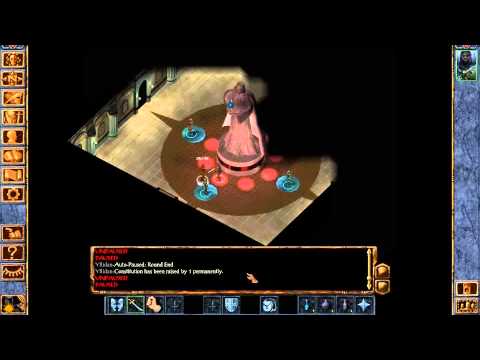
Visit the Lighthouse area to kill a total of 6 Sirines (12,000 xp, Greenstone Amulet charges x2 mandatory). Enter the cave to obtain the Manual of Bodily Health (Con +1). The best way to achieve that goal is to use Oil of Speed, Greenstone Amulet charge (to block the trap’s effect), and take the left path to the pool.
 http://youtu.be/F6jWQB1E8is
Finally, go to the Temple. Identify/donate, if needed. Then kill Kelddath Ormlyr and 4 Sirines (13,000 xp, use another charge from the Greenstone Amulet).
 http://youtu.be/hOlZ0PPcnsA
(3) Critical path run.
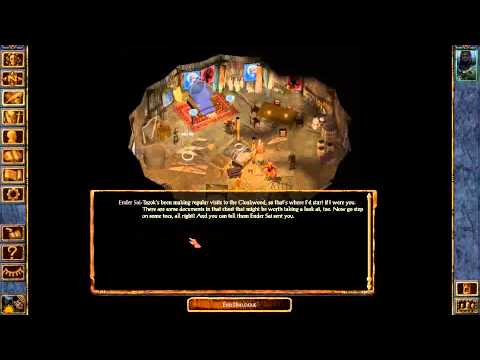
All right, you should have accumulated 64000 xp (level 7) as a Fighter by this point, so your 6 levels of Assassin become active once again. Time to do actual quests. Head to Nahkel Mines to kill Mulahey. It’s a super-trivial mission, the only thing that probably should be mentioned being all those nasty traps on level 3 are easily detected and disarmed with mere 10% in Detect Traps (remove your plate mail first, of course). With the death of Mulahey, chapter III starts. Go to Beregost, enter the 2nd floor of Feldepost’s Inn, kill Tranzig to reveal the Bandit Camp’s location on the world map. Travel to Bandit Camp. Use Jaheira’s Potion of Invisibility to infiltrate the camp unseen. Enter the big central tent. Talk to Ender Sai. Attack the bandits, starting with the mage. After the battle, apply whatever electricity resistance you have (Mulahey’s Boots of Grounding, Potion of Insulation, Potion of Absorption) and loot the trapped chest to start chapter IV.
 http://youtu.be/-Fs4j5RU-Gc
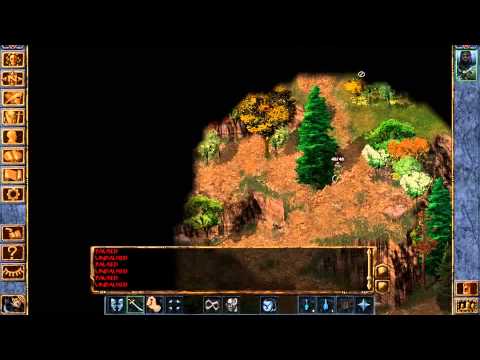
Very important: do not forget to pick up a Potion of Magic Blocking from the barrel in the tent. Revisit Ulgoth’s Beard. You should have about 35,000 gp now. That is enough to purchase a Ring of Invisibility, probably the most critical item needed for the completion of this run. Head to Cloakwood. The second Cloakwood area (Cloakwood Nest, AR2100) features numerous instant-kill (well, maybe not so instant, but nasty as hell) traps. You can save yourself a lot of trouble by carefully following the route I demonstrate.
 http://youtu.be/cHG5FLZB0A8
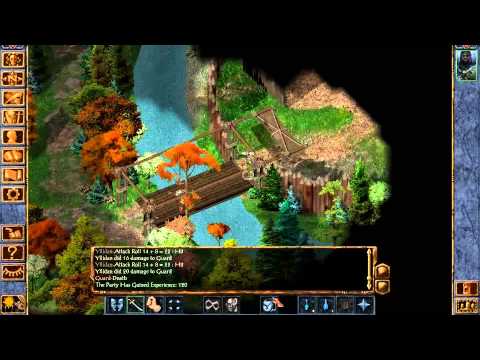
At Cloakwood Mines entrance area, kill Drasus’ party. Use your trusty Greenstone Amulet, Poison Weapon, start with the mages, and it is not going to be an epic battle, to put it mildly. Don’t forget to loot Boots of Speed from poor Drasus’ corpse.
 http://youtu.be/CETMPLtpTfQ
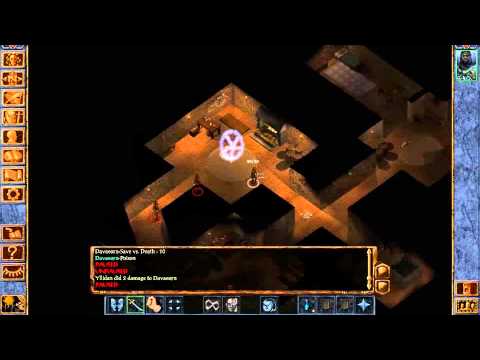
Use Ring of Invisibility. Descend to the 4th level. Kill the guard, open the secret door. Use Potion of Magic Blocking and Poison Weapon. Ring of Invisibility again. Engage Davaeorn and try to get a couple of hits through his Mirror Image. His script will start executing, he will teleport around the area a lot, casting some spells in the process. However, his hp is very low (45 hp), so three successful poison-enhanced hits will kill him. The death of Davaeorn starts chapter V.
 http://youtu.be/AuBuiZ_yWt8
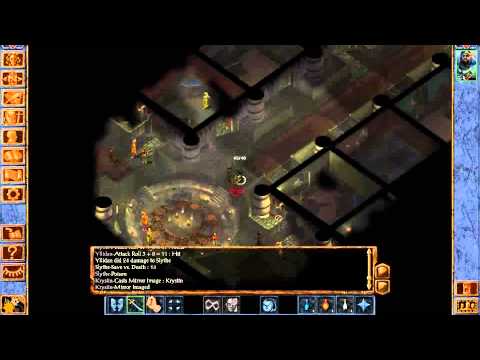
On to Baldur’s Gate. Accept Scar’s mission, visit Sorcerous Sundries to buy Potion of Absorption x2, Potion of Cloud Giant Strength, and Potion of Explosions. Pick up a Manual of Quickness of Action (Dex +1) from the barrel in Black Lily’s room at the Thieves’ Guild. Do the Seven Suns quest, speak to Duke Eltan, infiltrate the 5th floor of Iron Throne HQ (with Ring of Invisibility, of course), find the incriminating evidence, get teleported to Candlekeep by Eltan to start chapter VI. While at Candlekeep library, speak to Koveras at 2nd floor, then head back outside to get arrested. At Catacombs 1st level, go invisible, head left, then up, Potion of Absorption to avoid instant-death from the Lightning Bolt trap, Potion of Cloud Giant Strength to open the sarcophagus (lock difficulty 80, so that’s the easiest way). Get a Manual of Gainful Exercise (Str +1). Exit the Catacombs to start chapter VII. At the start of the chapter, I suggest revisiting FAI, donating there to raise the reputation to 10, then resting at the inn to gain Draw Upon Holy Might Bhaalspawn power. After which, head to Baldur’s Gate Docks, Iron Throne HQ, speak with the Flaming Fist mercenary that is waiting outside, infiltrate the 5th floor again (while invisible), kill Cythandria for Sarevok’s diary, descend to the sewers, enter the Undercellars. Here you will need to kill Slythe to get an invitation, which is not very difficult, plus collect a Cloak of Balduran by killing Quenash (reputation does not matter at this point).
 http://youtu.be/mQVuav2KHWo
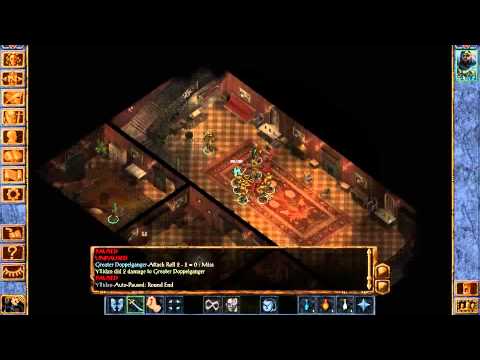
Head to the Duchal Palace. Pre-buff. The best course is: Draw Upon Holy Might, Vampiric Touch on any inanimate object, Poison Weapon. Proceed to the main hall, kill the doppelgangers, get teleported to Thieves’ Guild.
 http://youtu.be/N9xNrblSM-I
Descend the stairs to enter Thieves’ Maze area. Use Potion of Absorption, Draw Upon Holy Might, cast Vampiric Touch on Voleta (again, reputation is of no value at this stage), go invisible. Run through the maze. The Fireball trap shouldn’t hit you with Boots of Speed equipped, the Lightning Bolt trap will deal no damage, while the damage from Magic Missile traps you will be able to tank under DUHM + Vampiric Touch effects. Kind thanks, Voleta! Exit the maze to the Undercity. Head to Temple of Bhaal while still invisible. Set 7 traps near the temple gate. Enter the temple, taking the middle of the right side. Proceed carefully until you can discern a cyan circle around the bat near the throne. Target it with your Potion of Explosions, throw it, and immediately run outside. Don’t stop at the gate, move to the side so that the gate is covered with fog of war. Buff with DUHM and Poison Weapon (I use a Potion of Heroism as well, but this is purely optional). Approach the gate, where Sarevok that has followed you awaits. Immediately hit him with Larloch’s Minor Drain. Sarevok will initiate a dialogue, after which your traps should trigger. Now, he should be ‘Badly Injured’. All you need to do is to land a couple of hits, then run away. The poison will finish him off.
 http://youtu.be/aaJtxFqgKnQ
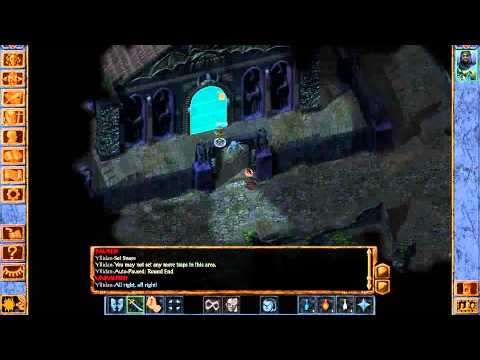
Save your game to be able to import into BG2EE.
(4) Gearing up phase.
Import your character into BG2EE. After the cutscene, make sure your character has a valid portrait, since it’s no fun running around with a huge question mark instead.
 http://youtu.be/m2DWGmXRVos
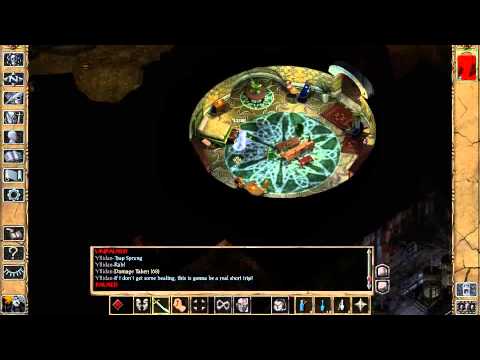
The starting dungeon is surprisingly tricky for a relatively low-hp character. Let’s take a closer look at the tougher moments (I assume the necessary minimum route here, so I skip Ilyich, Plane of Air, etc.). First of all, we have a nasty disabling mephit in a golem room. I suggest setting two traps near the door, then opening it and letting them kill the mephit without taking any risks.
 http://youtu.be/WDdU7xY5MRA
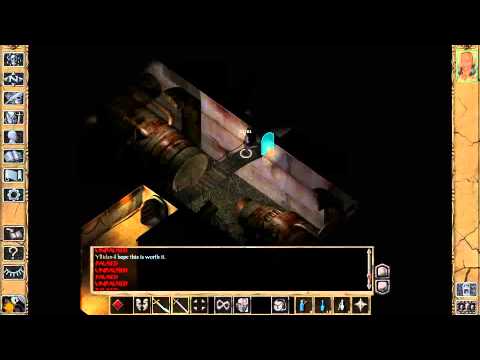
The second episode I consider a risky one pertains to a trapped drawer containing Helm of Balduran. Since no helmet in the whole BG saga even comes close, you absolutely must obtain it. The technique I prefer to use is DUHM + Vampiric Touch on a drawer/table/shelf. This combination should give you enough hp to withstand the damage.
 http://youtu.be/13f_4jG4V8g
Irenicus’ room is choke-full of traps, so be careful. Moreover, the portal key is stored within a double-trapped chest. DUHM + Vampiric Touch, stand before the chest to trigger trap no. 1. Rest. DUHM + Vampiric Touch, open the chest to trigger trap no. 2.
 http://youtu.be/QUQo0hh1DRo
The mephit room on the 2nd floor of Irenicus’dungeon can be deadly due to control spells some of the mephits possess (a failed save on Prismatic Spray will herald your inevitable doom, for instance). The tactic I prefer to use here is to destroy the portals with a Poison Weapon-enhanced shortbow. It is safe enough, but look at me lying on the ground for a very long time (failed a save on the last mephit, while the portal died of poison).
 http://youtu.be/N97vwyrVwg8
The last of the risky instances in Irenicus’ dungeon is the trapped bridge that can be skipped altogether under the effects of Oil of Speed (you should have picked two of those in the dungeon, even if following the minimal route).
 http://youtu.be/wf0wuEnXrGY
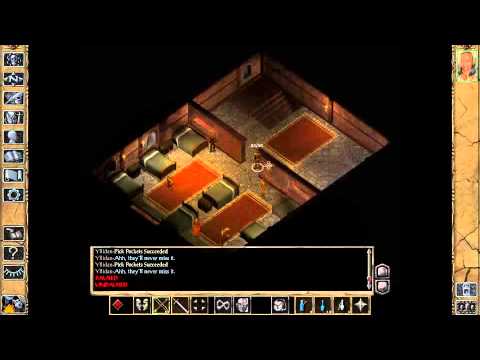
As soon as chapter I begins, head to the Den of Seven Vales, 2nd floor. I suggest removing your armor to pickpocket Amon first (most notably, Cloak of Non-Detection), then using a bit of cheap dishonest fake-talking to kill Brennan (Ring of Invisibility). The rest of the party won’t care.
 http://youtu.be/B9HY_cg_bEY
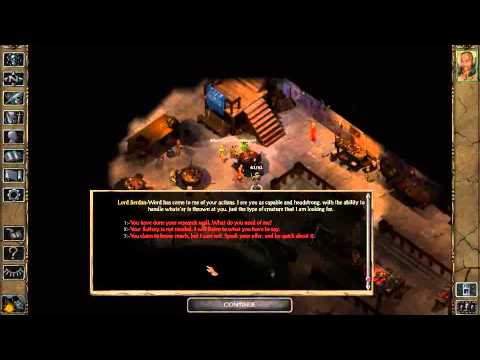
After selling the loot at Adventurer’s Mart (plus pickpocketing Ribald for his Ring of Regeneration), move on to the Slums district to start chapter II. Enter Copper Coronet to speak to lord Jierdan (aka Firkraag), then kill Lehtinan to make Bernard think Hendak promised us a discount (though we’ve never even seen the man) and open the access to his special stock. Oh, Lehtinan also drops loads of expensive loot. Buy a Sling of Seeking from Bernard.
 http://youtu.be/22LWWBmhjK0
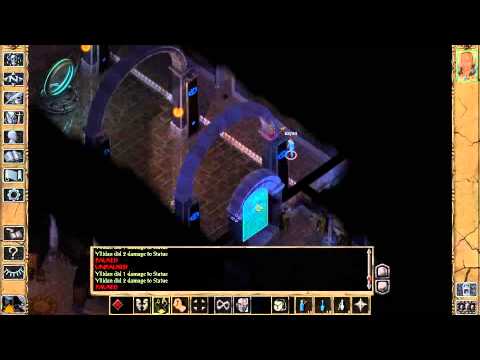
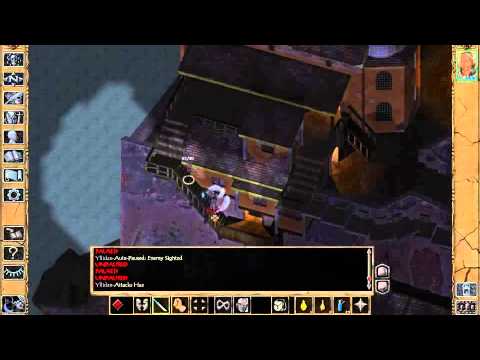
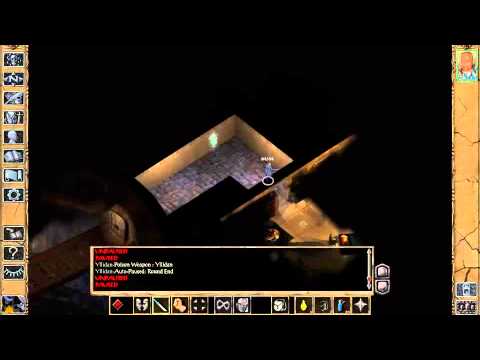
At this point, you should prepare for some adventures outside the city. Stock on Oil of Speed (Ribald sells those) and, optionally, buy a Potion of Cloud Giant Strength from Roger in the sewers. Go to City Gates (while invisible, preferably), skip the Suna Seni encounter, speak to Phlydian, exit the city. Our first stop is Trademeet. Make short work of the attacking beasts, then head to the Mayor’s House. Get Druid Grove marked on your world map. Go to Druid Grove (invisible, otherwise you’ll be fighting a ton of trolls in no time), enter the Ogre Tower, pick up Belm from an open chest. Our next stop is Watcher’s Keep, which is quite a serious business. Since you enter the 1st level of the Keep at level 8, the enemies in the rooms won’t be especially numerous or nasty. That said, it’s still a good idea to run invisible at all times. Collect the bell and the candle. Study the high priest’s sarcophagus. Before you start with the ritual, set 7 traps near the right statue (you can start with the left one, to be honest, I just think of the right as the more important one as it carries Foebane). Place the bell on the altar. Two statues will come to life. Traps + Poison Weapon-buffed Sling of Seeking is your friend here. The first one will fall.
 http://youtu.be/0PsZWjZ2uF8
Then the second one.
 http://youtu.be/UGz6L7hgMtM
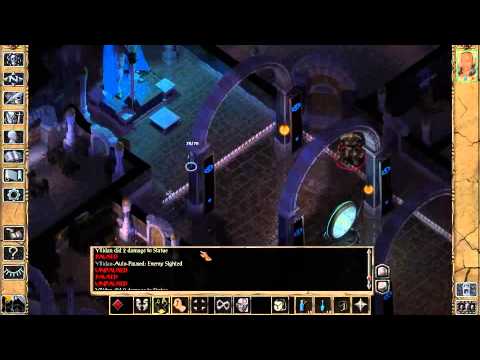
Now, set traps near the Usuno statue, then complete the ritual. The same tactics as with the first two statues apply here, the only difference being you need Oil of Speed in this case to outmaneuver four enemies at once. After the Usuno statue falls, collect the wakizashi. You should be level 9 by now, so scimitar grandmastery is already there, and now our weapon setup is ready.
 http://youtu.be/69_4gkzdszs
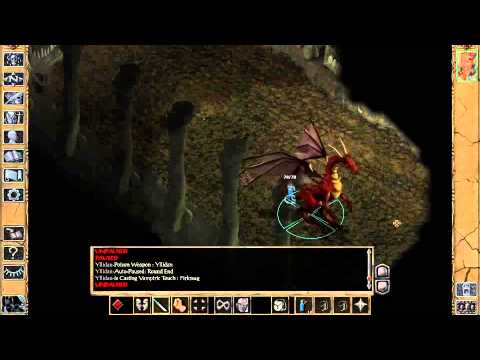
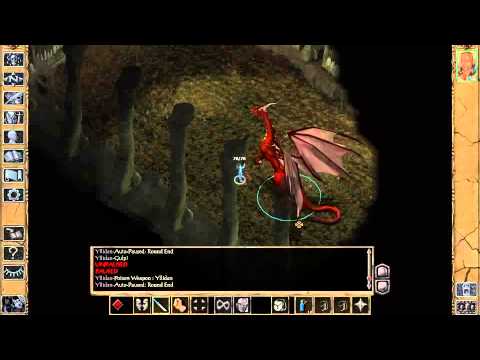
Leave WK and head to Windspear Hills. Nothing particularly interesting here. Defeat some knights disguised as monsters, defeat some bandits, enter Firkraag’s Temple invisible, run to the dragon lair at 2nd level. Nothing en route to Firkraag should present any trouble with Ring of Invisibility equipped (remember that you can rest while invisible without breaking the effect, effectively gaining an extra Invisibility charge). At Firkraag’s lair, set 7 traps, and use the following: Potion of Cloud Giant Strength, DUHM, Oil of Speed, Poison Weapon. When done with the pre-buffing, initiate a fight with Vampiric Touch. The initial impact of Vampiric Touch, 7 traps and several hits from Usuno/Belm (lightning + poison) should be enough to deal with Firkraag, if you are feeling lucky.
 http://youtu.be/B-ceJX6lI1c
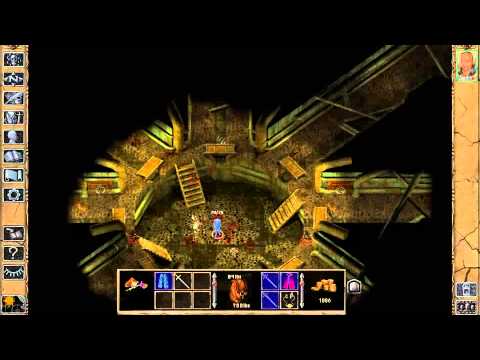
As you can see, Firkraag can be killed solo with a Fighter 9/Assassin 6 without exceptional gear, bar the weapons (I’m showing the character screen and the inventory on purpose in the video). However, if you aren’t in a heroic mood, feel free to fake-talk that dragon to death. Same result, significantly less epic, but infinitely safer.
 http://youtu.be/gIiP5yedqP0
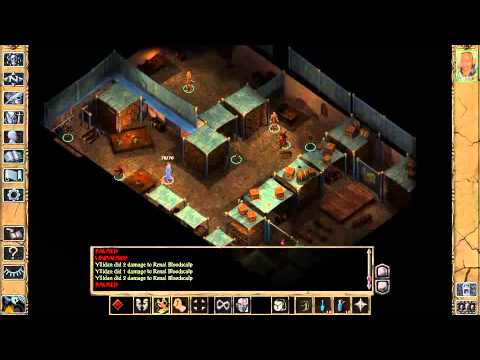
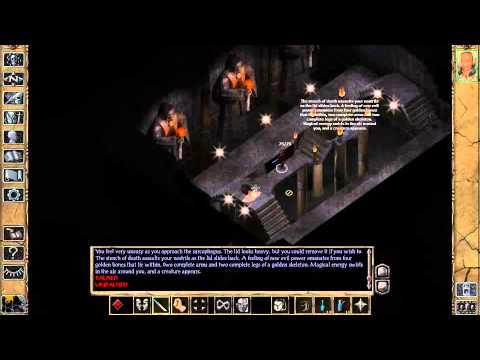
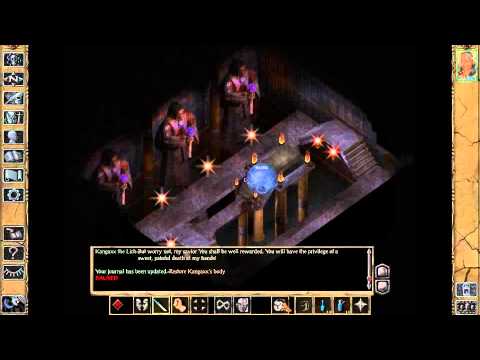
Buy a Potion of Fire Giant Strength (Roger in the Sewers sells those), head to the Docks. DUHM, force Kangaxx’s door open. Speak with Kangaxx, accept the quest. Enter the Shadow Thieves’ guidlhall, move on to Renal’s room. Equip your trusty sling, DUHM, Poison Weapon, fake-talk. After he gets hit 6 times, stand near the door. The moment Renal dies of poison damage, pause and leave the room. Come back, the thieves won’t go hostile, and the invincible version of Arkanis Gath won’t appear. Collect the loot, most notably Boots of Speed.
 http://www.youtube.com/watch?v=ECgp00GpSfE
Proceed with Kangaxx quest. Enter the Bridge district, go into the Elemantal Lich’s house, deal with him by setting 7 traps and attacking him once the moment he appears.
 http://www.youtube.com/watch?v=1vaFY7gvZl4
Head to Temple district, accept the Unseeing Eye quest, descend to the sewers. Kill the Rakshasa at the center of the area for the wonderful Cloak of Sewers.
 http://www.youtube.com/watch?v=Hm8TUEugSV4
Proceed northwest to enter the Unseeing Eye area. Speak to Gall to get the key to the northern door, open it, enter the Shade Lich’s lair. The same tactics as in the Elemental Lich’s case apply.
 http://www.youtube.com/watch?v=IemyD-9wNbA
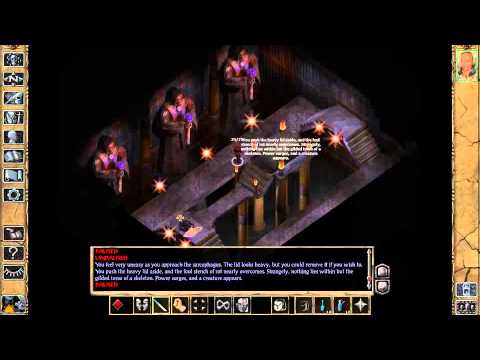
With that done, buy Potion of Genius x 2 (any temple), and a scroll of Protection from Magic. Head to Kangaxx’s house. Set 7 traps near the sarcophagus. Use both potions to raise your Int to 9+, then the scroll. The Lich phase of Kangaxx is dispatched easily enough with the same lich-slaying tactics, the Demilich is slain quite easily from the sphere of Protection from Magic. Usuno is +4, and so will hit the Demilich. Loot the Ring of Gaxx.
 http://www.youtube.com/watch?v=X8NF83jOLLc
The main bulk of your equipment should be acquired by now: Helm of Balduran, Usuno/Belm, Red Dragon Plate, Boots of Speed, Cloak of the Sewers, Ring of Gaxx. However, there is some more gear you can get optionally. For example, at de'Arnise Keep's main floor, there is a hidden room containing a Ring of Earth Control (-1 AC, stacks with magical armor). The Mercykiller Ring is superb as far as convenience items go, as it allows you to set traps much more easily. Rasaad’s quest (start in Trademeet -> City Gates -> Abandoned Aphitheater -> random encounter with Sisters of Selune -> Heretic Temple) is very trivial by itself, and grants access to a whole hoard of expensive magical loot. Of particular note are Gauntlets of Aln Zekk (15% chance to do 1d10 cold dmg on hit), since the bracers slot will remain vacant otherwise until very late in the game (the better options are either redundant, or force too much of a diversion from a critical path). A Cowl of Stars is actually mandatory for an unavoidable troll encounter at Spellhold, while a Belt of Minor Invulnerablity may prove very useful at the Western Tunnels in Underdark. Using the rest of the new items is really up to you. The battles over the course of Rasaad’s quest are easy. Also, please note that if you leave Rasaad at the Abandoned Amphitheatre, the Sisters of Selune encounter will still trigger, with the sisters remaining friendly as you chop them to pieces, as they see no Rasaad to attack! Unfair, but extremely efficient. You only technically need Rasaad to trigger a certain cutscene at the Amphitheatre, and then to gain access to trials at the Heretic Temple, so our solo run is not compromised.
(5) SoA critical path run.
Well, let's put it this way: I have become disinterested in this run. Currently, I'm in Suldanesselar, so the game is almost finished: during the whole critical path run, I didn't feel challenged once. And we are talking Fighter 10-13/Assassin 6, not some godly levels. The gear is good, of course, but nothing special: every other warrior would have the same (or better) items at this point.
Still, I'm willing to upload 3 videos (Bodhi's last task in chapter III, fighting Adalon in chapter VI) that are interesting somewhat. Please note Adalon is perfectly skippable, you only need to initiate a fight with her to make the Underdark exit open. Oh, needless to say, she's also fake-talkable.
During the last Bodhi mission in chapter III, I prefer to kill Haz first (and it's the easiest way to do it, IMHO), then do all the rest of the mini-tasks in a free order.
 http://youtu.be/J9o_U_ta37I
That's the Aran battle. Pretty trivial, if you have Invisibility and can deal enough damage during the first round.
 http://youtu.be/sF4KaoxGZD0
And, finally, Adalon. Not an easy fight, but a clever use of traps and switching to a Slayer form (to resist dragon fear and paralysis) at the right moment with Poison Weapon enable will make you victorious.
 http://youtu.be/Ki9dmpRXGQA
That's it, this post will not be updated anymore (not in the near future, at least). I'm not deleting the save, so if I suddenly feel like kicking some Yaga-Shura arse with an underleveled Fighter/Assassin, it will be resurrected.
Please note: It probably goes without saying, but this is not a role-playing playthrough (very few, if any, solo no-reload runs are). My goals are efficiency and optimization, not being true to the alignment/doing things that make sense from the RP point of view. It’s important to stress that I do not force my approach on the potential reader/viewer, and some reciprocity would be greatly appreciated in this respect.
I. Preliminary remarks.
Over the course of the past year, I have completed and recorded solo no-reload BGEE runs with a Blackguard ( an Avenger ( and an Assassin/Fighter ( Some more (Half-Orc Cleric of Thalos and Half-Elf Totemic Druid spring to mind immediately) were left unfinished, for various reasons. In other words, as you can guess, at this point, I can solo the critical path of BGEE in my sleep. As far as BG2 is concerned, some solo no-reload attempts have been made by me as well ( but since the game was so goddamn buggy even with the latest G3 Fixpack plus TobEx, I’ve never considered it seriously, lest it turns into something like this: http://speeddemosarchive.com/BaldursGate2.html. However, the advent of BG2EE made me reconsider: after all, with the infamous ‘potion swap’ bug out of the picture, BG2 could have become fairly playable for a hardcore soloist, not to mention all of the interesting shiny new stuff, et caetera.
Deciding on a character for such a double run was a difficult task. If my numerous BGEE playthroughs taught me anything, it was that without a slightest doubt, a dual-wielding Poison Weapon user with warrior ApR is the most damage-intensive character in the whole saga. Thus, I was left with two possibilities that do not drop utility/survivability for pure damage: an Assassin/Fighter, and a Blackguard. Then came the other considerations. Both fare great in BGEE, yet overall, Blackguard, to the best of my judgment, should be considered a stronger option. That said, to take maximum advantage of the best (best DpR, plus available the earliest, if you know exactly what & how to do) dual-weapon combination in BG2 - Usuno/Belm, one has to achieve scimitar/wakizashi grandmastery. Only Assassin/Fighter is capable of achieving it. Now, I could have settled for a simple Celestial Fury/Belm Blackguard, but... meh. You see, I have never been a fan of conventional wisdom (“Just equip that fantastic katana, it’s the best main-hand weapon in the whole game”). Not to mention the conventional wisdom is often imprecise, or altogether incorrect: Usuno/Belm does ~10% more damage than Fury/Belm at equal proficiency level – do the math, if you don’t trust me; besides, Usuno/Belm setup starts to benefit from grandmastery as early as level 9 (assuming two stars in two-weapon style), while Fury/Belm only becomes fully grandmastery-eligible at... level 18!
So, Assassin/Fighter it is. My plan is to dual-class into Fighter at Assassin level 6 (20,000 xp), in order to have both 95% pickpocket necessary to steal Drizzt’scimitars, and 50% set traps with 2 traps/day that will definitely help to successfully ambush Elminster (and not die of boredom in the process). Obviously, our Assassin should be NG or CG to be able to equip Twinkle.
II. The annotated walkthrough.
This section will get updated (steadily and regularly, I hope), as I progress through the saga.
A note regarding the videos: Since I have recorded numerous solo no-reload runs, I don’t feel I have to prove anything anymore. Therefore, this particular run won’t be recorded in its entirety – the time/effort investment is simply too much, and no sane person watches those videos from the beginning to the end anyway. I will omit all the by-and-large uneventful travel parts, and record only when I’m actually doing something. If that will make a potential viewer think I am secretely saving the game during those travel episodes, then re-loading like crazy, so be it.
The rules: Ironman (no re-rolls at creation screen, no-reload), solo (NPC interaction possible as long as one doesn’t use them to complete an in-game task such as picking a lock; accepting them into the party to take their items is acceptable, and, in fact, highly recommended), Insane difficulty (no slider down at level-up for max hp), one save per chapter (at chapter’s start) allowed for technical reasons.
(1) Assassin leveling up phase.
At character creation screen, I leave 12 points unused on a roll of 75, as I can get by with just 63 ability points (Str 18/Dex 18/Con 18/Int 3/Wis 3/Cha 3). In Candlekeep, it’s highly recommended to buy a helm and a sling with some bullets.
http://youtu.be/sbHfrFq9vdoAfter chapter I begins, accept Imoen, then Xzar and Montaron into a party to take their potions (most notably, Oil of Speed). Head to Mutamin’s Garden via High Hedge, do not enter Coast Way. Our goal at Mutamin’s Garden is to kill 20,000 xp worth of Basilisks. Involving Korax, it’s a completely safe process. The only opponent that can give you some trouble is, unsurprisingly, Mutamin himself. Below I demonstrate how to deal with him safely with a thief character. Note the Greater Basilisk’s script breaks when this method is used, and he never goes hostile when attacked.
http://youtu.be/x105qll20AoAfter reaching level 6 with the Assassin (Pick Pockets 95%, Set Traps 50%, + Long Sword, + Shortbow, + Sling), return to Beregost, and proceed to Nashkel to obtain Ankheg Plate Mail and to start chapter II. Head to Fisherman’s Lake. Here we pickpocket Drizzt for both scimitars. Nothing much to add, except technically, it’s always preferable to move through this map stealthed.
http://youtu.be/KcSkN6r4fCw(2) Fighter leveling up phase.
Return to Lion’s Way, and move eastwards to Coast Way. We are going to ambush Elminster. The precise technique is demonstrated in the video. In a nutshell, first you set 7 traps, then dual-class into Fighter, and, finally, attack Elminster with the sling. 26,000 xp is a nice bonus.
http://youtu.be/1BkkOzpsV5wBe sure to pick up Ring of Protection +1 and Girdle of Piercing en route to the Friendly Arm Inn. At FAI, there are lots of small things to do: pick up Ring of Wizardry, kill Tarnesh, identify your loot, kill Dorn for Rancor (no reputation penalty), and, very importantly, get Potion of Invisibility from Jaheira. With all those tasks completed, head to Ulgoth’s Beard. At the inn, buy the Greenstone Amulet first, while your reputation is still high enough. Next, kill Hurgan for 5,000 xp and some sellable magical loot.
http://youtu.be/IH5IexmuntEGo back to High Hedge, kill Thalantyr (very trivial, 3,000 xp, no reputation penalty). Proceed to the Shipwreck’s Coast, kill Shoal the Nereid (5,000 xp, sling her while kiting carefully, as if she ever catches up with you and initiates dialogue – she can do that even if hostile - your game is over automatically).
http://youtu.be/TCeTKmJqFBAVisit the Lighthouse area to kill a total of 6 Sirines (12,000 xp, Greenstone Amulet charges x2 mandatory). Enter the cave to obtain the Manual of Bodily Health (Con +1). The best way to achieve that goal is to use Oil of Speed, Greenstone Amulet charge (to block the trap’s effect), and take the left path to the pool.
http://youtu.be/F6jWQB1E8isFinally, go to the Temple. Identify/donate, if needed. Then kill Kelddath Ormlyr and 4 Sirines (13,000 xp, use another charge from the Greenstone Amulet).
http://youtu.be/hOlZ0PPcnsA(3) Critical path run.
All right, you should have accumulated 64000 xp (level 7) as a Fighter by this point, so your 6 levels of Assassin become active once again. Time to do actual quests. Head to Nahkel Mines to kill Mulahey. It’s a super-trivial mission, the only thing that probably should be mentioned being all those nasty traps on level 3 are easily detected and disarmed with mere 10% in Detect Traps (remove your plate mail first, of course). With the death of Mulahey, chapter III starts. Go to Beregost, enter the 2nd floor of Feldepost’s Inn, kill Tranzig to reveal the Bandit Camp’s location on the world map. Travel to Bandit Camp. Use Jaheira’s Potion of Invisibility to infiltrate the camp unseen. Enter the big central tent. Talk to Ender Sai. Attack the bandits, starting with the mage. After the battle, apply whatever electricity resistance you have (Mulahey’s Boots of Grounding, Potion of Insulation, Potion of Absorption) and loot the trapped chest to start chapter IV.
http://youtu.be/-Fs4j5RU-GcVery important: do not forget to pick up a Potion of Magic Blocking from the barrel in the tent. Revisit Ulgoth’s Beard. You should have about 35,000 gp now. That is enough to purchase a Ring of Invisibility, probably the most critical item needed for the completion of this run. Head to Cloakwood. The second Cloakwood area (Cloakwood Nest, AR2100) features numerous instant-kill (well, maybe not so instant, but nasty as hell) traps. You can save yourself a lot of trouble by carefully following the route I demonstrate.
http://youtu.be/cHG5FLZB0A8At Cloakwood Mines entrance area, kill Drasus’ party. Use your trusty Greenstone Amulet, Poison Weapon, start with the mages, and it is not going to be an epic battle, to put it mildly. Don’t forget to loot Boots of Speed from poor Drasus’ corpse.
http://youtu.be/CETMPLtpTfQUse Ring of Invisibility. Descend to the 4th level. Kill the guard, open the secret door. Use Potion of Magic Blocking and Poison Weapon. Ring of Invisibility again. Engage Davaeorn and try to get a couple of hits through his Mirror Image. His script will start executing, he will teleport around the area a lot, casting some spells in the process. However, his hp is very low (45 hp), so three successful poison-enhanced hits will kill him. The death of Davaeorn starts chapter V.
http://youtu.be/AuBuiZ_yWt8On to Baldur’s Gate. Accept Scar’s mission, visit Sorcerous Sundries to buy Potion of Absorption x2, Potion of Cloud Giant Strength, and Potion of Explosions. Pick up a Manual of Quickness of Action (Dex +1) from the barrel in Black Lily’s room at the Thieves’ Guild. Do the Seven Suns quest, speak to Duke Eltan, infiltrate the 5th floor of Iron Throne HQ (with Ring of Invisibility, of course), find the incriminating evidence, get teleported to Candlekeep by Eltan to start chapter VI. While at Candlekeep library, speak to Koveras at 2nd floor, then head back outside to get arrested. At Catacombs 1st level, go invisible, head left, then up, Potion of Absorption to avoid instant-death from the Lightning Bolt trap, Potion of Cloud Giant Strength to open the sarcophagus (lock difficulty 80, so that’s the easiest way). Get a Manual of Gainful Exercise (Str +1). Exit the Catacombs to start chapter VII. At the start of the chapter, I suggest revisiting FAI, donating there to raise the reputation to 10, then resting at the inn to gain Draw Upon Holy Might Bhaalspawn power. After which, head to Baldur’s Gate Docks, Iron Throne HQ, speak with the Flaming Fist mercenary that is waiting outside, infiltrate the 5th floor again (while invisible), kill Cythandria for Sarevok’s diary, descend to the sewers, enter the Undercellars. Here you will need to kill Slythe to get an invitation, which is not very difficult, plus collect a Cloak of Balduran by killing Quenash (reputation does not matter at this point).
http://youtu.be/mQVuav2KHWoHead to the Duchal Palace. Pre-buff. The best course is: Draw Upon Holy Might, Vampiric Touch on any inanimate object, Poison Weapon. Proceed to the main hall, kill the doppelgangers, get teleported to Thieves’ Guild.
http://youtu.be/N9xNrblSM-IDescend the stairs to enter Thieves’ Maze area. Use Potion of Absorption, Draw Upon Holy Might, cast Vampiric Touch on Voleta (again, reputation is of no value at this stage), go invisible. Run through the maze. The Fireball trap shouldn’t hit you with Boots of Speed equipped, the Lightning Bolt trap will deal no damage, while the damage from Magic Missile traps you will be able to tank under DUHM + Vampiric Touch effects. Kind thanks, Voleta! Exit the maze to the Undercity. Head to Temple of Bhaal while still invisible. Set 7 traps near the temple gate. Enter the temple, taking the middle of the right side. Proceed carefully until you can discern a cyan circle around the bat near the throne. Target it with your Potion of Explosions, throw it, and immediately run outside. Don’t stop at the gate, move to the side so that the gate is covered with fog of war. Buff with DUHM and Poison Weapon (I use a Potion of Heroism as well, but this is purely optional). Approach the gate, where Sarevok that has followed you awaits. Immediately hit him with Larloch’s Minor Drain. Sarevok will initiate a dialogue, after which your traps should trigger. Now, he should be ‘Badly Injured’. All you need to do is to land a couple of hits, then run away. The poison will finish him off.
http://youtu.be/aaJtxFqgKnQSave your game to be able to import into BG2EE.
(4) Gearing up phase.
Import your character into BG2EE. After the cutscene, make sure your character has a valid portrait, since it’s no fun running around with a huge question mark instead.
http://youtu.be/m2DWGmXRVosThe starting dungeon is surprisingly tricky for a relatively low-hp character. Let’s take a closer look at the tougher moments (I assume the necessary minimum route here, so I skip Ilyich, Plane of Air, etc.). First of all, we have a nasty disabling mephit in a golem room. I suggest setting two traps near the door, then opening it and letting them kill the mephit without taking any risks.
http://youtu.be/WDdU7xY5MRAThe second episode I consider a risky one pertains to a trapped drawer containing Helm of Balduran. Since no helmet in the whole BG saga even comes close, you absolutely must obtain it. The technique I prefer to use is DUHM + Vampiric Touch on a drawer/table/shelf. This combination should give you enough hp to withstand the damage.
http://youtu.be/13f_4jG4V8gIrenicus’ room is choke-full of traps, so be careful. Moreover, the portal key is stored within a double-trapped chest. DUHM + Vampiric Touch, stand before the chest to trigger trap no. 1. Rest. DUHM + Vampiric Touch, open the chest to trigger trap no. 2.
http://youtu.be/QUQo0hh1DRoThe mephit room on the 2nd floor of Irenicus’dungeon can be deadly due to control spells some of the mephits possess (a failed save on Prismatic Spray will herald your inevitable doom, for instance). The tactic I prefer to use here is to destroy the portals with a Poison Weapon-enhanced shortbow. It is safe enough, but look at me lying on the ground for a very long time (failed a save on the last mephit, while the portal died of poison).
http://youtu.be/N97vwyrVwg8The last of the risky instances in Irenicus’ dungeon is the trapped bridge that can be skipped altogether under the effects of Oil of Speed (you should have picked two of those in the dungeon, even if following the minimal route).
http://youtu.be/wf0wuEnXrGYAs soon as chapter I begins, head to the Den of Seven Vales, 2nd floor. I suggest removing your armor to pickpocket Amon first (most notably, Cloak of Non-Detection), then using a bit of cheap dishonest fake-talking to kill Brennan (Ring of Invisibility). The rest of the party won’t care.
http://youtu.be/B9HY_cg_bEYAfter selling the loot at Adventurer’s Mart (plus pickpocketing Ribald for his Ring of Regeneration), move on to the Slums district to start chapter II. Enter Copper Coronet to speak to lord Jierdan (aka Firkraag), then kill Lehtinan to make Bernard think Hendak promised us a discount (though we’ve never even seen the man) and open the access to his special stock. Oh, Lehtinan also drops loads of expensive loot. Buy a Sling of Seeking from Bernard.
http://youtu.be/22LWWBmhjK0At this point, you should prepare for some adventures outside the city. Stock on Oil of Speed (Ribald sells those) and, optionally, buy a Potion of Cloud Giant Strength from Roger in the sewers. Go to City Gates (while invisible, preferably), skip the Suna Seni encounter, speak to Phlydian, exit the city. Our first stop is Trademeet. Make short work of the attacking beasts, then head to the Mayor’s House. Get Druid Grove marked on your world map. Go to Druid Grove (invisible, otherwise you’ll be fighting a ton of trolls in no time), enter the Ogre Tower, pick up Belm from an open chest. Our next stop is Watcher’s Keep, which is quite a serious business. Since you enter the 1st level of the Keep at level 8, the enemies in the rooms won’t be especially numerous or nasty. That said, it’s still a good idea to run invisible at all times. Collect the bell and the candle. Study the high priest’s sarcophagus. Before you start with the ritual, set 7 traps near the right statue (you can start with the left one, to be honest, I just think of the right as the more important one as it carries Foebane). Place the bell on the altar. Two statues will come to life. Traps + Poison Weapon-buffed Sling of Seeking is your friend here. The first one will fall.
http://youtu.be/0PsZWjZ2uF8Then the second one.
http://youtu.be/UGz6L7hgMtMNow, set traps near the Usuno statue, then complete the ritual. The same tactics as with the first two statues apply here, the only difference being you need Oil of Speed in this case to outmaneuver four enemies at once. After the Usuno statue falls, collect the wakizashi. You should be level 9 by now, so scimitar grandmastery is already there, and now our weapon setup is ready.
http://youtu.be/69_4gkzdszsLeave WK and head to Windspear Hills. Nothing particularly interesting here. Defeat some knights disguised as monsters, defeat some bandits, enter Firkraag’s Temple invisible, run to the dragon lair at 2nd level. Nothing en route to Firkraag should present any trouble with Ring of Invisibility equipped (remember that you can rest while invisible without breaking the effect, effectively gaining an extra Invisibility charge). At Firkraag’s lair, set 7 traps, and use the following: Potion of Cloud Giant Strength, DUHM, Oil of Speed, Poison Weapon. When done with the pre-buffing, initiate a fight with Vampiric Touch. The initial impact of Vampiric Touch, 7 traps and several hits from Usuno/Belm (lightning + poison) should be enough to deal with Firkraag, if you are feeling lucky.
http://youtu.be/B-ceJX6lI1cAs you can see, Firkraag can be killed solo with a Fighter 9/Assassin 6 without exceptional gear, bar the weapons (I’m showing the character screen and the inventory on purpose in the video). However, if you aren’t in a heroic mood, feel free to fake-talk that dragon to death. Same result, significantly less epic, but infinitely safer.
http://youtu.be/gIiP5yedqP0Buy a Potion of Fire Giant Strength (Roger in the Sewers sells those), head to the Docks. DUHM, force Kangaxx’s door open. Speak with Kangaxx, accept the quest. Enter the Shadow Thieves’ guidlhall, move on to Renal’s room. Equip your trusty sling, DUHM, Poison Weapon, fake-talk. After he gets hit 6 times, stand near the door. The moment Renal dies of poison damage, pause and leave the room. Come back, the thieves won’t go hostile, and the invincible version of Arkanis Gath won’t appear. Collect the loot, most notably Boots of Speed.
http://www.youtube.com/watch?v=ECgp00GpSfEProceed with Kangaxx quest. Enter the Bridge district, go into the Elemantal Lich’s house, deal with him by setting 7 traps and attacking him once the moment he appears.
http://www.youtube.com/watch?v=1vaFY7gvZl4Head to Temple district, accept the Unseeing Eye quest, descend to the sewers. Kill the Rakshasa at the center of the area for the wonderful Cloak of Sewers.
http://www.youtube.com/watch?v=Hm8TUEugSV4Proceed northwest to enter the Unseeing Eye area. Speak to Gall to get the key to the northern door, open it, enter the Shade Lich’s lair. The same tactics as in the Elemental Lich’s case apply.
http://www.youtube.com/watch?v=IemyD-9wNbAWith that done, buy Potion of Genius x 2 (any temple), and a scroll of Protection from Magic. Head to Kangaxx’s house. Set 7 traps near the sarcophagus. Use both potions to raise your Int to 9+, then the scroll. The Lich phase of Kangaxx is dispatched easily enough with the same lich-slaying tactics, the Demilich is slain quite easily from the sphere of Protection from Magic. Usuno is +4, and so will hit the Demilich. Loot the Ring of Gaxx.
http://www.youtube.com/watch?v=X8NF83jOLLcThe main bulk of your equipment should be acquired by now: Helm of Balduran, Usuno/Belm, Red Dragon Plate, Boots of Speed, Cloak of the Sewers, Ring of Gaxx. However, there is some more gear you can get optionally. For example, at de'Arnise Keep's main floor, there is a hidden room containing a Ring of Earth Control (-1 AC, stacks with magical armor). The Mercykiller Ring is superb as far as convenience items go, as it allows you to set traps much more easily. Rasaad’s quest (start in Trademeet -> City Gates -> Abandoned Aphitheater -> random encounter with Sisters of Selune -> Heretic Temple) is very trivial by itself, and grants access to a whole hoard of expensive magical loot. Of particular note are Gauntlets of Aln Zekk (15% chance to do 1d10 cold dmg on hit), since the bracers slot will remain vacant otherwise until very late in the game (the better options are either redundant, or force too much of a diversion from a critical path). A Cowl of Stars is actually mandatory for an unavoidable troll encounter at Spellhold, while a Belt of Minor Invulnerablity may prove very useful at the Western Tunnels in Underdark. Using the rest of the new items is really up to you. The battles over the course of Rasaad’s quest are easy. Also, please note that if you leave Rasaad at the Abandoned Amphitheatre, the Sisters of Selune encounter will still trigger, with the sisters remaining friendly as you chop them to pieces, as they see no Rasaad to attack! Unfair, but extremely efficient. You only technically need Rasaad to trigger a certain cutscene at the Amphitheatre, and then to gain access to trials at the Heretic Temple, so our solo run is not compromised.
(5) SoA critical path run.
Well, let's put it this way: I have become disinterested in this run. Currently, I'm in Suldanesselar, so the game is almost finished: during the whole critical path run, I didn't feel challenged once. And we are talking Fighter 10-13/Assassin 6, not some godly levels. The gear is good, of course, but nothing special: every other warrior would have the same (or better) items at this point.
Still, I'm willing to upload 3 videos (Bodhi's last task in chapter III, fighting Adalon in chapter VI) that are interesting somewhat. Please note Adalon is perfectly skippable, you only need to initiate a fight with her to make the Underdark exit open. Oh, needless to say, she's also fake-talkable.
During the last Bodhi mission in chapter III, I prefer to kill Haz first (and it's the easiest way to do it, IMHO), then do all the rest of the mini-tasks in a free order.
http://youtu.be/J9o_U_ta37IThat's the Aran battle. Pretty trivial, if you have Invisibility and can deal enough damage during the first round.
http://youtu.be/sF4KaoxGZD0And, finally, Adalon. Not an easy fight, but a clever use of traps and switching to a Slayer form (to resist dragon fear and paralysis) at the right moment with Poison Weapon enable will make you victorious.
http://youtu.be/Ki9dmpRXGQAThat's it, this post will not be updated anymore (not in the near future, at least). I'm not deleting the save, so if I suddenly feel like kicking some Yaga-Shura arse with an underleveled Fighter/Assassin, it will be resurrected.
Post edited by Tisamon on
7
Comments