Wee Cant Spell [BGEE/BG2EE playthrough, complete]
 jmerry
Member Posts: 4,205
jmerry
Member Posts: 4,205
Wee Cant Spell: A Challenge
This challenge is simple: to run BGEE and BG2EE with a party that never casts spells. I play with my usual collection of mods - updated just before this run started - and at Insane difficulty.
Mods (BG1):
BG1 NPC project (24.9) - all components.
BG1 Unfinished Business (16.0) - all components.
Sword Coast Strategems (33.3) - all AI and tactical components. Wider random scroll selection, cure spells heal a random amount, restoration heals ability damage, bears, wolves, improved shapeshifting, innate sequencers and contingencies.
Tweaks Anthology (9) - weapon animation tweaks, send NPCs to inns, move Alora/Quayle/Tiax to convenient locations, new games start with AI turned off, adjust evil joinable NPC reaction rolls, ensure Shar-Teel doesn't die in the original challenge.
Portraits Portraits Everywhere (1.01)
Bigger Bard Song
Additional tweaks - Imoen has "base class" kit. Detect Illusion spell can be cast at range. Kivan's NPC project spear uses halberd proficiency, and the throwing dagger from his quest applies strength damage to ranged attacks. Shar-Teel's combat script knows how to use thief abilities.
Mods (BG2):
Ascension (2.0.11) - all but a couple cosmetic bits.
BG2 Unfinished Business (25) - no Suna Seni/Valygar, no redundant restored Bhaalspawn powers, no Artemis Entreri, no Bodhi hunt, no Anomen/Yoshimo portraits. Everything else is in.
Sword Coast Strategems (33.3) - all AI and tactical components except starting dungeon and Spellhold item loss. Wider random scroll selection, cure spells heal a random amount, restoration heals ability damage, bears, improved shapeshifting, innate sequencers and contingencies, innate HLA spells.
Tweaks Anthology (9) - weapon animation tweaks, new games start with AI turned off.
Portraits Portraits Everywhere (1.01)
Bigger Bard Song
Wilson Chronicles (1.8.1)
Yeslick NPC (3.0) - regular fighter/cleric.
Additional tweaks - Planetar weapon doesn't chunk. Imoen has "base class" kit. Enhanced Bard Song protects from swarms, like other sources of normal weapon protection. Wilson's strength bonus doesn't over-stack with itself. Yeslick gets a standard joining XP trigger. Bala's Axe only shows up once. Detect Illusion can be cast at range. Stein isn't stuck in a wall. Larloch's Minor Drain cast by Foebane heals the user. Kalah's illusionary werewolves don't deal damage unless attacked. Polymorph Self ogre form hits as magical. The Planetar of Justice from Dorn's quest fights Abazigal instead of hanging out by the door.
In detail, the rule is that anything accessed through the crescent moon spellcasting button is out. No arcane or divine spells. No HLA spells. Also, Identify and arcane sequencers/contingencies are out. Innate abilities and items are allowed, including casting from scrolls - although we won't use scrolls often often. Learning spells for the experience reward is allowed, but will only be done in BG2.
The protagonist for this run is Magpie, a halfling fighter/thief. Her name was supposed to be Maggie, but the scribe put the tail on the wrong side of a letter. Here she is, as she's about to leave Candlekeep for the wider world:
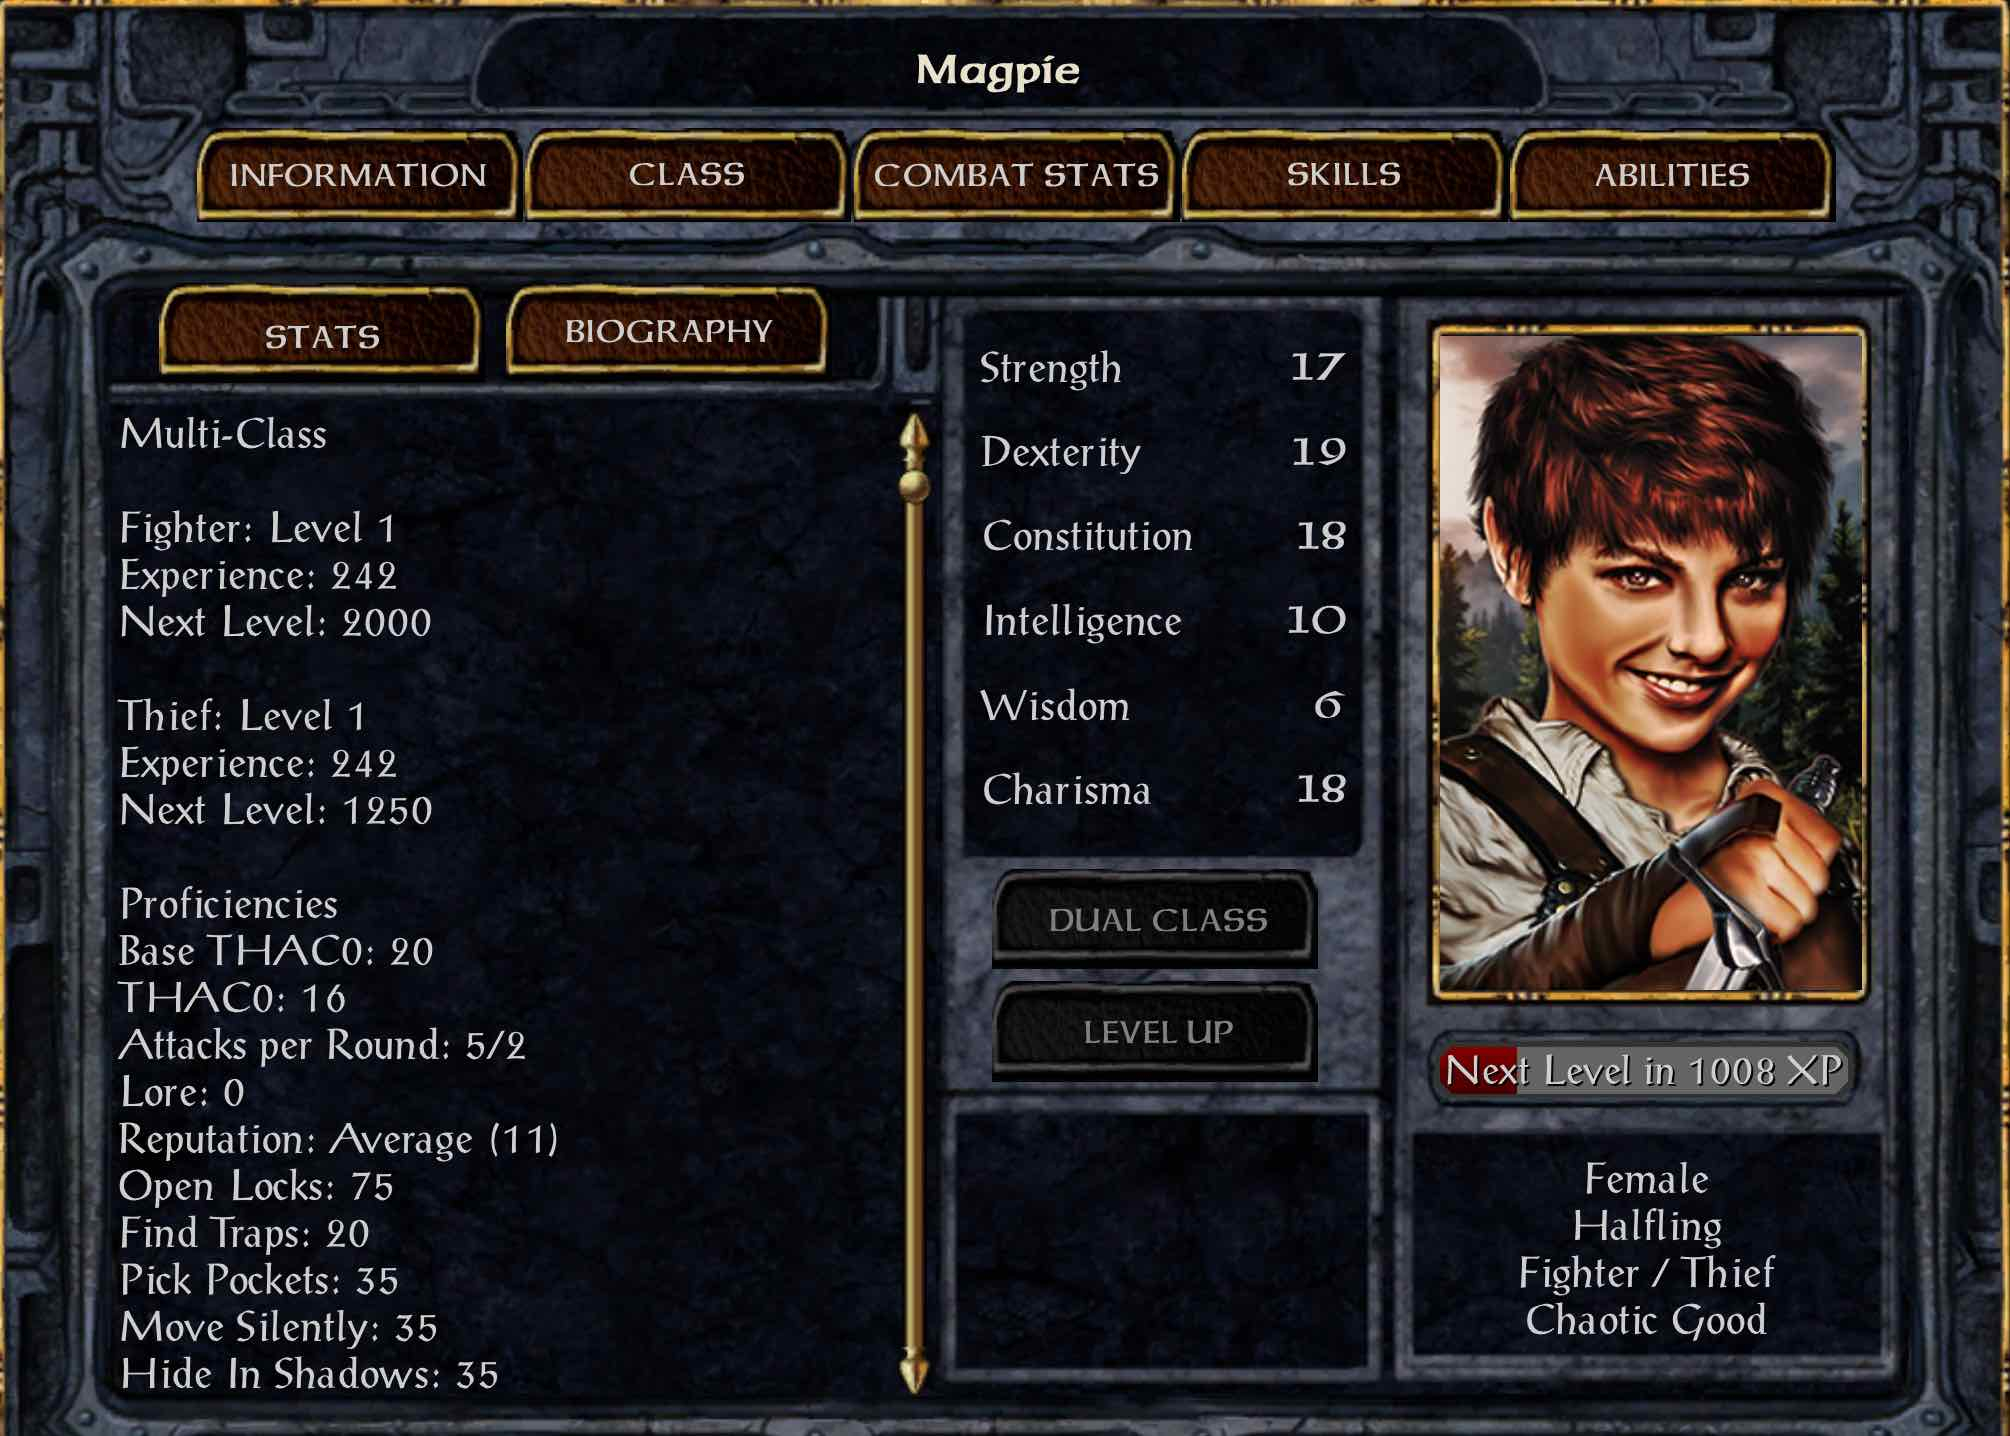

Her helmet, armor, and shield have been taken off so as to better display her colors.
Proficiencies: specialized in daggers, specialized in scimitars.
Finally, a little gimmick because it amuses me: every part's title will have at least one word deliberately misspelled as another. After all, this party can't spell.
Post edited by jmerry on
5
Comments
Magpie plays the early stages of the game alone, piling up experience at minimal risk. And if she needs to do something dastardly for it, the only rule is to not get caught. First, she avoids Imoen and heads north, grabbing the shiny things in secret stashes along the way. A ring of wizardry may not do us any good, but it sells for 9000 gold.
At the Friendly Arm, Magpie sneaks by Tarnesh to sell some things, unlock all the chests, talk to Landrin, and pick up some unattended items. Then to the north, talk to the fishermen and head over to Tenya ... wait, no, Tenya knows Command and isn't afraid to use it. A solo level 1 character can't afford to fight her. Instead, kill the fishermen and take the bowl to Tenya for 2500 XP and thief level 2. Magpie increases her Find Traps score to 45.
After that, sneak by the ankheg to the zombie farm. For this, Magpie uses her bow and arrows - zombies are slow and easy to hit, even without proficiency. Fighter level 2 comes during the fighting, and thief level 3 (Find Traps to 70) comes from the final reward. She took one hit, for five damage, early on when she failed to disengage from a zombie fast enough.
After a rest, she heads south to the Coast Way crossing, where she kills an ogre. A backstab attempt to start - rolled a 3, missed. After that, throwing daggers all the way - and a lot of them, because she keeps rolling badly.
Beregost is the next target, with safe experience for talking down Marl and picking a bunch of locks, and less safe experience for killing spiders. The spiders trap her for a few rounds at the entrance to the house, until she can kill the one blocking her escape - but fortunately, she's wearing the girdle of piercing. Overall AC versus piercing -3, so they need a 19 to hit. The remaining spiders are killed in a chase all over the western part of town.
All of this brings fighter level 3 for Magpie - two-weapon style taken.
Next, she heads south toward Nashkel. On the road, she meets some ogrillons who call her a pipsqueak - hey, that's Lady Pipsqueak to you.
Next, she ventures a bit west of the road to find some hobgoblins - note the different color on one of them.
On the way south, she is waylaid by another group of hobgoblins.
For the next part of the road, Magpie avoids conflict entirely. She picks up Colquetle's amulet, but otherwise sneaks by everything and on to Nashkel. Once there, she picks up a set of ankheg plate and a few other goodies. Of note, one of the watched chests upstairs in the Manor House doesn't call guards - you can loot it for an invisibility potion without anyone complaining. Then it's a visit to the carnival, where she kills an ogre and buys two key items: a PfP green scroll and a necklace of missiles.
She hasn't dealt with the killer in the Nashkel Inn, so she heads north to Beregost for a safe rest. Repeat that rest about five times, and a dream comes. Magpie has her first special ability, Cure Light Wounds. Now, she can take on something much bigger. And more dastardly.
Over to the southwest, Magpie hides in a copse as a gnoll attacks just offscreen...
After a full day of that ... a surprise ending.
In town, a couple errands bring her reputation back up to 9; Firebead gets the book he wanted and Mr. Colquetle gets his amulet back. Mirianne gets her letter for experience and a ring as well. One chest had resisted her earlier, so Magpie picks it for a diamond.
Over at the Burning Wizard, she returns Zhurlong's property and then kills him for his gall in picking her pocket. Then, it's time to enter the Red Sheaf ... invisibly.
After a rest, Magpie picks up a +1 bow and a stack of +1 arrows. With those, she heads west to take on the flesh golems at High Hedge. They're slow and easy to hit, so her lack of proficiency isn't a problem. Just make sure not to talk to Thalantyr until after they're dealt with.
Magpie's next stop is the Friendly Arm inn, where she kills some hobgoblins and retrieves a ring. Also, she takes care of Tarnesh so that she doesn't have to sneak past him again.
For her first companion, Magpie heads east. And puts on a belt.
Shar-Teel immediately levels up to fighter 6, taking two additional dots in long sword. Then, she dual-classes to thief - starting proficiencies shortbow and club, skill points to stealth.
After that, since we're in the area, Magpie uses the green scroll of protection from petrification on herself and goes hunting basilisks with Korax's aid. Four lesser basilisks later, Shar-Teel is a level 3 thief.
Mutamin is his usual obnoxious self, and I note that this incarnation has Charm Person spells. As such, he's very dangerous to take on solo. Fortunately, most of Mutamin's spells are targeted at Korax, who is immune to the status effects. The damage of some acid arrows does force Magpie to execute him early, though.
By the time the pair are done with the map - with the exception of a party they leave for later - Shar-Teel is about a third of the way to regaining her fighting skills.
Before recruiting the rest of the party, Magpie and Shar-Teel head off to face another challenge as a duo: the ghasts of Durlag's Tower.
Magpie buys a potion of hill giant strength from Erdane, and the pair sneak past the battle horrors under stealth. It's at this point that I notice Shar-Teel's "advanced" script not using automatic stealth or trap detection, and I start tinkering.*
Once inside the tower, Magpie drinks the strength potion for greatly increased throwing dagger damage. Shar-Teel just uses her +1 bow and normal arrows. We take advantage of the stairs to separate out the packs of ghasts into manageable ones and twos as much as possible, while pelting them with ranged attacks and constantly retreating out of melee range:
Heading back out, Magpie decides to take on the battle horrors - but not in melee. Using the long path and the necklace of missiles, she hits them with repeated fireballs:
Back in Beregost, the pair helps out Neera. She levels up, hands over her gem bag, and heads off to the Friendly Arm.
After a rest, it's time for the next long-term companion: Kagain. He levels up to fighter 6, taking the third and fourth dots in axe proficiency. Buy five +1 throwing axes and set them to melee mode, for a cheap unbreakable +1 weapon.
Kagain's quest is easy to knock off. We find the boy he was hired to protect dead - well, nothing left to do but take revenge.
The party shuffles around some temporary companions on the way north - Imoen, Montaron and Xzar, Khalid and Jaheira, then Ajantis. The two pairs are really just there so they don't disappear from the game, while Ajantis joins the party to stay. Up to level 5, second dot in longbow.
Ajantis' first comment on joining the party is that he wants Magpie to get that belt off ASAP:
And while we're here - might as well kill some ankhegs. The three helmeted melee warriors clear out the cave easily, taking a few hits along the way. The hit on Kagain will be regenerated away, while those on Magpie call for a Lay on Hands, a healing potion, and more the next day. This party does not have much renewable healing, and it never will.
Up on the surface, there are more ankhegs, and more hits to the party. By the time the map is clear, most of the party is badly hurt.
Imoen finally makes her artifact out of Tarnesh's spellbook, and we're free to dismiss her. Will we ever use it, the reason we kept her around that long? As it turns out ... no.
The next party member is Garrick. Talk to him and head over to meet Silke...
Garrick joins the party and goes up to level 6, taking staff proficiency. Not that it matters, since he won't be attacking much. Oh, and this is what I bought that thieving potion for - Garrick drinks it, then picks the pockets of the three "thugs". Three potions of defense acquired. Talk to two of them simultaneously, and they give us two more.
Then, since he's buffed already, Garrick pickpockets Algernon's cloak.
With the cloak acquired, the party goes on a shopping run - the +1 composite longbow and helm of charm protection from Feldepost, another stack of healing potions, Buckley's Buckler from the Friendly Arm. They had to sell a Laeral's Tear necklace, but there's still a decent reserve in the gem bag and a stash of magic gear to sell later.
Finally, the party recruits the last permanent member - Kivan. He goes up to level 5, taking bastard sword proficiency. Also, this starts his clock to reach the bandit camp. 14 days until the warning, then another 14 or 7 depending on chapter. Or, at least, that's how it's supposed to work. It is now the early morning of day 23, and we'll be tracking that timer while we try to clear as much of the wilderness as possible before it becomes an issue.
* All right, what's the issue with Shar-Teel? Her class script once in the party, which is what looks at those advanced AI toggles, is bdshartc.bcs. This script is written for a pure fighter, and doesn't have the blocks that control thief skill usage. I tried a few things, and then settled for editing her script by copying those blocks over from Montaron's script. With this modified script, Shar-Teel will use thief skills properly if you dual-class her and use advanced AI. If she's a pure fighter, those blocks won't do anything; one of their conditions is being a thief. I've attached the modified script here for anyone that wants to use it.
The first thing we do with Kivan is talk to Thalantyr, who hands over an item for him ...
In response, I tinkered with the item - without changing its stats, I changed it to use halberd proficiency.
The party clears out the skeletons and other assorted monsters in the area, bringing Ajantis to level 6. They also buy a wand of sleep - not as good as the real spell, but it's nice for packs of low-level creatures and usable by warriors. With that done, they head west to the coast.
The first significant target there is Shoal - or, rather, what we really want out of the encounter is Droth's helmet.
On the first try, Shoal goes down way too fast and can't call in Droth. Same for the second. Third try, Kagain saves against her kiss but then dies to a one-point hit?
The other major threat this area holds is the big pack of ogres. Against them, I use the wand of sleep - OK, that's a few down.
And then, Garrick gets struck by lightning. Apparently, the game just can't accept a clean victory like that.
The party helps out Arcand, and then moves to the southern part of the map. From experience, I know sirines are possible here, so Kivan scouts ahead under stealth. Some wolves, ghouls, and carrion crawlers are disposed of ... and there they are. I open with a pair of fireballs, from wand and necklace:
Over the course of the ensuing fight, Kivan is poisoned three times, and drinks antidotes twice. He's a little light on armor, and the enemy took advantage of it here. Still, everyone lives.
Before we leave the area, we visit the Surgeon, who wastes some of his spells on Kagain - Kivan only goes back up into the area. Move to exit, and... what's this? A new encounter I haven't seen before?
Of course, what really matters is the loot. The sahuagin drop some magical bolts, and Jozzi directs us to some treasure in the ship - a Boomerang Dagger?! That ... that's the best general-purpose melee weapon in BGEE. There are a few things that hit slightly harder than its 2d4+2 damage, but nothing else grants that extra APR. And you can throw it too. Magpie has a new primary weapon. Once she hits fighter level 6, she'll be dual-wielding it with Twinkle.
I planned out Magpie's weapon choices in advance, without knowing that the NPC project added this item to BG1. Now that I have it, though - I'm absolutely going to take advantage.
The party returns east, resting in High Hedge before returning to Beregost - the new armor should be ready. Picking it up is delayed, though - it's night when the party arrives. Instead, they head over to the temple area to take out the big wolf pack. Kagain runs around drawing attention while the others shoot down the wolves - a complete success, taking them all out with no damage in return. The battle brings fighter level 6 for Magpie (two-weapon specialization) and ranger level 6 for Kivan (bastard sword specialization).
By the time the party finishes with the wolf pack and other minor monsters, the sun is up and Taerom is in. Ankheg Plate picked up, full bag of gems sold, Full Plate bought.
With these transactions, it's time to take stock. The party's current armor choices:
Magpie - Mithral Chain +4. Kagain - Full Plate. Ajantis - Ankheg Plate. Kivan - Ankheg Plate. Garrick - Chain Mail. Shar-Teel - Studded Leather. I'd like to give the Mithral Chain to Shar-Teel, but she can't use it until she gets her fighter abilities back.
The party's next destination is to the southwest. They pick up Melicamp, but don't immediately go to restore him. There's no timer on his quest, after all.
Some hobgoblins accost the party ...
Fatigue sets in, and the party rests. This sets off an argument between Kivan and Shar-Teel:
With Bassilus, Magpie opens with a backstab rather than go through the conversation:
The party then returns to the coast, a bit farther south. The first enemies they face are a big pack of hobgoblins, which get a Wand of Sleep charge ... and they all make their saves. Oof.
Then, a group of hobgoblin elites join the fray, and Garrick takes a poisoned arrow. He's definitely preferentially targeted by enemies, and he's the most vulnerable to their physical attacks. One more antidote potion used.
Approaching the coast, I use a necklace fireball to take out a pack of hobgoblins - not because they're terribly dangerous, but because fighting them in melee might catch the sirines' attention.
...
No. Kagain's full plate and shield are enough to defend him from Magpie's assault. The feeblemind state doesn't count as helpless for the purposes of AC protection, so Magpie needs some rather high rolls to hit him (by my calculations, 15 main-hand or 19 off-hand). Kagain is badly injured by the time the charm wears off, but he survives.
Against the next group - Sil is invisible as we approach, so Magpie backstabs the one visible sirine. One-hit kill.
Between +1 arrows and the boomerang dagger, the golems in the cave are defeated at range. There's something for everyone in the loot inside. For this party, it's the constitution tome for Magpie (up to 19, and she can reach 20 with Buckley's Buckler to regenerate while traveling) and the wand of paralyzation for Garrick. Garrick also reaches level 7, and can identify almost everything with his lore.
Arkushule is allowed to leave, although Garrick picks her pockets for a scroll on the way out. Ardrouine gets the help she requested - and Ajantis is finally happier with our reputation. Maybe he'll stop nagging Magpie now?
This part's title was inspired in part by an actual typing mistake I made while writing it.
Magpie equips Buckley's Buckler for her first use of travel regeneration, and the party travels south to the dig site. The enemies here aren't too dangerous; Ba'ruk's kobolds don't hit the party at all. Only a cave bear does any real damage - but it's Kagain, so he'll be fine.
The party deals with the maddened diggers and warns Charleston - to which Shar-Teel objects. "This is the kind of stupidity we get with male leadership." Then she goes into more detail:
"What about Garrick, then? He's no warrior."
"Someone has to use the wands and keep morale up. A bard is very important to this party, and he's the best option."
We leave the idol behind and get out after that. No need to invite trouble. Also, Brage is left alone - we don't want to go to Nashkel just yet.
Instead, we continue south to the river. A bandit named Neville provides a notable bit of equipment - a +1 long sword for Shar-Teel, once she gets her skills back.
There are ogre berserkers backed by hobgoblin elites at the northern bridge, and that's a combination we can't beat with pure kiting. Magpie takes some nasty hits, and drops below half health. We kill a confused polar bear and pick up some nice boots, dispose of some ogre berserkers without archer support, and then head north to Laurel. The gibberling horde - there are enough of them that it's worth a Sleep wand charge.
Before moving on, the party rests, and Shar-Teel pokes at Kivan some more:
On to the Gnoll Stronghold, and Shar-Teel executes the first of many backstabs.
The charisma tome goes to Magpie, who is now at 21 Cha from her tome and cloak. That's not really any better than 20, but whatever.
The rest of the gnoll fortress is, of course, easy. Nothing there can stand up to archers, let alone a party full of level 6 warriors. The only highlight I took a picture of - a critical backstab.
At the end, what to do about Dynaheir? We send Garrick back to Nashkel to make room and escort her back to Minsc, taking the Brage shortcut. Our reputation is now up to 14.
Inside the Nashkel inn, Garrick rejoins just as Neira attacks. Shar-Teel tries to go for a backstab, but Neira goes down before she can get into position.
Over at the carnival, Garrick gets a book, opening up a quest for some better armor. Vitiare swipes some gold and then goes down just as fast, earning the party several potions.
Then it's time to face Zordral. He hits Garrick with an acid arrow, then goes down to a luck-aided backstab through his mirror images:
Bentha hands over a potion of heroism, then gets her pockets picked for an antidote.
The northern part of the map comes with some random monsters, including a trio of ogre berserkers. While I don't like engaging them in melee, backstabs are acceptable:
Since I still have quite a bit of time on Kivan's timer, the party heads back out. First, the surface area of the mines. We help out Dorn, picking up plate mail for Kivan and a +1 shield for Kagain. Also, Dorn is ready to recruit for his quests later.
Once we arrive, a hollow in a tree provides a wand of frost for Garrick, and then we talk to Prism. Interestingly enough, Shar-Teel has a personal beef with Greywolf.
The random monsters elsewhere in the area include some winter wolves, and we pass the belt of antipode around to help with them. This leads to a bit of trouble, as I forget to take the belt off... Garrick takes some fire arrow hits from kobold commandoes while wearing it. Oops. He goes down to 18/42 HP, the first serious injuries to non-regenerators in a while.
Over to the west, Shar-Teel rises to Sendai's provocations and then feeds her friend some steel:
After a rest, the party continues on to clear the area. Kill Rufie, because that is not a well-trained dog. Ajantis gets the bracers of archery.
Skipping the next area west because we don't want reputation, the party heads north instead. The xvart village is slaughtered, to Kivan's regret. But hey, they didn't give us a choice.
Borda gets a backstab - but he has 52 HP, so he lives.
Continuing north, the party revisits the lake where Drizzt was. Garrick makes the mistake of walking too close to an ogre, and takes an 11-point hit. Oops. Still, he redeems himself against a trio of ogre berserkers, playing bait so the archers can kill them safely.
The non-random monsters here are much less of a threat - the half-ogres are barely noticeable, and Ajantis' line about them doesn't even trigger (maybe because he wasn't in the party yet when Magpie talked to Bjornin the first time?). The bandits are low-enough level that a single arrow from Kivan takes out the mage right through her mirror images:
With the area clear, it's time to return to town - specifically, Beregost. We pick up the rewards for killing Bassilus and the half-ogres (rep to 16, Kagain's shield is no longer weak against missiles), sell some junk, and rest. But while we're here, there's something I'd like to set up for the future...
Over at High Hedge, Melicamp is restored:
On to Ulcaster next, for Garrick's quest. We're not going up on the plateau yet. I also realize something - this party has very little use for potions of 18 strength, and I have a few in the case. So, then I use on on Ajantis and have him equip a composite longbow. Damage +2 over the longbow he was using, good until he dies or finds something better.
Myr'Cutio greets us, and it's a fight:
I see a "weapon ineffective" message, so the archers get out the +1 arrows. Shar-Teel gets in a 39-point backstab, then joins the fray. Myr'Cutio casts Defensive Spin for a total AC of -10...
And then it's over.
I've been watching Kivan's timer closely through all this. More than 11 days of it have been spent...
After fighting the undead bard, the party clears out a few more monsters. The kobold commandoes on the hilltop get some hits in, but the area isn't much of a challenge when you're avoiding the plateau with the ruins.
The party's next destination is Gullykin. Killing the random monsters on the surface is pretty routine with the ambush party removed, and then Magpie gets to look for shiny things in the houses. With her usual attitude, of course - don't get caught.
The party settles down to rest, and Shar-Teel pokes at Garrick:
After that rest, it's time to head down into the ruins. The fact that the trap-disarmer Magpie normally wears heavy armor makes things tricky; she has to take it off every time she disarms a trap. Fortunately, the armor doesn't hinder trap detection at all, and you can put armor on in sight of an enemy as long as no attack orders have been issued yet.
While we do this, Kivan and Ajantis have a talk...
We eventually run into some kobold commandoes, somewhere in the twisty corridors. They call for help, leading to others from all over the dungeon trickling in. With them coming in ones and twos, they die practically as soon as they enter the party's sight, and don't even get the chance to attack. By the time we reach the big room in the east, there aren't any kobolds left in it. "Better calls for help" aren't always better for the enemies.
We return the ancient armor to the ghost knights, then head out toward the dungeon's "boss" encounter. Poking at Lendarn, he opens with a double-Magic Missile sequencer - Magpie is down to under half HP. There's not much we could have done there, since we haven't bought the Shield Amulet. Retreating back to the party, we spend our daily healing on her, bringing her back up to 64/83.
Before we can go out again, the ogre mage shows up. Shar-Teel opens with a backstab:
Then, pushing forward... Lendarn doesn't have a Stoneskin up. The results are predictable.
Up top, Jenkal gets away. We'll be seeing him again. The mayor's reward doesn't include reputation, so we gladly accept it. And then, back down for the shortcut to Firewine Bridge.
Poe gets some gold - but, sadly, there's no option to mention the ghost knights if you've already done their quest. We talk to Bentan, and for once I don't use the "some of us are sorcerers" line:
Many low-level undead get sliced up, and then we meet Meilum the "masterful".
And now, we're coming up on Kahrk. Oh, Kahrk. Such an incredibly vicious encounter. I make a save; if I fail, I'll leave it for later.
Kahrk puts up a Minor Globe and a Shield on spawning, but doesn't Stoneskin until he's activated properly ... OK, let's get stabby.
And then ... it goes straight downhill for us. Slow, Chaos, and brutal melee attacks with Improved Haste. Plus, he puts up a Minor Spell Turning to absorb the first Wand of Paralyzation hit. Fire arrows can't disrupt his casting, because he always saves. No characters have died yet when I abort, but the writing is on the wall.
The party heads back to Nashkel for a rest ... 14 days after I started the timer, and Kivan still hasn't complained. I want to run out the first timer before going through the mines, so I head over to the valley of tombs instead. (Reloaded, so that's from Firewine. The party arrives on the east side of the map.)
Narcillicus is the first significant encounter, and fire arrows get him through his PfNM.
Then, an odd line from Ajantis:
We kill some ghasts for a wand, a revenant for a dagger, and some ankhegs for their shells. A bit of banter while we move the shells:
The party gets back to Nashkel on day 39, 16 days into Kivan's timer. I'm curious, so I travel aimlessly for a few days ... no complaint out to day 45. Well, all right. I suppose I'll just press on and not worry about the time limit any more.
Down in the mines, Kagain smells kobolds - nothing we can't handle. Beldin lives for once:
Many kobolds fall to arrows and blades, and soon it's time to face their leaders. Shar-Teel, would you do the honors?
Then again, the shaman merely casts a Horror, absorbed by the active bard song. He goes down before he can cast anything else, and the other kobolds aren't much trouble.
Looking it up ... that kobold shaman is a level 6 mage with 37+12 HP. Definitely tougher than it should be.
Mulahet goes down in moments, to a crit from Magpie and a backstab from Shar-Teel:
Out of everything down there, the worst hits we took were the gray oozes somehow hitting Kagain twice in a row for 25 total damage. That regenerates too.
Then it's back to the surface and Nashkel. The Honorary Ring of Sune is worth 5000 gold, a very nice windfall. The fearsome Nimbul ...
Then on to Beregost, for the anticlimax of the session:
Traps are fun, aren't they?
With Tranzig down, it's time to visit the Wood of Sharp Teeth. Ajantis gets a package after we leave the inn.
In Larswood, we kill some gibberlings, then send off Baeloth. Nim Furlwing gets some help, but one hound goes down unavoidably before we can reach it; we get the lesser reward of 100 XP.
Mad Osmadi goes down:
We then surround Corsone, and kill him before he can do anything.
And then ... I spot a Blacktalon elite. Time for some sneakiness.
After that successful stab, we clean up with ordinary attacks. We take them down without being damaged, and get all of their magic arrows.
Then we meet Teven, and Kivan sets off a fight.
Another Blacktalon trio follows, and we get off two simultaneous backstabs this time:
With the area clear, the party heads east to the area infested by spiders rather than bandits. Put on the buckler ... Magpie regenerates instantly? Uh, OK? High-Con regeneration seems to be glitchy that way.
Fatigue catches up, and the party rests. This brings up a dramatic character point, as Ajantis proposes...
We get the experience for retrieving the scroll of "wisdom", but can't identify it yet. The 85-point lore requirement for identifying green scrolls in BG1 is extreme.
Then comes the big spider pack.
First, Kivan gets webbed by a giant spider, poisoned by a phase spider, and killed.
Then, Shar-Teel gets webbed, and poisoned by a giant spider. That poison is much slower, so she should make it ...
What can I say about that whole encounter? Well, how about this: the giant spiders' Web Tangle ability, introduced by the "improved spiders" SCS component, is flat out too good. Save versus breath, at range, or be helpless for two rounds. Free action protects you, but the web immunity from being a spider doesn't. Also, it's harder to get a good breath save than anything else. Warriors get the best breath saves, so this party is about as well off as any party could be. And you see how that turned out.
The party reaches the Friendly Arm without incident, and spends the extra gold on Resurrection instead of Raise Dead. 400 gold each is a very fair price to pay, compared to days of rest or a stack of potions.
I don't return to the spiders' domain. Instead, Peldvale is my next target. This comes with an upgrade to the Blacktalon encounters ... a pack of six instead of three. Well, that calls for more than just a couple of backstabs. Garrick gets out his wand and summons some monsters to aid us.
And then - another pack shows up, catching the party largely by surprise. Magpie can't get her armor back on...
The next few encounters are breathers; hobgoblin elites, non-hostile bears, and Viconia's tormentor. Viconia gets his helmet and then gets sent off to Beregost. The rapid changes in reputation lead to some comment from the characters, with Kagain disagreeing with himself:
There's one more Blacktalon pack in the north.
We then rest, with Magpie using the buckler to regenerate. This triggers the chapter 2 dream, and she finally has her second CLW. Also, some lesser bandits spawn on the first rest attempt.
A talk with Raiken, and the party is invited to bandit camp. Tazok greets us:
Summon some meatshields, send in the warriors, and supplement with fireballs (from wand and necklace) where the reinforcements are streaming in.
The crew from Tazok's tent show up, and the mage Venkt opens with a Sleep on our summons. His only spell defense is a Minor Spell Deflection - and that means he's fully vulnerable to non-targeted spells. I pass the necklace around for multiple fireballs per round, and he doesn't last long.
I don't have specific shots for the gnoll Britik or the human archer Raemon, but I'm pretty sure fireballs took them out. Taurgosz gets in too close for fireballs, so I use the wand of paralyzation on him.
Kivan gets some dialogue here, now that the fight is over ... but it was clearly written assuming it would trigger before fighting most of the camp. As it is here, the timing is just weird.
There are a few stragglers in tents and the cave that didn't come out; they're easy enough to kill. Then it's into the main tent to free Ender Sai and end the chapter. This triggers a pair of dialogues, elaborating on what this means for Kagain and Kivan:
There are a few notable item upgrades here - a +2 longbow to replace the nonmagical composite longbow Ajantis has been using, a set of full plate so that every combatant has AC 1 armor, and a second pair of weapon mastery gauntlets for Shar-Teel.
And that's the bandit camp. In my experience with the area since installing SCS, this is actually the easiest time I've had with it (well, aside from the vastly overleveled party of dukes). Being free with the item charges was the key - one monster summoning charge, one paralysis charge, seven or eight fireballs.
Before proceeding with the plot, the party makes a detour to Ulgoth's Beard. It's mainly for shopping purposes, but Magpie also sets a few traps for much later. Four attempts, three successes. I wasn't quite sure before going, but neither the paladin nor the ranger can use a wand of the heavens. As such, I don't buy that particular item. Raise Dead scrolls, on the other hand, are something we can use.
The first area of the Cloakwood isn't very notable - only the cloak of non-detection for loot, and a bunch of critters for encounters. The Aldeth/Seniyad encounter is skipped, for now.
On the way to the second forest area, it's an ettercap ambush:
Once there, it's a few more ettercaps, and Garrick reaches level 8. He takes shortbow proficiency, and finally identifies Twinkle.
The first notable injury here is a phase spider that gets Magpie. AC -9 vs piercing and save vs death on a 4, so that spider had to get seriously lucky. (THAC0 12, so it had to roll a natural 20. Save at -2 to avoid poison, for a 1/4 chance of poisoning her on a successful hit.)
Fatigue catches up to the party just as they finish clearing the exterior, and they rest. The first attempt brings giant spiders - Magpie gets webbed, although thankfully not poisoned on the inevitable bite. The second attempt succeeds, and brings a dream - Slow Poison. A renewable source of poison curing is very valuable for this party.
For the big dome of spiders, the party takes up ambush positions outside the entrance and sends one member in to draw them out.
Once the enemies are drawn out, Ajantis gets Spider's Bane. He'd rather fight with a bastard sword and a shield most of the time, but free action has its uses.
On to the next area, to kill some Shadow Druids. First, blow off Laskal:
Shar-Teel has gained enough experience to level up, but she's holding off again. That + icon will be visible for a while.
The next foe is Amarande, up in the treehouse. He tries casting a spell, but we have ice arrows:
Takiyah and Izefia aren't any more successful. Neither is Peter, and the local hostile wildlife goes down easily.
Moving forward, the amazon brigade catches up to the party:
Lamalha gets some spells off - a Hold that catches Kivan, and a Command for Shar-Teel. Still, we're not taking any damage.
The next area has that eternally annoying hamadryad. This time, it gets a backstab.
Elsewhere on the map, Magpie gets poisoned by a baby wyvern - there goes another antidote. In the wyvern cave, a charge from the wand of fear simplifies things a bit:
Finally, the party reaches the mine itself. We'll clear the exterior first. This starts with a Blacktalon quartet:
Over in the east, a mere two Blacktalon elites in a group? The double backstab ends this encounter instantly.
With the outer area cleared, it's time to take on the courtyard and Drasus' party. After dealing with the bridge guards, we set traps (one success, one failure with damage taken), summon some meatshields, and activate them. Shar-Teel retreats fast enough after the initial dialogue that they don't come charging at us - OK, let's go for a backstab.
As she reaches the party, a bit battered by physical attacks, Rezdan follows up with a Chaos. Shar-Teel is protected, Magpie saves, Kagain and some summons confused.
That leaves the rest of the party to gang up on Genthore. He gets some hits in on Magpie, dropping her into the red, but we win through. The still-stunned Rezdan is trivial after that.
The first notable banter during this wait is one between Ajantis and Garrick:
Then Kagain and Shar-Teel talk, and we get some insight into Kagain's philosophy:
Then, a little voiced exchange between Shar-Teel and Garrick.
When Magpie's HP reaches the green, at 63/83, we enter the mine. The first floor is a perfect backstabbing playground, and Shar-Teel cleans it out without taking any retaliatory hits.
The second floor brings the challenge of Hareishan and her room of guards. Hit them with a triple fireball (one wand, two necklace):
Down to the barracks level, where the first room allows some guards to charge the archers. Kivan switches to melee, and I get to see the spear of entanglement do its thing:
Continuing on ... both the gem bag and the scroll case are full. We'll have a lot of stuff to sell when we get back to civilization.
The mage Natasha has buffs including a fireshield, so I just wait her out.
And now, it's time to face Davaeorn. Deal with the guard out front, disarm the traps ... and now, I have no intention of fighting fairly. Or, really, fighting at all.
The first tick hits for 2 damage, and he drinks an extra healing potion. Then 10, 7, 1, 10, 10, 2, 8. 48 total damage, to his 45 HP. Dead.
We don't fight the Battle Horrors this way; they're scripted to die when Dave does. That's 8000 XP we don't get, plus whatever reinforcements might have come down. It's a small price to pay for such an easy victory.
There's a bit more down there, but nothing too dangerous. Shar-Teel takes a mustard jelly hit, we pick up the loot, and we head up. Yeslick is recruited long enough to flood the mines, and the party's reputation goes back up to 11.
For those keeping score, that's one mage backstabbed before his buffs went up, one mage stunned with a wand, one mage blasted with fireball item charges, one mage killed in combat after waiting out her initial buffs, and one killed from out of sight with a damaging spell scroll. Only one enemy mage ever got off any troublesome spells.
Using a Cloudkill to kill Davaeorn, even with the SCS AI improvements - it's a bit of cheese I only discovered recently. If one scroll had rolled poorly on damage and left him alive, I had another. There are three guaranteed Cloudkill scrolls in the game - one hidden in a wilderness container, one on Lendarn in the Firewine ruins, one in the warder level of Durlag's tower. As such, you're very likely to have a spare scroll or two - use it here, and you avoid one tough fight.
A few other spells can do the trick here, too. A shaman can stack multiple castings of Writhing Fog, and a mage with enough levels can cast Ice Storm twice if you were lucky enough to get it as a random drop. Skull Trap might work, but has a high risk of getting you spotted and would need several tasks. Fire and lightning spells are not recommended, as Davaeorn is highly resistant.
The long journey back to civilization begins with an ambush.
Halacan goes down in the middle of casting a necromancy spell:
Molkar then goes down; five on one battles are usually easy. Mop up the two that panicked, and continue onward.
After a rest in the shadow druid area, it's a spider ambush on the next travel. Kivan gets webbed and poisoned, while Magpie is also webbed:
The party escapes the Cloakwood without further incident, and starts clearing out their inventories. The Friendly Arm buys most of it, and then the party heads to Beregost for the wyvern head bounty and to get the reward from Gurke for finding his cloak.
While we're over here, it's time to finish off some partially cleared areas. Ajantis doesn't even comment on killing off the Flaming Fist idiots south of Beregost? Wow.
The Ulcaster plateau comes next, with the fearsome fighter Icharyd. Phase 1 is over very quickly with a backstab, and Shar-Teel re-hides for another in phase 2:
The time shenanigans do call for a rest; after zombies interrupted the first try, Magpie gets her second Slow Poison.
Down in the dungeon, Mal-Kalen is the first encounter.
Against the mustard jelly - just switch Magpie to her backup slashing weapon and send in the melee.
Finally, it's time for the big bad wolf.
Back to the road, we run into some lady ogres. There's a potential reputation point here, but we resolve the situation in a somewhat less heroic way.
In Nashkel, we finally turn in Mulahey's holy symbol (rep 12), then pick Zeke's pockets and free Branwen. She gets some basic gear, and we send her off.
In the southwest, we enter an unexplored area - save a dryad and a dead cat, get a few more goodies to sell.
The next destination is in the east, where we pick up a cliffside cache, a scroll, and a sick man. Magpie can now become fire-immune at a moment's notice.
We travel north to the next unexplored area. Sarhedra's mini-quest is a bit silly when you come to her from the south:
Saving the cow is a bit tricky, without Sleep to disable the attacking xvarts. Still, we manage it.
We stop off in Beregost to sell off a few scalps and rest. Ajantis warns that Samuel is getting sicker, but it's only 12 more hours to the Friendly Arm. Reputation is up to 16 now.
There are just a few more things to do in the wilderness. First, we return to the basilisk area to help out Tamah (rep 17) and take on Kirian's crew.
Next, revisit the spidery part of the Wood of Sharp Teeth. It's time to face the Red Wizards.
Soon after, we take down Lasala - but both Magpie and Kagain have failed their saves versus a Slow spell.
A still-confused Shar-Teel gets the final blow in, completing this very painful victory.
That completes our wilderness exploration. Next time, Magpie and her team visit the big city for the first time.
After some rest and healing, the party crosses the Wyrm's Crossing bridge - only to be accosted at the city gates.
Once we enter town, we set some quests in motion. Ajantis has qualms at the thieves' guild, but he doesn't stop Magpie from dealing with the thieves.
Magpie prepares a trap in the Blade and Stars - the other attempt failed. Then she faces the docks basilisk - with the aid of a PfP mage scroll.
The fight in the thief bank is uneventful - except for the one thief that manage to drop his gear into a bookcase on the other side of a wall when he died. Impressive, really.
The northeast district is our first destination, and I stash most of the party inside the Blushing Mermaid. That leads to Larze, who we taunt a bit before fighting.
Then Shar-Teel heads out to act as lookout. With her 100/100 stealth, it's very easy to avoid the guard.
Now that we have Larze's gauntlets, we return Noralee's set. That brings reputation to 18 - the highest we can go safely. Time for a lot of shopping at Sorcerous Sundries.
Items bought: enough +2 arrows to equip or two archers for a very long time, a stack each of acid, dispelling, and detonation arrows, and three potions of magic blocking. After that incident last time, I want access to instant guaranteed dispels. For the dispelling and detonation arrows, I use the buy/resell trick to increase Halbazzer's stocks. We'll be able to buy more later on if we need them.
Next, Magpie does some burglary at Gantolandan and Oberan's houses. She has the trap and lock skills, with enough stealth to get by. Complete the thieves' guild quest, and move on.
I want some breathing room on my reputation, so I seek out Phandalyn ... not there. Looking it up, he doesn't hang around that tavern at night. Oh well, I suppose we'll have to wait.
While we're here in the southwest sector, we might as well head next door and take on Sunin. He's a highly dangerous level 11 mage, but we have some very good tools now. Specifically, dispelling arrows. Duck out to avoid the minions and the first spell, then shoot him:
The poisoning quest comes next; we buy the tome, talk to Tremain Belde'ar, and play things violently at the temple of Umberlee. Ajantis took a Hold and Magpie a Doom, but the priestesses didn't inflict any damage. The reward - Magpie's wisdom goes up to 7, Kagain gets a new shield, and we get a bunch of experience.
Over at the Blade and Stars, Magpie tries to set traps... two failures. Well, they weren't critical anyway. I use a Grease scroll to slow down Lothander:
Next, Marek.
The night has ended, and the party pays a visit to Phandalyn:
Some mage intrigue comes next. Against Ragefast, the first two arrows strike true through his mirror images. Dead.
We dispose of some green slimes, then head over to face the mage responsible - Ramazith. We know he's guilty, so Shar-Teel stabs him on the ground floor.
The jellies hit Kivan hard and poison him:
For the rest of the tower, Shar-Teel wrecks them with backstabs, ducking back down out of sight after each one. Well, the hobgoblins and kobolds get stabbed in the front instead; their lower HP means that's enough for the one-hit kill. We reach the top floor, and Magpie has 11 Int.
Now, we just have a few more things to do in town. Break into some houses...
Then we head upstairs to face Jardak:
Some noncombat errands - help out Petrine, give Rinnie a book, deliver the good luck amulet and report back to Nadine, cure Ghorak. Our reputation is back up to 17, and Garrick reaches level 9.
We hand over Algernon's cloak for some gold and XP, then take it back by force:
We visit Entar to report his son's death, and Magpie reaches thief level 8 - her last BGEE level. She takes Set Traps up by 10 to 80 and Pick Pockets up by 15 to 55.
Finally, one last item grab. Over in the Low Lantern, we face Desreta and Vay-ya.
Vay-ya hit Shar-Teel with a Vampiric Touch, but that was all.
Magpie takes the Hands of Takkok, passing her Legacy of the Masters down to Kivan.
And with that, I end both the session and this visit to the big city. A whole lot of reward in both items and experience, for not all that much combat. Next time, we'll take on some character quests.
In order to make room for our new characters, Ajantix takes a break from the party and hangs out near the city gates. On the the Friendly Arm, and then a bit of a shuttle between there and Nashkel, as we trigger dialogues for Neera and Rasaad. After that, we pick up Dorn and head down to Nashkel to actually do his quest. Reputation down to 15.
Dorn's talk triggers as soon as we rest, and we're off to chase his old enemies. Kryll comes first:
A second Horror takes Kagain out of the fight, leaving only Magpie and Dorn to finish off Kryll - but that's enough.
Then, as we're moving to leave, Shar-Teel picks a fight with Dorn. She wins easily, proving her superiority in combat.
We rest a couple times on the way north, fully healing Dorn in the process. And then, it's time to confront Simmeon at Wyrm's Crossing.
Those Thralls of Azothet hit hard; they roll natural 20s against both Kivan and Shar-Teel for enough damage to knock both down into the yellow. Still, it's over easily enough.
Next, it's Neera's turn. We head out to Firewine ... and get waylaid by kobolds. Just some assorted kobolds, including plenty of archers.
We raise her back in Beregost, then head out again. This time, it's hobgoblins that waylay us, with far less archer power. No damage taken.
The party takes the shortcut through Gullykin and the Firewine Ruins, killing a bunch of respawned kobold commandoes in the dungeon. This is done with Neera well behind the lines, so she isn't in any danger. There are more kobolds on the surface, which we again handle without risking Neera's safety.
And then, we reach Adoy's enclave. It's quite easy, as usual. The one thing to watch for - the archer goblins here are thieves, so the SCS AI has them hide and go for backstabs. Despite literally negative skills (0 skill investment, 9 Dex), they always succeed at hiding and can easily land their 2x backstabs on squishy characters. Don't let mages run around unprotected with missile weapons equipped.
The first place we have to worry about those little backstabbers is the Rogdok encounter; before then, they're all neutral until we're in range. With this party, we use Albruin's Detect Invisibility ability to neutralize them:
The final boss encounter of the area, Ekandor and his minions, is far trickier. The barbarian guards unrelentingly chase Neera with their enhanced speed, so she has to run rather than trying to fight at all. I use dispelling arrows to neutralize the two mages while doing this.
And then, the game crashes on me.
The latest save - autosave at the cave entrance. On the replay, neither mage gets a single spell off, and Ekandor's scroll is ours.
Rasaad's turn comes next. His dialogue triggers as soon as he rejoins, and we travel to the big city. Rest on arrival, and the two-day timer is up. He's ready to start the quest.
We visit the docks, where time advances to night and Dark Moon monks attack.
With Sorrem, I go for the immediate kill rather than letting him advance time another 24 hours.
Now that we know the location of the Dark Moon temple, we head there. One snow troll later, Shar-Teel reaches the key experience threshold - thief level 9 reached. She is a longsword grandmaster now.
Inside the temple, I have Rasaad drink a potion (strength 19) to hit harder. We clear out a bunch of low-level chumps, and then find the big prize.
Gamaz and company are just as easy as the rest - as long as you remember that Gamaz is immortal until his minions are down. Don't waste your time attacking him too early.
Finally, there's one last enemy as we leave. We reveal the backstabber Bassano with Albruin, have Garrick dodge, and attack.
There's one more companion quest to deal with before we get back to the usual party. This one is NPC project content, and an unusually involved quest for that mod. With Jaheira in the party, you can resolve the Aldeth/Seniyad encounter peacefully and pick up an additional quest to rescue some druids from their shadow rivals.
As such, we invite Khalid and Jaheira into the party, dropping Kagain for the moment. I touch spellbooks for the first time, making Jaheira un-memorize her cure spells. Autocasting at rest time is still casting, and we can't allow that.
We pick up the quest and head deeper into the forest, where we are waylaid by wyverns.
After a rest in the shadow druids' grove, it's on to rescue Beador. We open with a Wand of Fear hit when the druids tormenting him go hostile ... one dead, three panicked, only one still fighting. Excellent.
Overall, this was nearly a flawless victory - Garrick took a Chromatic Orb, and that was the only damage we took.
Jaheira heals Beador in a cutscene - it doesn't use any spell slots, so it doesn't count against the rules. He sends us to the next phase of the quest - the Shadow Druid grove, to rescue Maretha. After a rest there, Magpie switches weapons, to the fire immunity Icingdeath offers. This is why:
Andarthe's companion gets a dispelling arrow and a backstab - one down.
Returning to Seniyad, he gives Jaheira a nice club. It's not something any of our usual party can even use, so I let her keep it.
So, what did we get out of this quest? The items aren't relevant to the party; we keep the flaming spear around because it has an activated ability, but that's all. The experience is nice. But the real reward? It's a chance to lower our reputation by a good chunk without going out and killing an innocent.
There's one last ettercap waylay on the way out, and we drop off Khalid and Jaheira at the Friendly Arm. Kagain rejoins, and we pick up Imoen for the short trip back to the city. Enter the Elfsong tavern with her, get her necklace (a +1 protection necklace that doesn't conflict with other protection items), and then finally bring back Ajantis to restore the normal party.
Now that we've got the party back together, it's time to take on some challenges. First, the mages upstairs at Sorcerous Sundries. We hit them with a Horror to start, because anything that reduces the number of mages we're fighting is good.
A couple more easy quests follow; retrieving a body from the sewers for Arkion's use and stealing from the Hall of Wonders. The reward brings Kagain to level 8.
Now, we leave the city for a few things outside. We have a chat with Mendas, opening up the island quest - and lay four more traps while we're in the area.
Then, it's off to Larswood to deal with Shilo Chen's ogre magi. They're pretty low-level as spellcasters, so we just power through them (one magic missile, one Burning Hands, one Glitterdust). The reward for that is a pair of pickpocket gloves for Garrick - situational, but very nice.
We also lay some traps in the city - three out of four successes in the Undercellar.
Returning Nester's dagger brings reputation to 13, and then we visit Laerta and Louise. They get some help - the easy way.
Next, it's time to visit Degrodel. Backstab a Helmed Horror, draw out two Invisible Stalkers ... no damage taken.
After talking to the man of the house and getting his quest to find the Helm of Balduran, we detour for some pickpocketing. Garrick's new gloves earn us the sea charts (in lieu of paying off the captain's bar tab), Arkion and Nemphre's trinkets, and Vail's letter. Incidentally, I botched the order here; by not talking to Ordulinian earlier, I lost the ability to give him the trinkets for a reward.
The stoned adventurers are freed, and we tell Vail we're not taking the helm. He helpfully points us to the cloak instead ... so we go for the helm anyway.
The Maulers of Undermountain are the next big fight, and we prepare by getting into position at the entrance:
Heading out to get the cloak, we speak to Brielbara - until now, it's always been the wrong time of day when we came by. That, naturally, leads us to go deal with Yago.
Slice up a mustard jelly for a drunken bet, and then it's back to Degrodel.
This last fight brings Magpie to the experience cap:
It's time to get back to the plot, and deal with a doppelganger infestation. In the Merchant's League headquarters, I try out a UB sidequest for the first time - sell Edie a potion of genius. The doppelgangers themselves, of course, are no problem, and we now have Kondar. Reputation goes up by 2 to 16 when we report success at the Seven Suns.
Next, we clear out the sewers. A phase spider poisons Kivan, and we spend an antidote on that. The sewerfolk and Ratchild's crew inflict a few minor hits, and then we head to the eastern section.
The carrion crawlers then switch targets and paralyze Shar-Teel - but they don't do much damage. The rest of the party easily takes them out in time to save her.
We report our success and give Fergus a ring for reputation 17. That's the last reputation increase we'll get; we could pick up another one from Oublek, but we have no real reason to go to Nashkel.
Before taking on the Iron Throne headquarters, the party rests. Magpie lays another trap in the Undercellar, with the second attempt a failure.
On the way up to the top floor, one of our excuses fails. This leads to us needing to kill a guard, and the merchants going hostile. They're harmless, but we keep AI off so as not to accidentally kill them. In retrospect, though? I should have just let my party kill those merchants. They're not innocents, and it would have saves some trouble later with the way they wander.
For the gang on the top floor, our plan is to use the stairs against them. We set up an ambush position...
Once the dialogue is triggered, Magpie steps back down. Shar-Teel heads up in her place, and backstabs Zhalimar (68 damage) before retreating. She takes an arrow, but dodges the spells. One Spook, possibly others I didn't take note of.
A doppelganger, some skeleton warriors, and the fighter/cleric Aasim follow her to the party.
Next up, the mage Naaman comes down the other stairs. We're a bit out of position for that, so I go down another level to set things up. Kivan hides so he can get off a dispelling arrow - successful on the first try. Shar-Teel follows up with a backstab.
Shar-Teel heads up for the next move, and Diyab spends an Invisibility Purge - which he doesn't have memorized, the cheater - only to fail because of her cloak of nondetection. Zhalimar drinks a healing potion and gets stabbed again - still not fatal. Shar-Teel's retreat brings the fighter Gardush this time.
Back up for one more stab to finish off Zhalimar. The fighter-mage Alai hits Shar-Teel with a Chromatic Orb before she can get back down.
Alai gets a stealthy dispelling arrow next, and is joined by Diyab to face our party.
The backstabbers Shennara and Kaalos - never showed up. Looks like a script glitch, possibly related to how we kept going up and down. And that's it. All in all, the Iron Throne fight went pretty smoothly. Magpie and Shar-Teel dropped into the yellow, Kagain took a minor hit, and that was all.
Finally, on the way out of the tower, one of the merchants follows us:
Before ending the chapter, I want to see what that deal with Edie did - nope, still studying. Well, then, advance time with a rest. Sell off lots of stuff, for over 100K gold. Steal back a set of fully charged wands - one "general store" in southwest BG buys wands, and has a steal difficulty of only 10. While I'm at it, recharge the Greenstone Amulet (which I haven't used at all) and the necklaces of missiles by selling and buying them back. Finally, restock on +2 arrows. Two traps laid in the Undercellar, rest again.
After this last rest, Edie is finally willing to talk - and the point of the test was to cheat. She passed, and we can be glad we helped her. Two traps laid in Flaming Fist HQ, and we talk to Duke Eltan to end the chapter.
Author's note:
I had this short update ready two days in advance, and then I forgot to post it in the morning. Oops. The shortness, of course, comes from the natural stopping points. The alternative would have been to merge it with part 11, but that felt too long.
And then my internet connection isn't doing so well today; after four failed attempts to upload the first picture, I had to leave the building to get a better connection. On a related note, am I the only one who compresses the pictures before uploading them? It makes a big difference; a screenshot in the original PNG form runs several megabytes, while the compressed JPGs I use are a few hundred kilobytes each.
Because of those "ironman" plans, I track the protagonist's XP at each major stopping point. The first marker is just before talking to Eltan to end chapter 5: 170317.
After that chat, we are transported to Candlekeep, where we are met by a group of ogre mages - the last and most serious group of bounty hunters.
The battle goes on, and Shar-Teel takes heavy damage from both magic missiles and melee attacks. As such, I have her drink a healing potion.
Since this level of damage vastly exceeds our daily healing resources, we need to supplement that. We could use some of our stockpile of healing potions here, but I decide to buy healing from the local priest. He appears to have caster level 1 for his services, so the cure spell tweaks make the level 1 Cure Light Wounds spell really not worth it. 50 gold for 2-9 healing with CLW, 100 gold for 11-39 healing with CSW, or 200 gold for 14-49 healing with CSW. The middle option is by far the most efficient, at about 4 gold per point of healing on average.
Being transported to Candlekeep takes time, so we need rest as well. After disposing of a doppelganger, the party rests at the inn. Magpie gets the chapter 5 dream for Draw Upon Holy Might.
Now, on to the library. We loot many scrolls and a few other trinkets, kill a greater doppelganger, and discover Magpie's divine heritage. Ajantis needs some reassurance that she's good - the reputation helps. Then, talk to Koveras and go to confront the Iron Throne leaders.
What to do ... Shar-Teel speaks up. Ajantis doesn't. Killing it is, then.
As we loot the shelves behind them, Kivan pipes up with a comment:
"That was a noble deed."
Well, he is devoted to revenge.
As soon as we leave the floor, we are arrested. Ulraunt seems determined to ignore the evidence, but Tethtoril still believes us innocent.
Practically the first thing we do? Magpie blunders into a trap. Thankfully, it's only a 3-shot Magic Missile, and Garrick's song is active. Only 4 total damage taken.
The Wisdom tome goes to Magpie - up to 8.
Further in, we meet some phase spiders, and Shar-Teel gets poisoned.
The trove beyond brings Magpie to strength 18 and improves Kivan's defenses with the +2 cloak of protection.
The ghasts along the last path are easily disposed of, and it's on to the doppelganger floor.
The first hall is lined with rooms holding single doppelgangers, which are completely ineffective. The central area comes next, and we are joined by Arkanis and Deder for some skeleton-bashing.
The greater doppelganger ... goes down without getting a single spell off.
That brings us to the next floor, and the most dangerous fight in the chapter. Shar-Teel scouts it first, and I prepare my plan: fireballs. Magpie is super-immune at 110% resistance, so she charges in while four others launch their fireballs.
Or, at least, that's what I try. In practice, Prat runs around behind a corner and gets off a Vampiric Touch before the arrow can land. Magpie resists the spell, and the only effective act he manages is a melee hit on Shar-Teel.
The +2 throwing axe goes to Kagain, and is his new primary melee weapon - it's faster than the +2 battle axe, with the same average damage.
The spiders in the rest of the level cause a bit of pain, with Shar-Teel getting poisoned again. She's still in the yellow, though. That encounter brought spiders from all over with their "call for help" script - a bit of a hairy fight, but nothing we couldn't handle.
That leaves one last fight down here - our third basilisk encounter. In previous encounters, we've used a green scroll and a blue scroll. This time? I go for a potion of mirrored eyes.
The second basilisk lasts longer. It switched to melee, and Magpie rolled 16, 3, 3, 2 on her second round's attacks. Only one hit, for 13 damage. Still, we have a total of ten rounds on the potion's duration. It doesn't take nearly that long to finish things off.
With that, we escape from Candlekeep. Magpie is now up to 182090 XP. Also, Kivan has reached level 8.
It's not such a good idea with the entry I made; starting the fight there makes it hard to place the Cloudkill without hitting your own side. And my party isn't immune to the instant death effect.
I've never adopted strategies with Protection from Magic scrolls myself; I always seem to find other tricks that work, and end up saving those scrolls for never. Even in this run, I didn't use any.
Now that we're done with chapter 6, there's one more thing to do out in the wilderness. It's time to take out Kahrk, "greatest of the ogre mages". We open with a dispelling arrow from Kivan:
He strikes back with a Slow spell, slowing both Kagain (despite his fantastic saves) and Shar-Teel. That prevents Shar-Teel from getting a backstab in, but we're still doing plenty of damage with Magpie and two archers. Shar-Teel drinks an invisibility potion to go for another stab attempt...
Resting in town brings the chapter 6 dream and the second instance of DUHM. And then, we're off to Ulgoth's Beard. Four traps set in Shandalar's house (before and after a rest), and then we talk to the wizard so he can send us off to the ice island.
On the island, Andris and his friends are the first group of enemies. Retreating quickly after the initial talk makes them hostile but doesn't activate most of their buffs. That allows us to get a good stab in:
Beyn chases her, and gets a dispelling arrow for his trouble:
But then, the third mage Marcellus emerges as well. We're not quite ready for him, so he gets off a Slow and a Chromatic Orb before we can escape to the surface. Kagain failed his save against the Slow again.
Coming back down ... wait, Marcellus didn't have a Stoneskin up? We could have just attacked him. Oh well, we do that now. He gets off another acid arrow, hitting Garrick for some damage.
Andris usually teleports back in if he fled earlier, so we wait around for a bit - but he doesn't come. Apparently, that hit was hard enough to scare him off for good.
The next mage, Cuchol, is stabbed without a fight.
Shar-Teel's retreat is blocked by an ankheg, so she stops to take it out. That gives Garan long enough to cast a Remove Magic at her, although she's out of sight by then. The strength 19 potion she drank earlier is not removed.
We then kill off some Winter Wolves, and Ajantis reaches level 8. This interlude allows Garan's short-duration prebuffs to wear off, so Magpie and Shar-Teel sneak in to finish the job. Fighting straight up, they exhaust his stoneskins and his second set of mirror images before killing him.
After mopping up the ankhegs, we head along the twisted path toward the other exit. Tellan is found on the way, attempting to cast a divination spell that wouldn't have revealed Shar-Teel anyway...
And then, we reach the exit, where Andris fled to.
The second level consists mainly of large numbers of Winter Wolves. They're no real challenge to our party; the spiders in the Candlekeep cave area this was cloned from were much more of a threat.
And then, there's one more mage at the end, backed by his unique Snow Golems. Dezkiel gets a backstab...
This last fight brings Garrick to level 10, the last level we earn in BGEE. He can now identify any item in the game with his 100 lore.
Finally, we talk to Shandalar ... and pickpocket him repeatedly as he teleports away.
We rest one more time before leaving so we can lay another two traps in Shandalar's house, and then hire Ike's tour. Durlag's tower is next.
The tour is interrupted by a demon knight teleporting in to fling fireballs around.
We have some things to finish upstairs and on the battlements, but first I head down to set some traps on the first dungeon level. One of two tries successful. Coming back up ... crash. BGEE unexpectedly quit. So much for the ironman run, but I do console the XP back for that.
The outer battlements come next, with Shar-Teel performing repeated backstabs. And, for the regular skeletons, sometimes frontstabs.
The other side is a bit trickier, with exposed stairs instead of a protected path inside the wall. The doom guard survives a stab:
Now, it's time to take on the basilisks on the roof, and to show off a fourth way of dealing with their gaze.
A paladin has the easiest time of getting there, with a base save of 9 at level 7+. It's even theoretically possible to do it without any temporary buffs - use a paladin, and substitute the Claw of Kazgaroth for the potion of invulnerability.
On to the battle, where I record the displayed saving throws: 6, 6, 1, 7, 6, 5, -3, 8, 6, -2, 14, 0, -2, -3. Pretty terrible rolls (add four for the original d20 numbers), but there's no such thing as a critically failed save in the BG series.
On to the tome, guarded by an undisarmable charm trap. Magpie still has her potion of invulnerability active, so she saves with a 1. Her wisdom is now 9.
I go for a backstab on the ghost ... failed. It can see invisible foes, apparently. Let it activate its prebuffs, then duck down a level to wait our the PFMW we can't fight.
Coming back up, I use a Detect Invisibility to reveal it, and follow up with a dispelling arrow ... missed.
Kirinhale comes next, as I hope my still-active invulnerability potion will help. It turns out not to matter.
And then, Riggilo.
That concludes the upstairs portion of the tower. Magpie is up to 196851 XP; we already claimed a good chunk of what was available back in part 2.
Down on the warder level, we set to clearing out the various monsters. One amusing sight early on - a Phase Spider teleports right into backstab position:
The trio of greater doppelgangers is my first target. The initial backstab fails, but drawing them out to fight one by one is just as effective. And then, the third doppelganger takes a backstab right through its mirror images.
Somewhere in here, I realize I've inadvertently erased the party's fatigue by reloading. As such, I rest. And set two more traps.
Progress through the level is slow and steady, killing monsters in small groups and disarming traps. The pair of skeleton warriors at the bedroom are the only ones to inflict any notable damage, dropping Magpie into the yellow.
And then, it's time for the boss fight.
Finally, that leaves the backstabbing Avarice. It gets a hit on Magpie...
The party heals up with potions, and continues down into the depths. Magpie is up to 206963 XP.
The second floor of the dungeon is haunted by doppelgangers in the image of Durlag's family, repeating scenes from long ago.
The first two of these doppelgangers are not particularly noteworthy, coming alone as they do. Magpie does forget to put her armor on and take some hits, but they're easily swarmed and eliminated.
Then comes the room with Kiel's helmet. I follow my usual strategy here, sending the entire party to the vicinity of the helmet so that they won't stand in the Cloudkill. They're in a Stinking Cloud instead, but that's not much of a hazard to a bunch of warriors.
The next room brings a Durlag and an Islanne, fighting in their more dangerous dwarven forms. In particular, the mage Islanne is a threat we need to deal with quickly.
Our next target is the lava room with its many doppelgangers. We start with a backstab on the Islanne, and then send in the party.
There's one last doppelganger that didn't join the main fight. We just charge that Islanne and kill it quickly.
Finally, there's one last big fight on the level - the four dwarven doom guards. They get twice as many attacks per round as regular doom guards, at a better THAC0. And there are four of them. My solution? Don't fight them in melee. Garrick can handle this.
The remainder of the floor just has some traps and ghasts to dispose of, which we handle easily. Magpie is at 217241 XP entering the third floor of the dungeon.
The first challenge of the third floor is the room of explosions - which is also an opportunity. With Icingdeath and two rings of fire resistance, we can bring any party member to over 100% resistance at will. That makes the explosions a source of unlimited free healing.
The first path we follow is the room with the dragon skeleton. I accidentally activate two statues instead of one, so Hack and Tarnor tank for us against all three wyverns. It's as easy as one ...
The party travels through the back corridor to the garden area. Knowing the threats I face here, I have Garrick stay back and drink a potion of defense, while Ajantis and Kivan switch to melee mode with bastard swords and shields.
The first ashirukuru rolls a 12, and misses.
The second ashirukuru gets in a successful stab on the first try, then a miss on the second:
There are also greater ghouls here. They can do some serious damage:
And then, there's one last ashirukuru to fight.
There is precisely one spell that can stop them from going invisible repeatedly. Glitterdust. Unfortunately, this party can't just memorize three instances to handle the area.
Instead, we take our somewhat wounded party to the exploding room to heal up.
The middle path, with its platforms full of skeleton archers, is cleared with fireballs. We recover a great deal of magical ammo this way.
And now, the elemental rooms. I deviate from my usual order here. Fire comes first. Shar-Teel switches to fireproof gear and goes for a backstab on the archer, while the others use ranged attacks on the melee Phoenix Guard.
Air comes next, starting with a backstab on the Air Aspect.
Ice is a straightforward brawl.
And finally, Slime. I prepare for what comes next by turning off AI and distributing some potions, while I give the archers fire arrows. The fission slime goes down easily, and we head to the chess scrum.
In response, I have the archers switch targets to shoot down the surviving rook, while our melee forces deal with the still hasted knights.
Magpie enters the final floor with 231487 XP. This floor offers a chance of paths again, and we choose to face the spiders first.
Riddles come next, followed by the bone path with very little fighting. We do get some nice loot out of it; Pellan's shield is an upgrade for Kagain.
Finally, we head down the acid path. This area is populated by ghouls and crawlers, all hasted. Against these nasty threats, I decide to go for repeated backstabs ...
The party reaches her fast enough to keep her alive, but it takes a lot of healing potions to recover once the paralysis wears off. Also of note - we're using our massive healing potion stockpile now. I could save some by resting, but I'd rather waste more time than necessary.
Two more stabs succeed, and then a good-sized pack gathers. They go down, without any serious damage.
Farther forward, the acid pools become unavoidable. As such, Magpie uses a pair of acid protection scrolls for immunity, and grabs the loot. That also lets her open the path to Grael safely, and draw him out:
There's one more piece of excellent loot here, the Burning Earth longsword. Shar-Teel now has elemental weapons in both hands. We pick up the gold and gems, answer one last riddle, and head out to face the demon knight.
For this special occasion, I summon some meatshields and use a scroll of haste. That's a total of 20 APR for the party warriors.
Also, note Shar-Teel invisible there ... the Demon Knight sees through invisibility, but he's not immune to backstabs. With other attackers in place to distract him...
And then, it's over. No further damage. Kagain strikes the final blow.
And that closes out the tower. It's storming when we head up to sell things off, and Magpie is just under half health, so she drinks a healing potion to be safe. 241556 XP for Magpie, and about 275K gold for the party.
Before heading north, I notice an odd glitch: the selection circles for Ajantis and Kivan have been replaced by targeting icons. This doesn't seem to be causing any trouble, so I keep playing.
After a rest in Beregost, it's off to Ulgoth's Beard to face the cult of Aec'Letec ... and to see just what our preparations have wrought.
Garrick takes evasive action, Ajantis uses Albruin's Detect Invisibility, and the two archers switch to melee mode.
It has been a long travel day, so the party rests at the inn before heading on to Shandalar's house. Upon waking, we switch a bit of equipment around, and start using our potion stockpile. Heroism all around, fortitude and strength 20 for Shar-Teel, agility for Ajantis. Shar-Teel switches to ankheg plate and a ring of protection instead of the Mithral Chain, and Garrick turns into a wolf (with Kiel's buckler) for slightly better AC.
The door guard at the house triggers the next fight.
And then, we head into the house.
The wizard's buffs start activating ... Minor Spell Turning, Minor Globe, Shield, Stoneskin. One dispelling arrow hit too early, another on the way ...
And finally, it's time for the basement - which I haven't seeded with traps. Everybody drinks potions of mirrored eyes and descends.
The mage Tracea Carol goes invisible right after the dispelling arrows land. Oh well. We can't have perfect timing every time. Shar-Teel activates Detect Illusion, but she reveals herself to start casting. That invites more dispelling arrows, and her defenses go down.
Now, it's time to take out some guards. We launch fireballs for this:
Aec'Letec throws another Silence at Garrick, and the melee forces finish off their target. Two guards remain.
Magpie's XP after defeating the cult: 247091.
The final demon battle was messy, but the rest of the quest went beautifully well. Oh, and what about the gaze? What was the consequence of letting half our party's protections fall immediately?
Nothing. In SCS 33.3, and other recent versions, Aec'Letec was unable to use his gaze at all due to a bug. There was no risk of losing party members permanently to it, and no need for those potions of mirrored eyes. This bug (which I had reported) was fixed in version 33.4, which came out approximately an hour after I played this.
If the gaze had been a concern, I would have spent a few more days in the area so I could lay traps in the basement. Tracea Carol's Remove Magic is a threat we have to deal with, and instantly killing her with traps is the best solution. Once she's down, Aec'Letec doesn't have a dispel of his own, and the party's buffs stay up for their full duration.
This section's title inspired in part by a recent discussion in which it was determined that Aec'Letec is a necrophiliac. Some of the pictures have been posted before, as a preview of sorts - I just felt that good about the cult battle in the house.
Taking Mendas' ship sends us to an unknown island, with no immediate way back. We can only work with the strange village here ... and loot their possessions. There aren't any guards to call, so just take it all. Talking to the leader gets us a mission, and we head north. Since we're so close to the end of the game, I try to keep potion buffs up. Here, it's heroism all around at the first sight of an enemy, and strength 20 for Shar-Teel.
The first serious fight is Palin's bunch, who deal substantial damage to Shar-Teel:
The sirine queen gets a backstab:
The remainder of the outdoor part of the island doesn't have much in the way of threats, and we enter the ship. On the first floor, it's all wolves:
For the second floor, we set up an ambush and draw them down to the first floor.
The contingent on the third floor is handled with an ambush on the second; not because we couldn't fight them upstairs, but because this way we can keep the archers and the bard back to do their jobs.
There's no reason to mess with a winning formula, so I do the same to the top floor. Shar-Teel is in position for a backstab on Karoug:
And then, Shar-Teel's second main-hand attack of the round lands.
The rest of the wolfweres fall easily, with Daese the last to go.
The potions wear off on our way back to the village; I'll replace them when hostilities start anew. We exterminate every villager that transforms and attacks ... oh, oops, I forgot to go back to Dradeel and return his stuff. Do that, losing some time on the potions.
With that delay, the potions run out in the tunnels, and I partially renew them - just Magpie and Shar-Teel. We take a few hits, but healing potions cover that easily.
And now, Kaishas. It's possible to talk her down with SCS, but I'm not trying for that.
With that, we leave. Mendas and Baresh await us back in Ulgoth's Beard.
I wasn't expecting the lycanthrope bosses to go down that easily, but Shar-Teel's backstabs are just that good. Magpie now has 266747 XP heading into the Chapter 7 plot.
We return to the city of Baldur's Gate - Magpie is a wanted woman now. Still, it isn't hard to avoid the Flaming Fist patrols, especially by using the sewers. We reach the Flaming Fist headquarters without incident.
Inside, mercenaries await us - it seems the new commander Angelo doesn't want anyone coming for the duke.
Trouble finds us on the way out, as a Flaming Fist enforcer is right there waiting for the party. We are captured and brought in to meet Angelo - Shar-Teel's father. He recognizes her, and takes action:
Indeed, two more enforcers are stunned on the way to the harbor master. Next, we enter the Iron Throne building again. On the way up, we ignore the hostile merchants and set up by the stairs. Poke Cythandria to draw her golems out:
Of course, we hit hard right back. Kagain takes down Ungh immediately, and Magpie finishes off Argh no more than a round later.
I prepare for another round, and ... death by crash.
Going back to the autosave delays our entry into the building just a bit - but it's long enough for a pair of Flaming Fist enforcers to follow us. They get some stuns, of course. I record Cythandria's prebuffs this time: Mirror Image, Shadow Door, Shield, PfNM, Stoneskin, Minor Globe, Minor Turning.
Only one golem follows us down this time, and Ajantis takes down Arge with no damage to the party. Then Cythandria follows, invisible. I hear evocation - dodge downstairs. That Sunfire misses us. Back up, and she's still invisible. Another Sunfire, and we fail to dodge this time.
The third evocation spell reveals Cythandria, and we get the dispelling arrows off. One of two hits.
After this, the party heads down into the basement and out into the sewers, stunning an enforcer again on the way. Our target is the Undercellar, which is quite close by underground.
In the Undercellar, our preparations come to the fore again:
And now, the coronation. We still haven't rested since returning to Ulgoth's Beard, but we're not fatigued. Press on!
The warriors drink potions of heroism and strength 21, and Garrick equips a scroll of Chaos:
The Chaos lands, confusing the mage and the regular doppelgangers.
One last-minute tweak to inventory and equipment - we need to set up the planned imports.
Now, in the maze, we add oils of speed to our buff potions - everybody has hasted movement.
For Rahvin's crew, we give the melee forces invisibility potions and get in position:
I get impatient, and start up the undead hunting before that happens. Magpie and Kagain use scrolls of protection from undead, to be joined by Shar-Teel. They go off hunting ... and it doesn't go as planned. Several skeleton warriors charge the party, and we can't reposition because of Shar-Teel. They do serious damage before we can take them down.
Once the undead are cleared out, in complete safety, it's time for Tamoko. I've never fought her before, but there's a first time for everything.
Our potions expire, and we enter the temple. Time for one last round of potion buffs for the final battle.
And now, we fight. Some disposable summons to distract Sarevok and Tazok in the middle, blast away on one side, and send in the melee on the other. Dispelling arrows are added whenever possible, of course. Diarmid, on the right, is the first to fall.
Tazok and Angelo are next to fall, completing Kivan's revenge and Shar-Teel's tragedy.
A sharp eye may notice a continuity hiccup - the pictures in this update are slightly out of order. I didn't remember to swap that equipment out until after entering the maze. That also ran out some of the buff clock, leading us to need to refresh the oils of speed mid-maze.
And there it is. Baldur's Gate EE defeated without ever casting a spell. We just used innate spells and items - including mage scrolls, but only rarely on those.
Thanks
Gus
Final stats:
Magpie: 297108 XP. 18/20/19/11/9/19 stat line. Level 7/8 with 59+37.5=96 HP before equipment. Specialized in scimitars, daggers, and dual-wielding. Thief skills Open Locks 60+40=100, Find Traps 75+25=100, Pick Pockets 15+40=55, Move Silently 0+38=38, Hide in Shadows 0+38=38, Detect Illusion 0, Set Traps 65+15=80. She had 847 kills for 401258 XP, with her strongest kill officially Drizzt (12000) but really Sarevok (15000).
Shar-Teel: 696 kills for 402029 XP. Her strongest kill was the greater wolfwere Karoug (8000).
Ajantis: 385 kills for 164660 XP. His strongest kill was Angelo (9800).
Kagain: 330 kills for 170388 XP. His strongest kill was the Demon Knight (15000).
Kivan: 568 kills for 186301 XP. His strongest kill was officially Ungh (8000) but really Aec'Letec (16000).
Garrick: 26 kills for 17535 XP. His strongest kill was Davaeorn (6000), and two thirds of his kill XP come from just four enemies in two encounters.
It wasn't nearly as hard as I thought it would be. I expected to need more buff potions, but I ended up only really using them at the end - and that's something I do every run, because I have them and they're not going to carry over. Warriors dominate for most of BG1, and the rest of the time items and rogue tricks pick up the slack. Necklaces of missiles and arrows of dispelling, in particular, solve a lot of problems.
Also, ultimate backstabber Shar-Teel is an absolute beast. Relatively fragile, but incredibly deadly.
I numbered all the pictures, so I can give an exact count easily: there are 352 pictures in the BG1 portion of this report. And while I'm still playing and haven't written most of the posts, I can say that SoA will have more than twice as many.
Since none of this party will join Magpie for BG2, I'm giving them brief epilogues. No deep basis, just what feels right for the characters as I see them.
After the battle of the Undercity, Shar-Teel drifted rudderless. While her name was cleared and she was regarded as a hero of the city, her last vestige of trust in men or authority had been shattered by her father's betrayal. She turned to vigilante action, hunting men who were accused of attacks on women, until one such man escaped her wrath long enough to call for help. He was investigated, but the ducal courts acquitted him of any crime and Shar-Teel was branded an outlaw. In the wake of this, she fled the vicinity of Baldur's Gate for parts unknown.
On parting company with Magpie, Ajantis returned to the Order of the Radiant Heart in Amn. His misjudgments in love weighed heavily on him, and he followed his mentor Keldorn's example of devoting himself entirely to his duties as a paladin. Ajantis was last seen venturing into the hills of eastern Amn as part of an Order delegation, chasing rumors of a gathering of dangerous monsters.
Kagain returned to his home in Beregost after the battle with his newly burnished reputation and a great deal of wealth. He invested this windfall into building a new mercenary company, the Blackbird's Blades. With the Flaming Fist greatly weakened by the revolt of Sarevok's followers, they pulled back from outlying areas, and this allowed the Blades to become the primary protecters of Beregost and its environs. Their emblem of a black bird holding an axe and dagger is recognized throughout the area as a sign of safety, and any rumors of smuggling under the company's banner are soundly rejected by the townsfolk.
With Kivan's revenge complete, nothing remained to tie him to civilization. Instead, he retreated into the depths of the Cloakwood to mourn his wife and search for a new purpose. Many years later, he emerged a changed elf, and took up with a party of young adventurers facing the region's latest crisis. His wisdom and experience served them well, as he taught them many lessons that might otherwise have come at a harsh cost - but that is a tale for another time.
Garrick spread the tale of the heroes he had traveled with far and wide, but the tales warped in the telling as they often do. The diminutive Magpie became an imposing and crafty crow, so that few who had not seen her in person would recognize her from the tales. And when Garrick told of his own exploits amid the great warriors who had felled Sarevok, he was laughed at. None believed he could have defeated an archmage, or a group of animated armors, for his lack of practice in anything martial was obvious. And so, Garrick traveled south to Athkatla, and sought an alternative to fame. One woman's enduring love would outweigh a crowd's fleeting attention ... if he could achieve it.
And as for Magpie? She vanished not long after the battle, only to appear again in even greater adventures. Her story continues ... Monday.
Upon starting the SoA campaign, Magpie's experience immediately brings her to fighter level 8 and thief level 9. She takes another 25 points in Pick Pockets, to a total of 20 with her stats. Imoen levels up to mage 10 for nothing but a few hit points, and we rescue Minsc and Jaheira (ranger 8, fighter 8/druid 10). We have three level 8 warriors, and Jaheira will be fighting in animal forms.
Aataqah's ogre mage can be a serious fight, especially without spell aid - this iteration has stoneskin, mirror image, haste, and a spell defense. And we just don't have the gear needed to fight mages efficiently yet.
The gibberlings have to be chased down, but they're easy enough to handle. Then we kill some goblins to get Imoen a bow, a mephit to pick up a stash of gear including the Grave Binder dagger, and a pair of lesser clay golems:
There's a +1 staff in the room of jars - which means we have a weapon that can hurt the jailkeep golem. Start bashing!
We could hurt the sewage golem with that staff, but not kill it. Instead, we just tell it to open the doors. The otyugh beyond gets a backstab:
Some trap-filled areas with minimal combat come next, and Magpie recovers the Helm of Balduran. It's not what she was wearing for the Sarevok fight, but it's still a nice helmet. Some dryads request that we recover their acorns from a group of duergar, and we agree.
Those duergar are our next target, with Magpie going for a backstab on the mage ... but he runs around long enough for her stealth to expire. A Burning Hands on Magpie, and her allies come up to aid her.
The next challenge is the platform in the Plane of Air, and the very nasty mephit fight within. One each of air, smoke, mist, fire, and steam. The steam mephit is the nasty one: Boiling Rain Storm for an AoE 2d6 poison damage, stunning those affected for a round unless they save vs breath. As our best breath save is Magpie's 11, we'd like to avoid that being an issue. Go for a backstab ...
On the second try, I add a couple traps - not that they make a difference. Still, the backstab works as intended:
Fighting the cambion comes next - a straightforward brawl. It gets in two hits on Magpie for 20 and 17 damage before going down to an arrow crit from Minsc:
On to the second floor, where Yoshimo joins. We take on the mephit portals without too much trouble; the mephits can't hit very hard even when they ignore them, and the radiant mephit doesn't get too lucky with its Color Spray variant.
An escaped clone throws some mad accusations out, and we take it down.
Then, in the corridor beyond, we meet trouble:
We've collected the keys to disarm the traps in the next hall, and do so. Wands retrieved - and they will be important. Some of them, anyway.
Frennedan is easy enough to handle - just gang up on him with our warriors after he refuses to make his own way out.
The duergar group to the northeast is slightly troublesome with a mage, so we focus on him first:
I always like to get the experience for killing Ulvaryl, so I reload after the first try fails. On the second try... the Shadow Thief Battlemage stuns her with a Chromatic Orb:
There's one final encounter with Shadow Thieves on the way out; this bunch go for backstabs, so I have the archers switch to melee weapons:
A cutscene battle ensues, and Imoen forgets the rules...
After stashing some things and picking Ribald's pocket for a ring of regeneration, Magpie dismisses her companions. It's time for some solo adventuring and experience gain. And the first target is the circus tent.
Inside the tent, Magpie easily takes down the shadows, but ignores the illusionary werewolves. SCS breaks their scripting to not use real weapons unless attacked, so I remove the override creature files to revert them to their vanilla versions.
On to Aerie's room, where a pair of "peasants" hold the key to her chains.
With that, Aerie joins and gets a set of splint mail to wear. It doesn't show up very well on her mage avatar, looking like a set of light robes. She levels to 8/8 for a few more hit points and two-handed proficiency.
On to the fight with Kalah ... and I didn't prepare properly for it. The first try has Kalah target Aerie with MMM attacks, then confuse and stun her ...
On the second try, the Confusion doesn't get us - but Magpie gets polymorphed.
Third try ... aborted with no pictures. The fourth try is more successful:
I moved on at this point, but later had an idea to revisit it. There is a reliable way for a character straight out of Irenicus' dungeon to take down Kalah with no spellcasting aid.
You just have to be careful with friendly fire - that test had Quayle die in the stream as Magpie ran around. His death doesn't drive away Aerie or lose you reputation, and you get the same quest experience either way - but it just feels like a better ending with him alive.
Anyway, now it's time for a scribing spree. We buy two potions of genius for Aerie and scribe what we've collected so far, which is enough for Magpie to reach thief level 11. She takes ten more points of Pick Pockets and 15 of Detect Illusion, then drinks the potion of master thievery from the starting dungeon. Galoomp has steal difficulty 49 and Lady Yuth is at 55, so Magpie's potion-boosted 155 skill is good for certain success taking their scrolls.
Many scrolls later, Magpie reaches fighter level 10 and thief level 12 - more than a million XP. With these levels, she takes katana proficiency and 25 more points of Detect Illusion skill. Also, while I'm at it, Magpie sells and steals back all of those one-charge wands. Rather than scribing the Limited Wish scroll for a mere 7K experience, Aerie casts it for a set of +2 full plate. It's a massive improvement over +1 plate mail for Magpie and will be useful for some time.
There are a few scrolls I save - notably, the five arcane Remove Curse scrolls. That scroll is quite rare (no others in SoA shops, and I don't think there are any fixed drops), and temple services are the only other way for this party to get that effect before high-level abilities.
Aerie gains some levels too, but that's not important. After all, Magpie lets her go after this, never to rejoin. She travels on to the slums to begin chapter 2, alone.
Magpie will run solo for a bit now, seeking the threshold of 1.25 million XP before recruiting any further companions. As such, her first targets are in the Copper Coronet. In there, she greets Nalia and agrees to her quest, telling Nalia to meet her at the keep. She also duels Amalas; since he needs a critical 19 to hit her in that full plate, this is not a hard fight.
Once in the back rooms, Magpie picks up the pickpocket gloves - they will see a lot of use. Then it's off to free the slaves. She sets a trap just as the first guard confronts her ...
Continuing on, the winter wolf gets a backstab. So does the beastmaster:
After the gladiators are released, Hendak takes a while to move; that leaves Magpie to finish off Lehtinan:
Now, down into the sewers. The hobgoblin packs here are vary dangerous for a solo adventurer, so Magpie uses stealth. Backstab one shaman ... only 22 damage, not enough to kill it (35 HP). The other uses his Hold Person, but Magpie saves. She switches targets when the first shaman panics, going after the unhurt one ... which follows up with a Remove Fear. That shaman dies, and the formerly panicked one casts Bless. Still, that wasn't the actually dangerous Hold Person, and Magpie finishes him off.
For the grate room's mix of sewer creatures, Magpie starts by backstabbing the otyugh and sticking around in melee to finish it off. The oozes come next, with her switching to a nonproficient slashing weapon (the Sword of Chaos) for the mustard jelly. Even without proficiency, Magpie hits on a 6; mustard jellies defend themselves with resistances, not AC.
More backstabs follow for the carrion crawler and kobold shaman, killing them in one hit each. This naturally offends the other kobolds, but they don't have any spellcasters left to be a threat.
The next hobgoblin pack only has one shaman. That shaman dies in one hit to a backstab.
I could pick up Lilarcor now, but I save that for later with a full party. Instead, I head out to the slaver ship, from the surface entrance. Coming up from the sewers is far too dangerous as we are now. Sure, there are a couple of jerks in the way on the surface, but they're not hard for a fighter to handle.
This approach allows us to pick off enemies and use the door to dodge the wizards' spells. The first wizard is poorly protected; with no stoneskin, simply attacking and clearing out his images with Detect Illusion does the trick.
Further in, we get to the captain and his followers. The priest of Cyric is first, and we use the door against him - not just to dodge spells, but to set up a backstab:
After some minions, it's the captain's turn. We drag him out to the door, then get in a good backstab:
There are also a pair of trolls to deal with before we can free the slaves. Magpie beats them down with her normal weapons, then follows up with nonproficient fire arrows when they're down.
Finally, Magpie heads back to the Copper Coronet and gets the quest reward from Hendak. This experience leaves her just short of 1.25 million, so she heads over to Gaelan's place and picks two locks. Now she's ready to start recruiting a party for the long haul.
Magpie's first new friend is Korgan. He goes up to level 13, taking two dots in two-weapon style. The nearby thief "Hexxat" also joins, going up to level 15. She takes single-weapon style and a massive investment in Pick Pockets - enough to shoplift from Bernard with impunity with the aid of the gloves. We take advantage of this to buy 40 acid arrows, sell them back, and steal enough stacks for a very long time. Our archers will be using acid arrows for nearly everything.
Also, while we're at it, we loot the good stuff from Bernard and Arledrian. There are a number of useful items there, but the best highlights are the +3 axes Azuredge and Stonefire. The first will be an undead-killing mainstay, while Korgan will wield the other regularly.
The party's first stop is at the graveyard, where we disturb an open grave, talk to the graveyard, and leave. I want to handle that little quest before I recruit anybody that would object to what I intend.
On the way to the Bridge district, our party of three is ambushed.
The enemy mage opens with a Ray of Enfeeblement on the only visible target; Korgan saves. Magpie gets a good backstab off, but Hexxat's target turns and only takes five damage.
Suna Seni falls to Magpie's dagger and the priest to Hexxat's arrow simultaneously. Only the mage remains as a visible foe.
The mage falls as well, but another enemy remained hidden. Hexxat takes a backstab from the thief for more than half of her hit points, before Korgan finishes him off with a critical.
We wait out that charm running around, and avoid any damage from Magpie's madness this way.
It is late enough when we reach the bridge that some muggers show up. Hexxat manages to dispel one of their invisibility potions:
The other thieves get in backstabs on Hexxat, but she's wielding her sword. They don't do much damage that way. And of course, once they're revealed, they're doomed.
A vampire encounter follows. We watch the Shadow Thieves die, and then hurl Azuredge at the vampire ... missed. She gets away.
The party visits the playhouse, and takes on Raelis' task. Of course, progress will have to wait for our business here. The other inn gives Hexxat an option to pick a man's pockets ... Boomerang Dagger acquired on the third success. It's a massive boost to Magpie's combat prowess, upgrading both damage per hit and number of attacks.
Finally, we reach the kidnapper dressed in red. Am-Si can't reach the door to the hideout, and goes hostile - I'd never seen that before.
The party splits, with Hexxat occupying Camitis' attention (a 30-point backstab left him "barely injured") while the other two step outside to deal with Reti before he can flee. Once that's done, the fighters come back in to finish the job.
Upstairs, Korgan is all for collecting the ransom ... but we'll be sneaky about it.
Now, it's time to head over to the temple district for our next two party members. We get the Unseeing Eye quest and head down into the sewers. There are three paths we could take to reach the northwest corner. The northern path holds a powerful bandit party. The middle path holds a rakshasa and his kobold minions. And the southern path will have a group of beholders teleport in. Faced with that choice, I take the middle path.
The kobold shaman follows up with a Hold Person - Magpie saves. Hexxat gets in a backstab on the shaman, and then takes the brunt of the archers' attention. The hasted rakshasa chases Magpie and Korgan, as they go after the other kobolds ...
Finally, the end comes.
Anyway, now that we're clear, we pick up Keldorn.
Mekrath's lair follows. We clear out some mephits, then talk to the mage - he wants us to kill an imp and retrieve a mirror, in exchange for Haer'Dalis' freedom. That's easy enough; the imp is on the eastern side of the sewer area, which we can reach safely.
And now, it's time to get that gem for our newest comrade. There is a group of yuan-ti in our way including three mages, so ... Cloudkill wand time.
A greater yuan-ti charges out at us and becomes the first to fall. Then it's the mages' turn. The first has a (blue) fire shield up, so we take some damage before the dispel lands.
Then the third mage comes down, and falls to a rare melee attack from Haer'Dalis.
With a party of five, including four of the permanent party, we're ready to take on the sewer bandits. Not to fight fair, of course - we have wands now.
On the second try, my timing is much better. The greeter retreats quickly enough, and we get off three Cloudkills with no retaliation at all.
The party is starting to come together. Next time, we'll finish that process.
We've been running around for a bit with Korgan and Hexxat. Now that we have most of a party together, it's time to deal with their quests. The party visits the bridge district to free Elgea, and shoplift another full plate while we're there. After that, we're off to the graveyard district to delve into some tombs.
Korgan's quest comes first, and we head down to the lower tombs past some spiders. Level-draining undead are present, so Korgan enrages and takes point. Haer'Dalis also summons some meatshields with our wand.
That first batch goes down, and we move forward to take on the Vampyre. Korgan leads, and Magpie follows with Azuredge. It's a bit of trouble, summoning some wolves to harass us, but it eventually goes down to a thrown axe.
Now, for the next hallway. Spectral undead tend to be vulnerable to lightning, so Haer'Dalis uses a wand:
Sadly, the wraiths that follow are mostly uninjured. Korgan enrages just in time.
Moving on, we face traps, mummies, and ghasts. Magpie goes after the undead with Azuredge, which leads to a little trouble when a skeleton warrior comes up from the other path to harass the party.
Finally, we head to the tomb Korgan was seeking - only to find it already looted. The skeleton warrior there does drop an arrow of detonation - nice. And we're saving it, because we'll be able to multiply it ... eventually.
Now, it's Hexxat's turn in the Tomb of Dragomir. This brings the dreaded Devil Shades, since Magpie has over 1 million XP. The script that spawns them, OHHSPWN1, is not modified by the SCS component that ties level-dependent spawns to difficulty - instead, it's the protagonist's experience alone. You get two Devil Shades if your protagonist is in the 1-2 million XP range, or four if they're over 2 million.
Devil Shades are hasted, with 4+1 APR at THAC0 5, dealing 1d6+1 slashing damage and 1 level drain each hit. They have 110 HP, are immune to weapons less than +2, and have AC -3. They're immune to fire, cold, acid, and poison, 30% resistant to physical damage - but they take more than double damage from electricity.
Because of this extreme vulnerability, I have Haer'Dalis use the wand of lightning again.
Then there's a second spawn trigger, with another Devil Shade. This one falls to the bolt, but Haer'Dalis and Magpie are hit on the rebound. Ouch.
After killing a few shadow fiends, a nice banter pops:
Burich is already hostile while talking, so we kill him. Magpie reaches thief level 13 disarming a trap, and increases her Detect Illusion skill to 65.
And then, Magpie heads forward to face Dragomir. She starts with two very bad rolls:
But since none of the other party members are in sight, I just wait it out. Throw again ... 10 damage. Dragomir saves against dying with a nat 20, and dominates her again. And then dominates her a third time before she can even throw. This is getting ridiculous. Finally, after that, she gets a second hit in. Save failed. Dead.
And now that she has nothing left to do, "Hexxat" levels up to 16. We move forward, awaken the real Hexxat, and watch the fake die.
Back at the Copper Coronet, we temporarily drop Keldorn so he doesn't complain, and invite Hexxat into the party long enough to get her bag. She takes longsword, stealth, trap-setting, and a bit of illusion detection. Then let her go. We're back down to four party members for now.
And then, up top to meet Korgan's "friends". Hit them with a wand Horror ... very effective. Only Shagbag isn't panicked.
We visit a temple and the Government District to open up a few more quests - illithium, the Planar Sphere, Imnesvale. This brings us near Viconia, and despite Keldorn's misgivings we won't simply leave her to be burned. A fear charge scatters the fanatics:
Korgan isn't very interested in helping out a village, but he is interested in the mercenary work of hunting down Valygar - though he doesn't trust the wizards.
While we're here, we might as well handle Keldorn's personal quest. The path we're following in the near future is combat-light, and we can afford to give him some time off. Now two quests point to the promenade, so we head there - waylaid.
The mage and priest go down at the same time, and we divert attention to the confused thug attacking Renfeld. Can't let him die on the ground.
We run into a mad cleric on the way down ... dead before he can even finish casting his first spell. Three warriors in the face will do that.
Now, back over to the promenade. Talk to Jerlia and Sir William, sell some junk, and we have enough gold (12600) to buy a stack of 40 dispelling arrows from Perter. Sell them back (2400), then steal twelve stacks of 40. Keep half, visit a fence to sell the other half (21600); we made a substantial profit on the deal. Updated offers come in, but we're not taking either the thieves or their rivals up on anything yet.
Keldorn finally reconciles with his wife, and gets a day off with her.
We revisit the Promenade to buy a few things from Ribald - Ring of Air Control, Girdle of Hill Giant Strength, gem bag. So much for all that gold.
Now, we're finally ready to leave the city. Pass through the gates, talking to Flydian to open up Trademeet. Pop over to Watcher's Keep to buy a potion case and a fifth gem bag, then to Trademeet. Recruit Rasaad (already level 13, so no choices to make) and rest for the first time. Magpie dreams, of a warped reflection of Candlekeep.
We don't talk to the mayor, and instead head on to the Umar Hills. I contribute to delinquency, buy gem bag #6, talk to Madulf, and check out the ranger cabin. That points us to the temple ruins, where our last party member awaits.
The packs of shadows outside are easily handled; we don't need a cleric when we can fight this well.
We retrieve and use the first sun gem so we can rescue Gorje Hilldark, then leave. This party is not prepared to face liches.
Now that the party is together, it's time to work on some quests. We have a lot to do in Athkatla.
First, we handle the early stages of the thieves' guild quests. Magpie infiltrates the temple of Talos for a necklace and some other goodies - including a wand of the heavens Rasaad can use. Then she clears out the skill testing room in Mae'var's guildhall and sets a few traps right in front of the boss. He doesn't mind.
Then we're off upstairs to talk to Edwin. Keldorn doesn't appreciate being called on for murder, but - well, it's a Cowled Wizard. He doesn't like them either.
On the way out of the docks, we're ambushed by some thugs:
Over at the graveyard - we're late. There's no one around to meet us. As a consolation prize, we clear out the minor tombs. These are straight-up brawls, in which our warriors have a clear advantage.
There is one more notable fight here: the Crypt King.
We hop back to the docks to begin the process of tracking down Valygar, and look through the containers ...
Fortunately, you can reroll the bugged items in chests by leaving and re-entering the area. Or, if that's not possible, dropping another item into the chest on top of them. I didn't discover that second option until much later, so I rerolled manually a few times.
And then my computer overheats and goes into a hard freeze; I have to force a shutdown with the power button. On returning, it's a scroll of Conjure Earth Elemental in the chest.
We kill a few minotaurs in the building with a trapped door further down, then check out the secret room in the inn next door. Pirates! They have a mage - no PfMW up, so he gets a dispelling arrow:
Now, for that Cowled Wizard. The ground floor of his home is full of mephits, which get a fear charge:
Still, the next floor has golems; since they require +2 to hit, Mazzy switches to melee.
For Rayic himself, we stall to get into position, then open with a dispelling arrow when he goes hostile.
The item rewards ... a +2 staff and AC 7 bracers. Utterly useless for us. The wand of fire might be of some use, but we already have a fully charged one we haven't been using.
The next task is to fetch some documents. A high-charisma female character can sweet-talk Marcus ... but not if she's a halfling or other short character. Instead, Magpie just picks his pockets. "In and out and no one noticed."
Then Mae'var wants Embarl dead. We instead convince him to hand over his dagger and run. And we stop there. The last stage of this quest can wait. I'd like to prepare the field some more.
Next, we head to the slums, where Gorf the Squisher is outside the Copper Coronet.
Inside the tavern, Unger Hilldark still doesn't have the illithium - but he tells us where we can find it. And then, we head down to pick up Lilarcor.
I have a trick for helping remember which item goes in which pipe - mark the pipes with similar items. A ring, a potion, a staff, a pair of gloves.
We celebrate the sword's acquisition by clearing out the myconids. One Confusion cast on Korgan (saved), two on Keldorn (immune due to Lilarcor).
Then it's over to pick up the illithium alloy from Jerlia and finish up that quest. Sarles isn't happy, but the temple of Helm is. And that Helm of the Noble means we now have magic helmets for all four helmet-wearers in the party.
We also start the Dawn Ring quest, but can't progress it further until nightfall.
Over in the bridge district, some investigations lead to the tanner's shop. Aegisfield went before us and is dead, but at least Rasaad levels up to 14 from some trap XP. He now has magic resistance.
Downstairs, backstabbers await. An immediate True Sight is called for:
Heading over to Neb's hideout, we pass some street theater:
Inside the abandoned building, Neb gets Keldorn's last True Sight of the day:
After a rest at Delosar's inn and another unsettling dream, night has fallen again. We check in on that graveyard meeting - but since we don't have 15K gold right now, we're told the offer is on hold.
Back in the slums, we see a mugging and Keldorn acts automatically:
This is a UB encounter. Looking it up ... the dialogue is checking the wrong variables. For the closure dialogue to trigger, a "shady character" has to be dead - but not the one we just faced. Instead, it's a shady character who spawns farther east, that was dealt with some time ago and might even have left without a fight.
For future runs, I'll probably just disable this encounter entirely.
We eventually manage to talk to Travin anyway, and then go see Borinall. There are more backstabbers in here, so Keldorn uses a True Sight:
Still, we take down this den of thieves and recover the Dawn Ring.
I've procrastinated long enough. It's time to return the planar gem and secure the loyalty of Haer'Dalis for good. Next time, we will complete the first of the stronghold quests.
End note:
This part's title was inspired in part by an actual typo I made while writing it. Also, I've finished the gameplay and planned out the schedule of future updates. It's all subject to change since I haven't written most of it, but the target end date is in February 2021. I didn't ever need to lower the difficulty from Insane, even in the Ascension final battle. I had to reload from deaths a few times, but that final battle wasn't one of them.