Dorn It: BGEE and BG2EE with Dorn as the protagonist [Complete]
 jmerry
Member Posts: 4,221
jmerry
Member Posts: 4,221
This is the tale of a run with Dorn as the protagonist, enabled through console trickery. Patch 2.6, insane difficulty but no increased damage, unmodded except for my personal tweaks. In BGEE, this is an informal "stuff in override" version. In BG2EE, this is the released (2.0) version of my tweak mod.
Posts will be M/W/F, aside from this first post on the infamous Ides of March.
We do not open our tale with Dorn. Instead, we start with a poor sod. Well, he started out poor.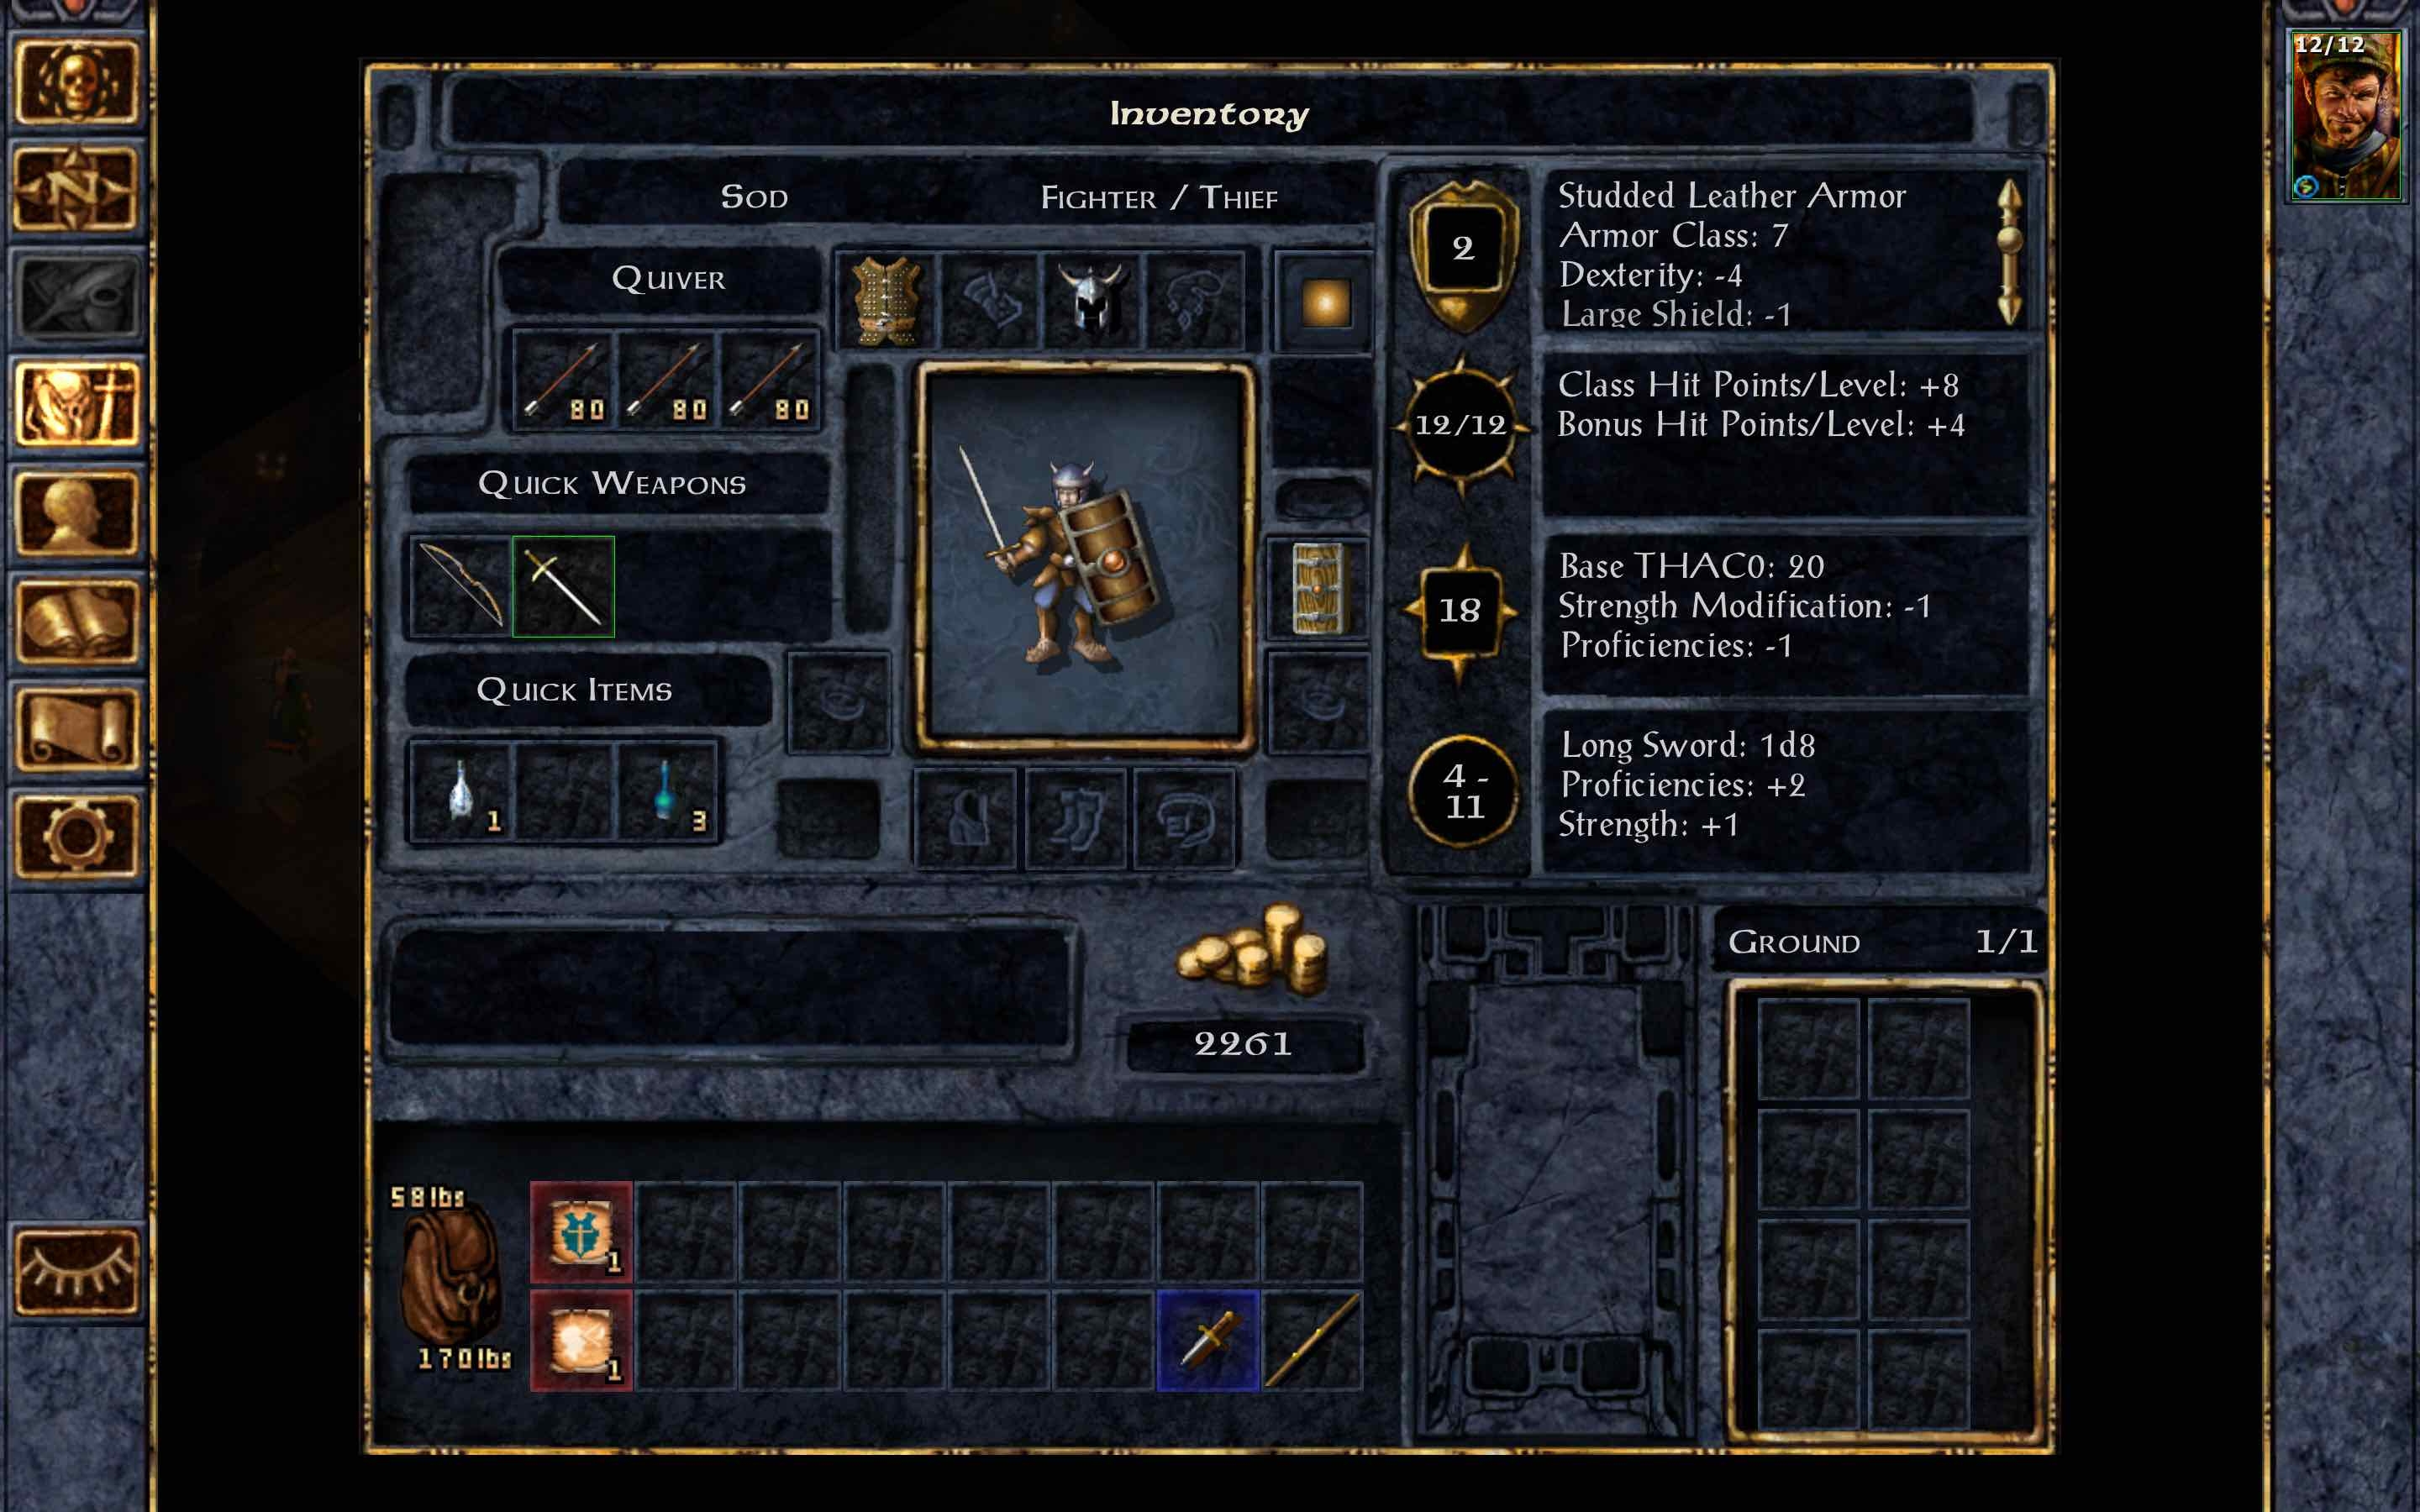 Sod has been optimized for looting Candlekeep (halfling fighter/thief, 18 charisma, enough Open Locks for that one chest), so he's actually rather wealthy by the time he hits the road. He does suffer from a lack of intelligence and wisdom, though. And his poor judgment will come back to haunt him.
After Gorion's death, Imoen joins. A wolf goes down cleanly, but a pack of dogs on the way to the crossroads is more troublesome, and Imoen takes a nasty hit.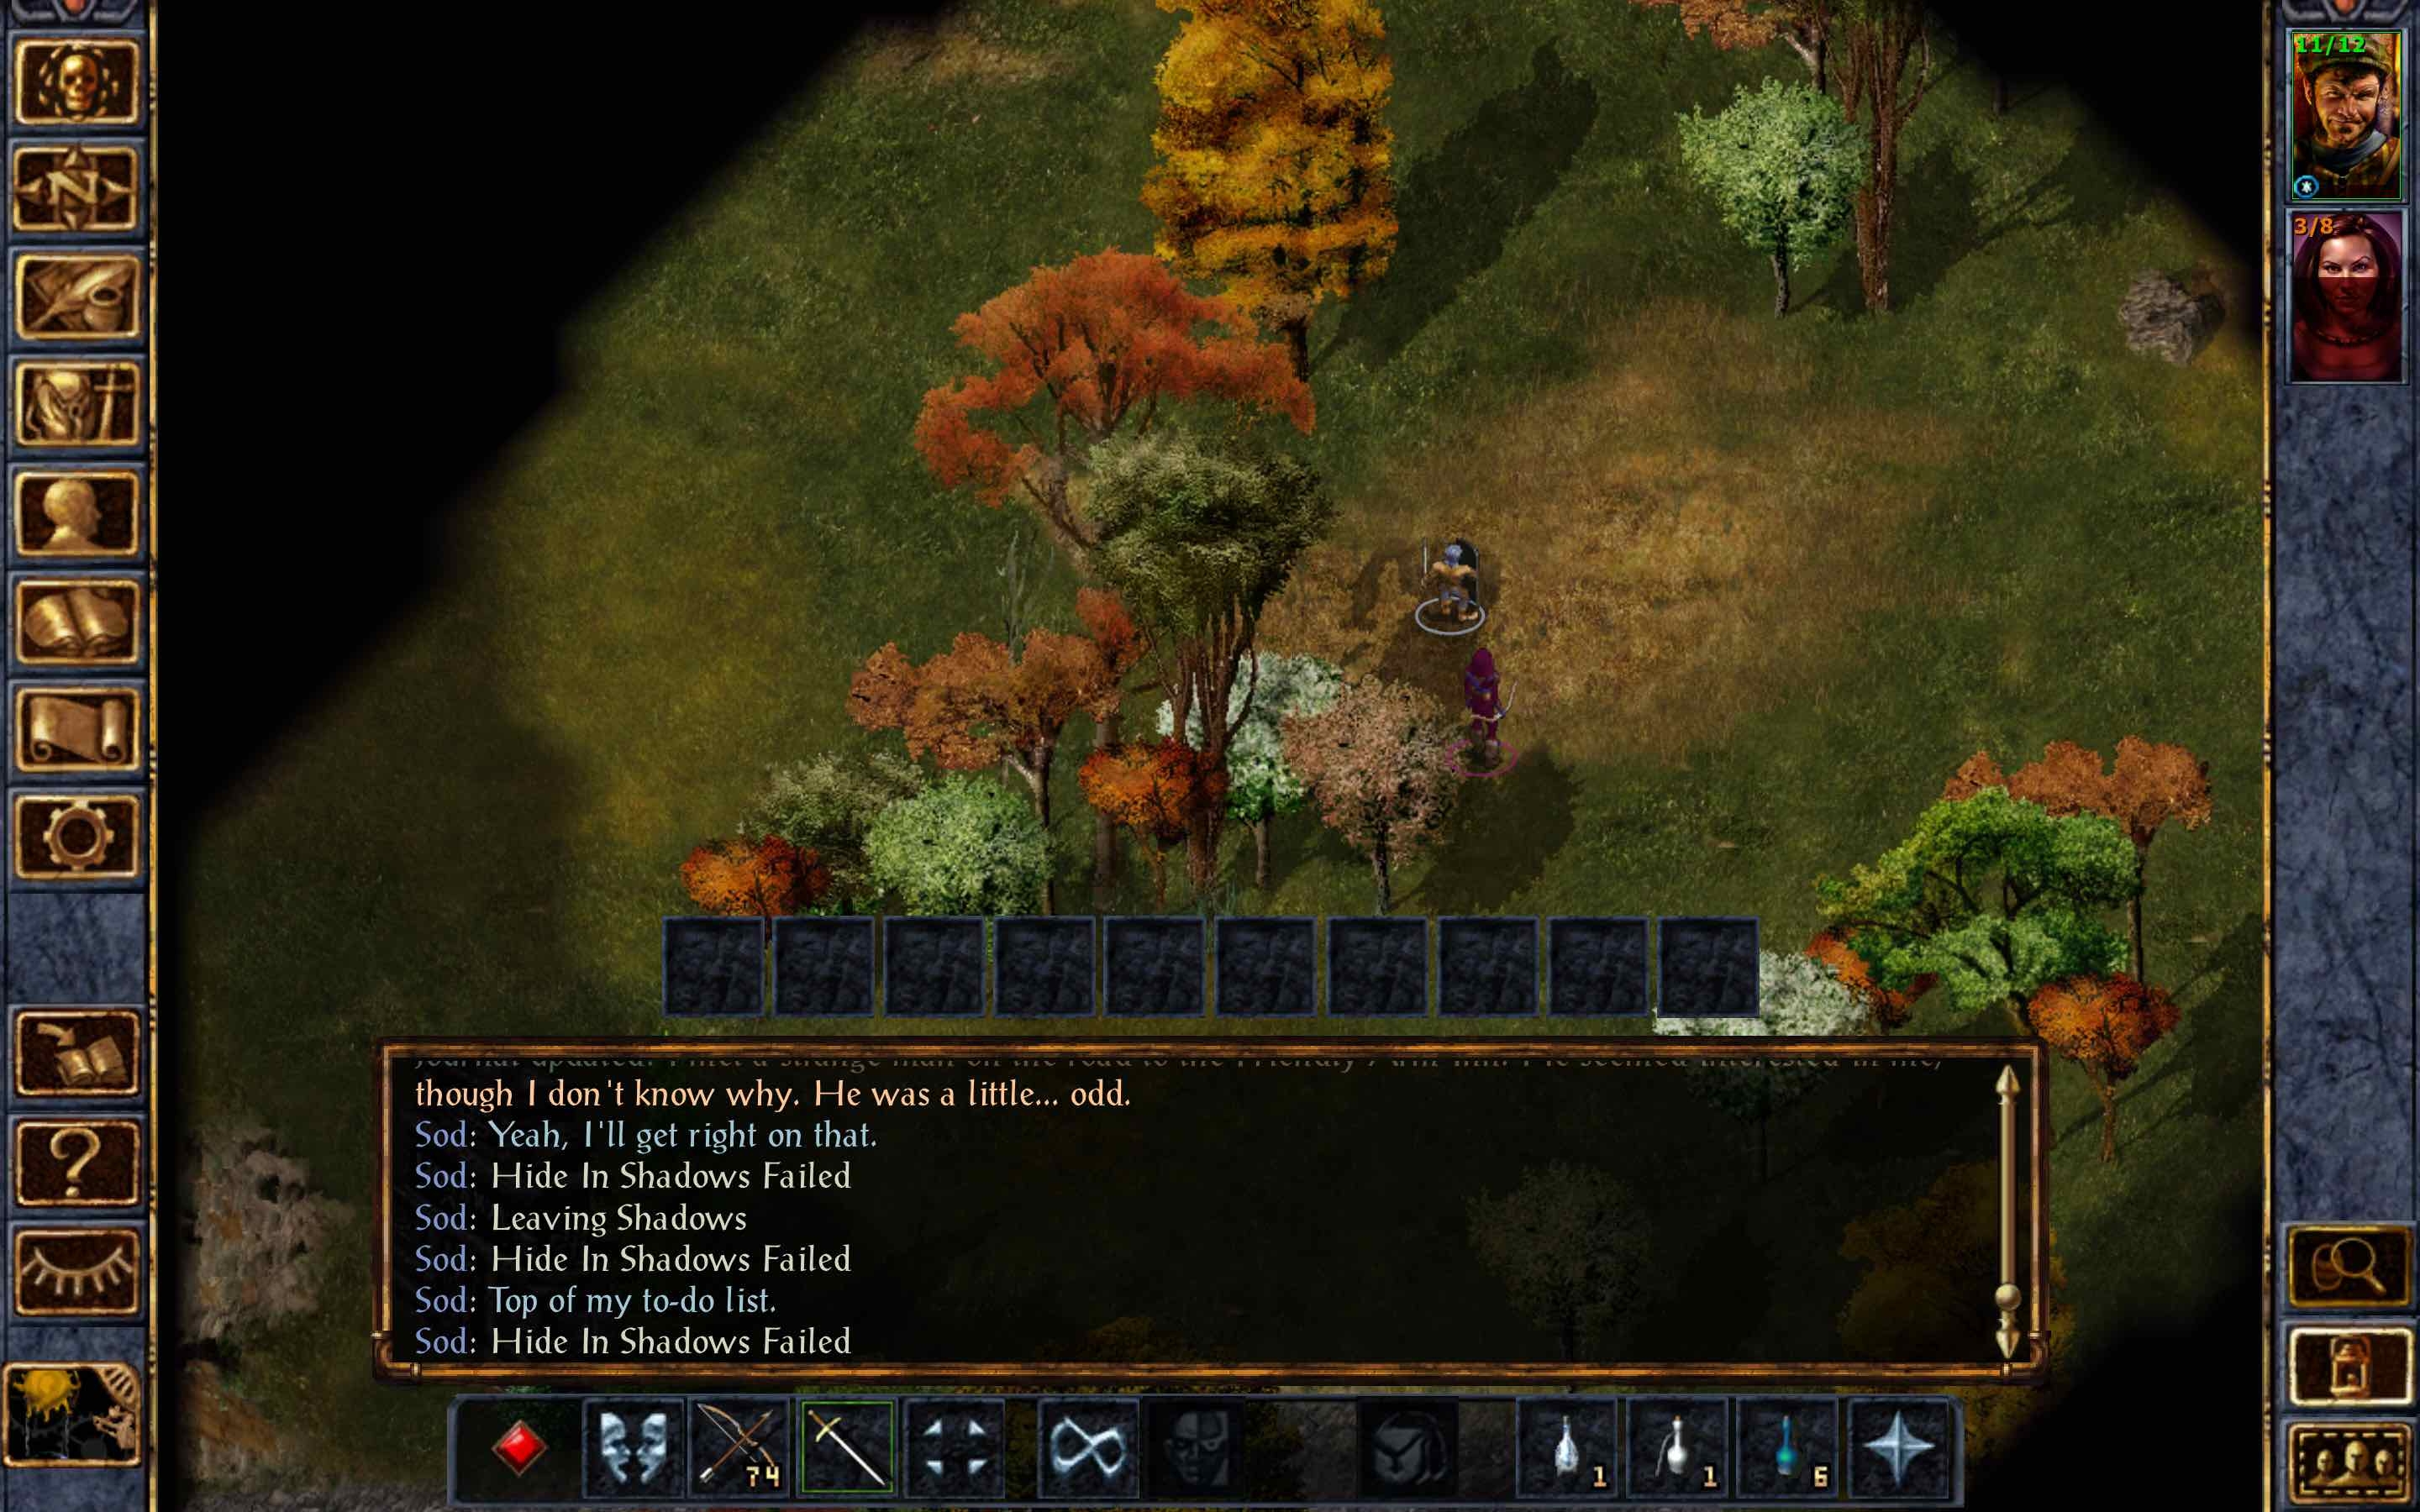 Still, the pair press on. Healing is best done in a safe place.
At the Friendly Arm itself, Imoen decides to stay and rest in one of the outbuildings.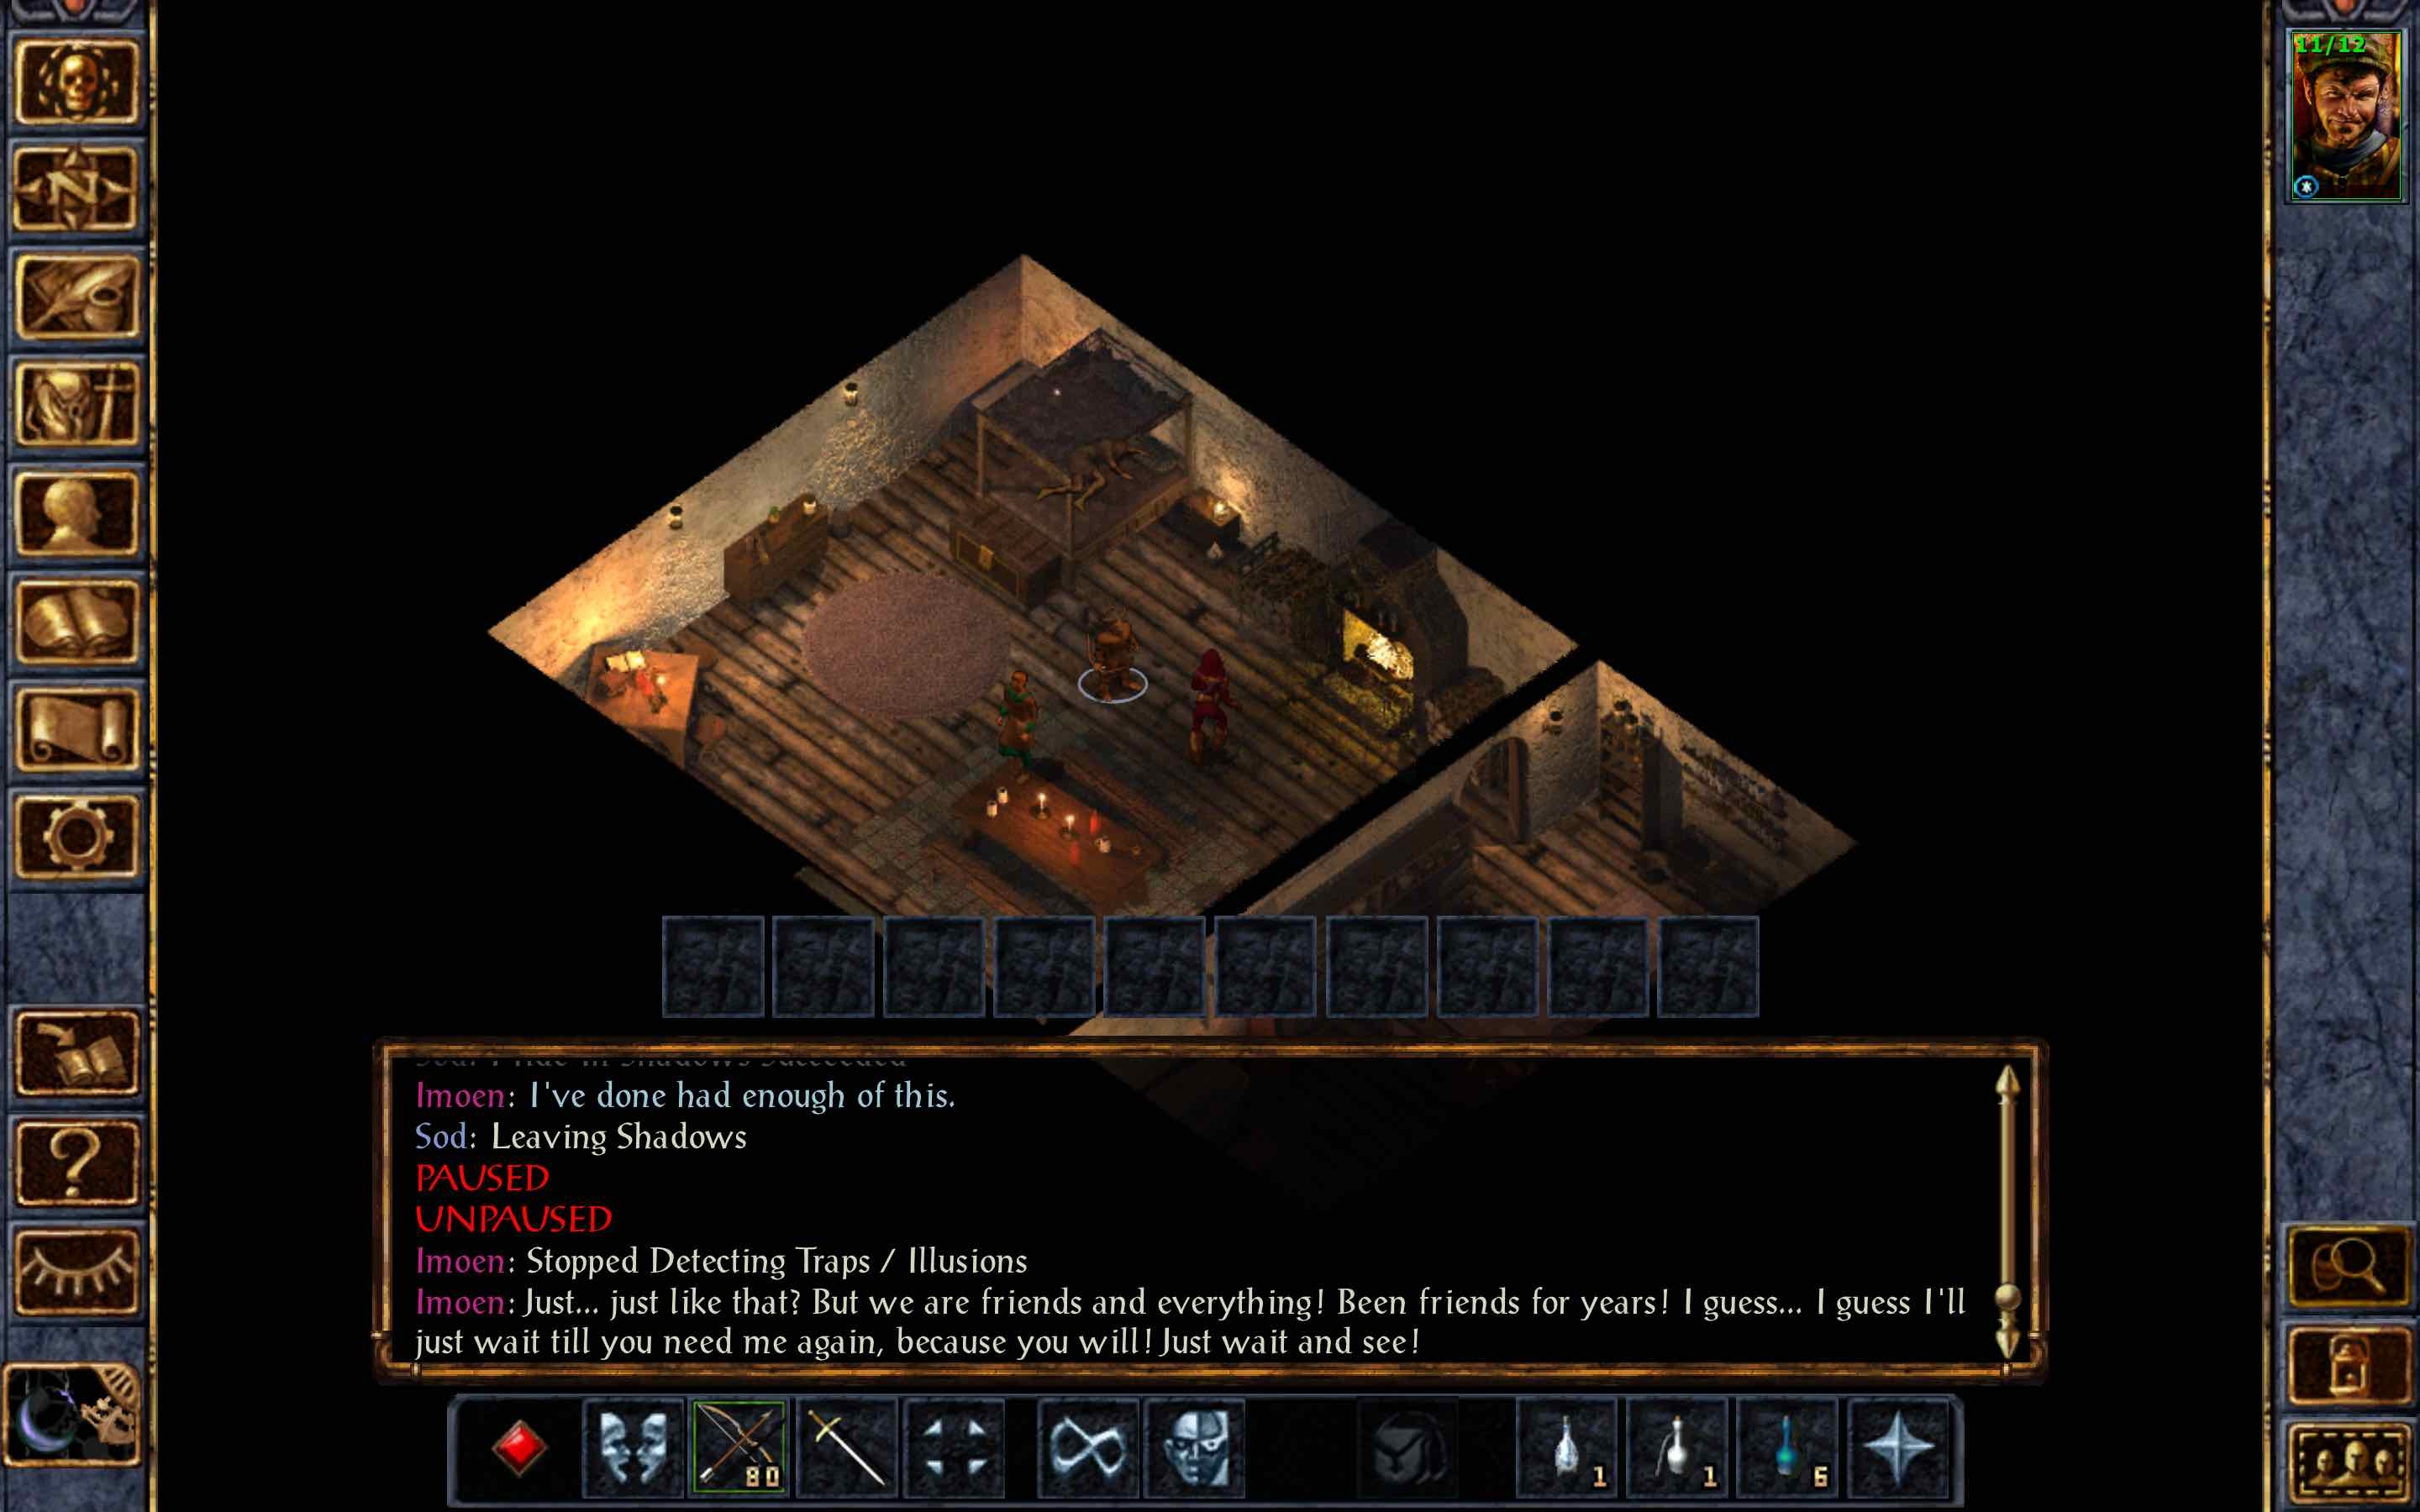 Sod, however, continues forward to sneak in to the main building, past a suspicious character.
 Inside, he meets the most fascinating character.
 Or perhaps it is the other way around. Plans are made...
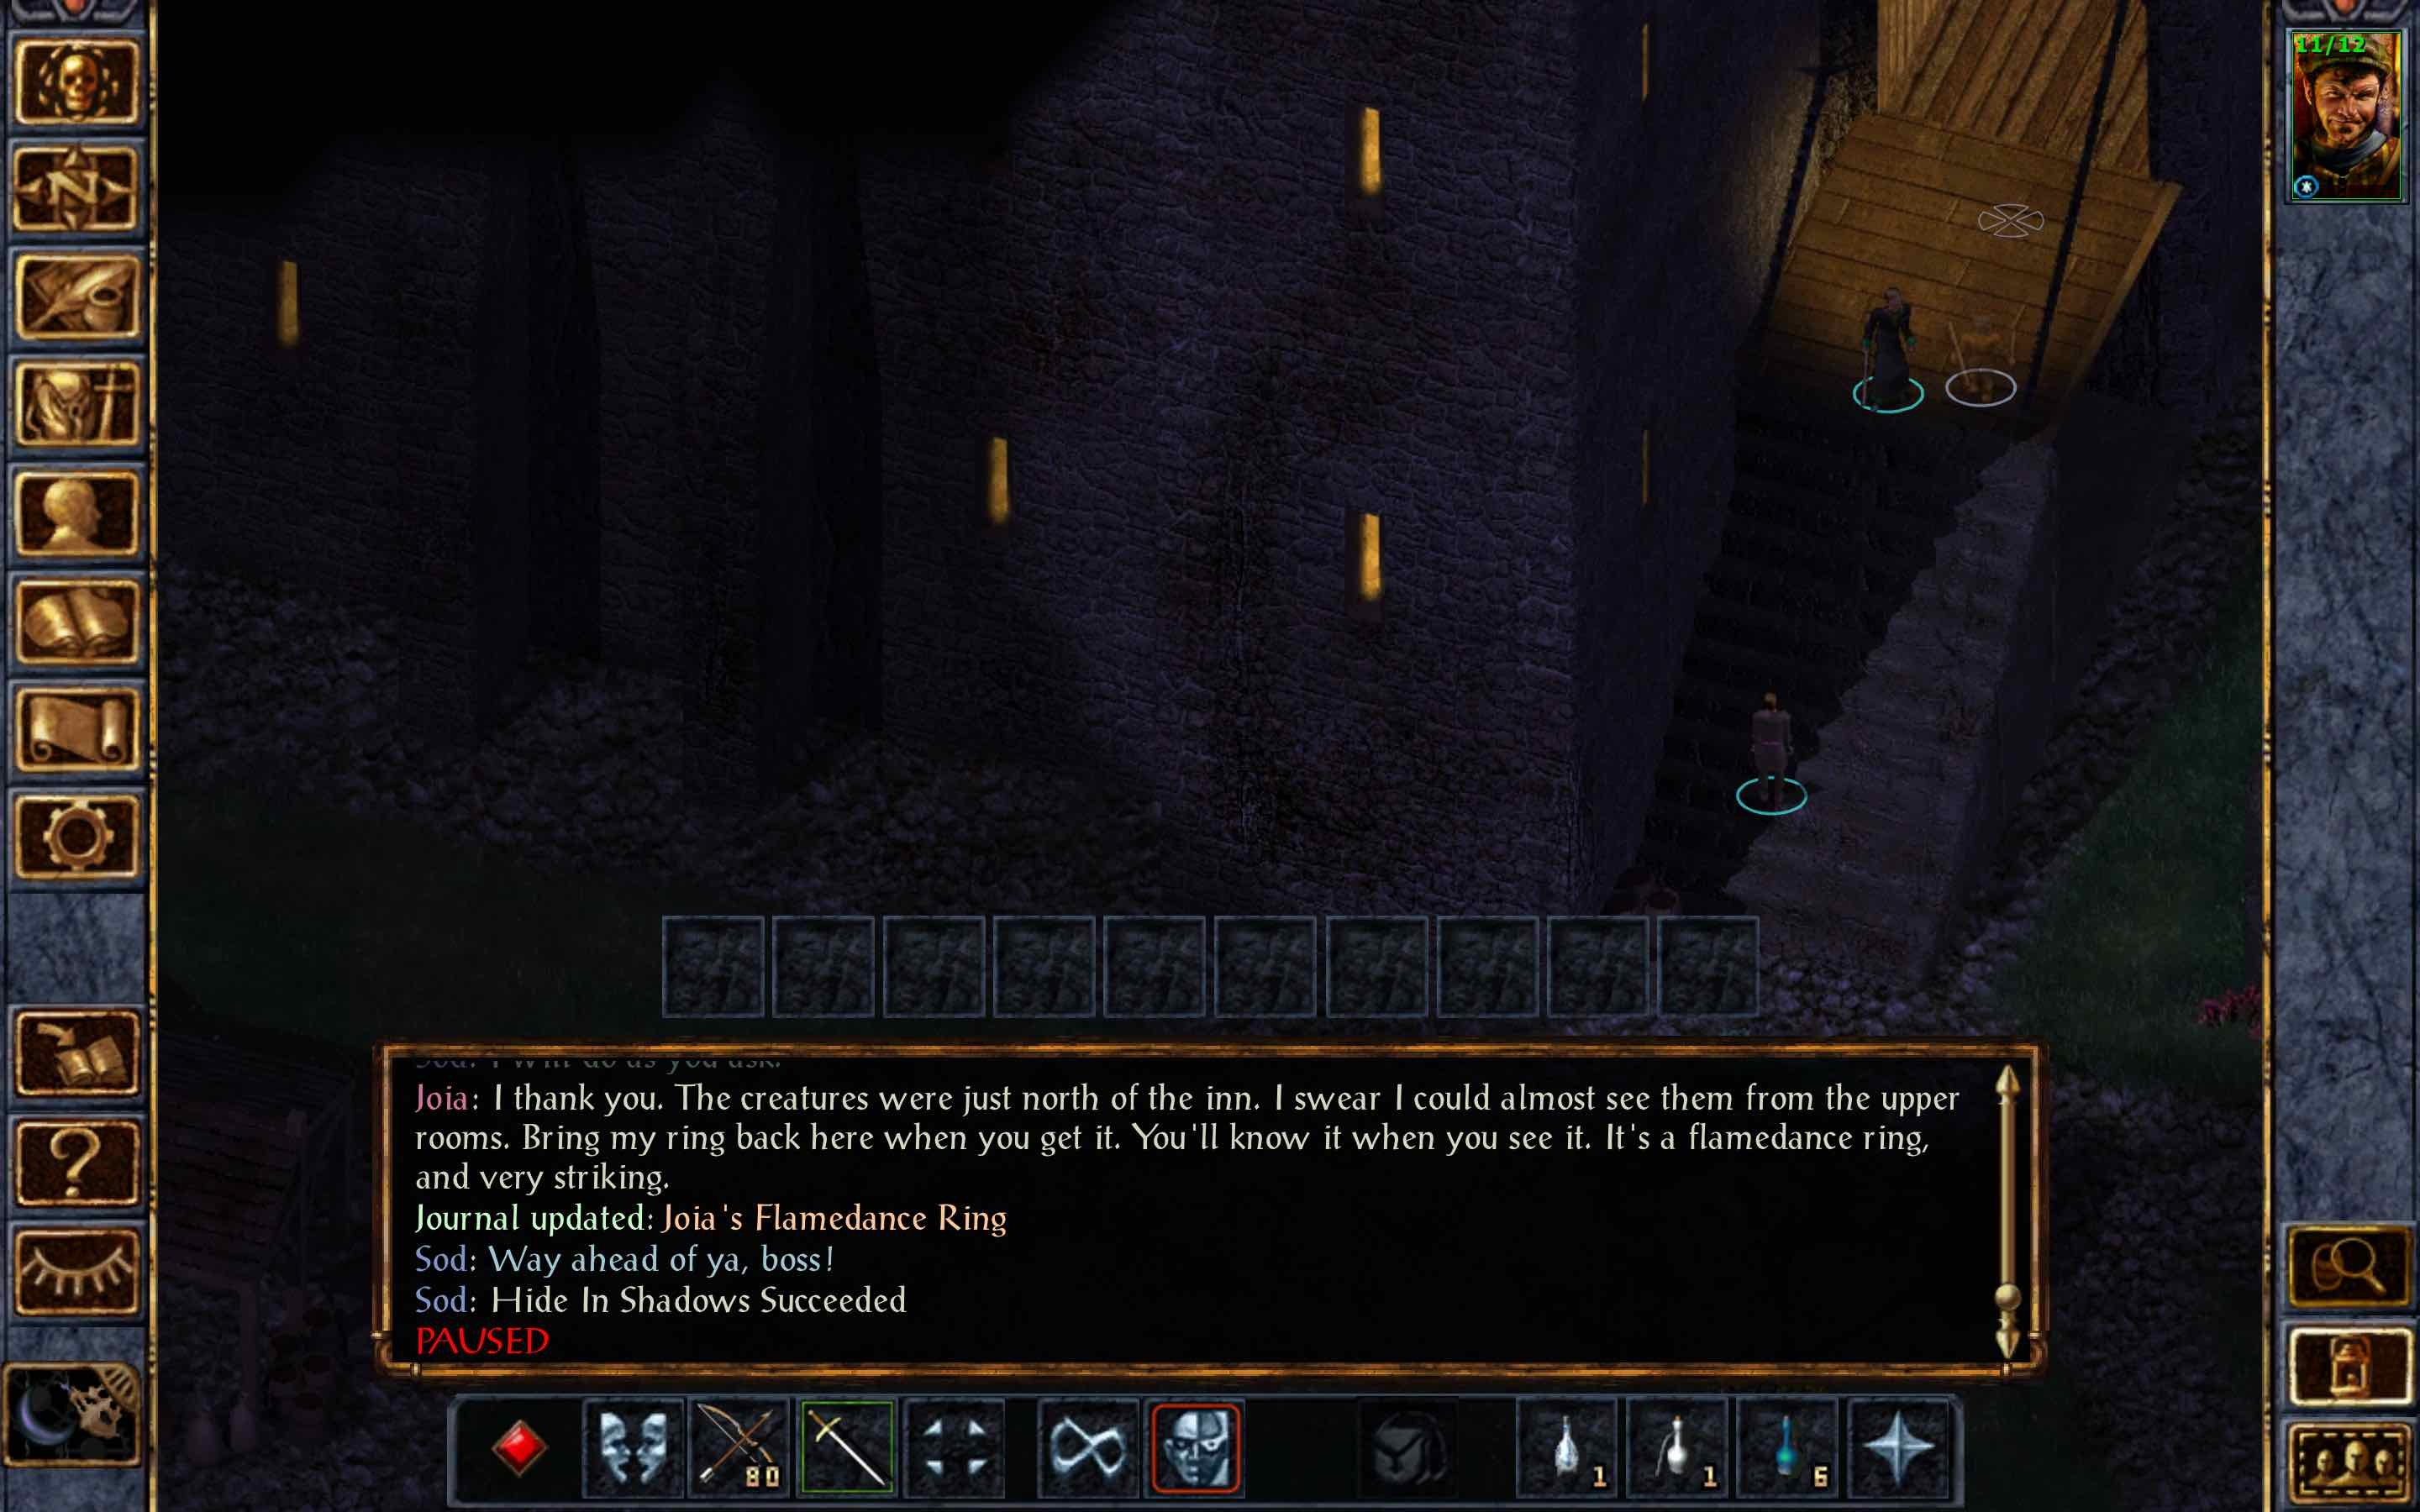
Sod talks to some people upstairs, acquiring some antidotes and pants. After that, he sneaks out again to head to Beregost, and is lucky enough to filch a cloak on the first try.
 (Well, actually, I did that in the other order - which meant sneaking in and out of the Friendly Arm an extra time.)
With all that done in the north, Sod heads south to Nashkel, avoiding all conflict. Until Dorn returns. A fight ensues, Sod and Dorn against Senjak, Dorotea, and their bandits. Sod breaks a sword on one of the bandits, and Dorn misses his first nine attacks against the plate-armored Dorotea. Until he finally rolls a crit.
 That was not a quick death, indeed. And it's a good thing his immortality item works now - he needed it, as he took two crits for 16 total damage.
Sod immediately follows up by shooting down Senjak, and Dorn can join.
The pair continue to the mines, where in a secluded storage shed... Sod takes a dirt nap. And Dorn's blackguard blade draws something interesting from his victim...
That's it for the first session. Dorn is now free to adventure as he sees fit.
A mechanical note: how to do the protagonist switch. To pull this off, pause the game and use the cheat command Control-K to remove the protagonist from the party. With the game still paused (if it's not paused, it's just Game Over), save and then load the save. Everyone else moves up a slot, and you can continue the game with the new protagonist. Killing the previous protagonist is entirely optional - but this is Dorn we're talking about.
(I chose Sod's name for the joke in this part's title. And no other reason.)
Posts will be M/W/F, aside from this first post on the infamous Ides of March.
Prologue: Poor Sod, taking the dirt nap so soon.
We do not open our tale with Dorn. Instead, we start with a poor sod. Well, he started out poor.
After Gorion's death, Imoen joins. A wolf goes down cleanly, but a pack of dogs on the way to the crossroads is more troublesome, and Imoen takes a nasty hit.
At the Friendly Arm itself, Imoen decides to stay and rest in one of the outbuildings.
Sod talks to some people upstairs, acquiring some antidotes and pants.
With all that done in the north, Sod heads south to Nashkel, avoiding all conflict. Until Dorn returns.
Sod immediately follows up by shooting down Senjak, and Dorn can join.
The pair continue to the mines, where in a secluded storage shed...
That's it for the first session. Dorn is now free to adventure as he sees fit.
A mechanical note: how to do the protagonist switch. To pull this off, pause the game and use the cheat command Control-K to remove the protagonist from the party. With the game still paused (if it's not paused, it's just Game Over), save and then load the save. Everyone else moves up a slot, and you can continue the game with the new protagonist. Killing the previous protagonist is entirely optional - but this is Dorn we're talking about.
(I chose Sod's name for the joke in this part's title. And no other reason.)
Post edited by jmerry on
0
Comments
Now that he's on his own, Dorn doesn't continue into the mines. Instead, he turns back north toward Beregost, only to be waylaid.
In hindsight, I really should have just run away.
On reload, the ambush doesn't happen, and Dorn rests safely in Beregost. From there, he heads east for a basilisk hunt.
After some more lesser basilisks, it's Mutamin's turn.
One hit later ...
Finishing off the battle, Dorn reaches level 5 and gains another nine hit points (roll 9/10).
I give the adventurers a go ... no. Save versus Rigid Thinking failed, and Dorn goes down without killing any of them. Instead, he just clears out the map's random critters, plus Korax when he gets too hungry. With 27737 XP, he heads back to civilization.
Back in Beregost, an errand is interrupted by an angry drunk.
Completing the errand brings a slightly improved reputation, and far more usefully a scroll case.
Dorn still wants some XP, so he goes after the spiders Sod heard about.
Dorn can't quite afford the +1 composite longbow, so he just leaves town and heads north.
One swing later (with Poison Weapon active), Tarnesh is down a mirror image and takes two points of poison damage. The ongoing damage doesn't stick, though; the image absorbs it. The second swing takes out another image. The third ...
Landrin gets her stuff back. 30687 XP. Dorn continues north for just a bit more. A bandit and twenty zombies, and the critical 32K threshold is reached. Now, time to turn south again and recruit a party.
But first, Dorn dreams.
The first recruits are Montaron and Xzar. Montaron levels to 5/5, gaining 27 HP (rolls 23/32), taking longbow proficiency, and investing in Open Locks (+60 to 85) and Find Traps (+40 to 50). Xzar levels to 5, gaining 10 HP (rolls 10/16) and a pile of spells.
The trio head to Beregost, and Montaron gets busy looting the place. It's good for enough gold to buy that bow Dorn was looking at earlier.
In addition, I take on one combat encounter - Neera's introduction. Minor Drain the wizard, then backstab...
For the rest of the party, I head east. Shar-Teel comes first, at the place where the basilisks once roamed.
She levels up to fighter 6 immediately, gaining 26 HP (rolls 26/40) and taking longsword mastery. Then she immediately dual-classes to thief, taking scimitar and shortbow proficiency and investing in stealth.
Larswood comes next, and Shar-Teel gets her first backstab kill on a gibberling.
Also of note here: I have Shar-Teel using "Advanced AI" to automatically hide. Without my tweaks, that wouldn't work; her combat AI (BDSHARTC.BCS) lacks the blocks that control use of thief skills. All hiding and trap-searching would have to be done manually.
The fix I use is now my tweak "Slightly improved party AI". The AI scripts for all party members get the blocks controlling thief abilities, singing and dancing, and Turn Undead, regardless of whether the character is normally of a class that could use those abilities.
Once those gibberlings are dealt with, Baeloth shows up.
Baeloth starts with 36 HP, the maximum possible for his six levels and 16 Con. He's not very squishy at all. And he comes with multiple 3rd level spells already available. Including Fireball.
Finally, Peldvale. The party rests there, crosses the map, and meets a drow woman. One flaming idiot later, we invite her to join.
Oh, and this part's title? Now that Baeloth is in the party, it's all alliteration, always. Until I leave him behind for BG2, of course.
@JuliusBorisov : Good "luck"? I would rather have "intelligence", because "luck" runs out. Like the understanding to tweak a bunch of Dorn's BG2 cutscenes so they don't hang the game when Dorn is also player 1. If luck is a problem ... well, this isn't a no-reload run. Gameplay progress is currently mid-SoA; I like a considerable buffer between what I play and what I post.
(The cutscene problem ... CutSceneId(Player1) followed by ActionOverride("dorn", do something). That command and any commands that follow aren't executed if Player1 and "dorn" point to the same creature, which leaves the game in a state only a force quit can get out of.)
Now that the party has been gathered, we can clear out some areas and explore a bit. Montaron and Xzar want to investigate the troubles in Nashkel, but that's not too urgent.
First, we head back to the Friendly Arm to rest and memorize spells. And to clear out some hobgoblins.
Next, we head south to the crossroads. Unlike the inn's surroundings, this area has spawn points that will repopulate the place indefinitely. Most of them just throw gibberlings and xvarts at us, which go down with no problems. A pack of dire wolves, though? That gets a Horror.
This area's final challenge is an ogre. Extremely dangerous to first level characters (who should never try to melee it), but helpless against our might.
This ogre carried two magic belts, which Baeloth identifies immediately. The girdle of piercing goes straight into use, and will never come off.
With the area clear, we head west. This area is just populated by animals, but at least the wolves and bears are worth decent experience. Particularly the bears, at 175 each.
Traveling south to High Hedge brings an undead ambush, and Xzar takes damage down to 7/14 HP. Then, upon arrival, Dorn is fatigued. Most of the rest of the party soon follows. Well, I guess we're cutting this visit short. Rather than fully clearing the area, we just deal with some gnolls near the tower, using drain spells on them for some free healing. Shar-Teel reaches thief level 2, and invests into stealth. With Perdue's sword in hand, we head back to Beregost to rest.
After that rest, we head over to the Red Sheaf...
This area has large packs of knife-throwing skeletons. Perfect targets.
A second pack gets a different fire spell:
A third group of skeletons gets another two Burning Hands spells - though this involves Xzar entering melee range, and he takes a hit. Down into the yellow for this very squishy mage.
The biggest threats around, though, are inside the mage's home. Two Flesh Golems. Well, we did buy some +1 arrows...
With that done, we visit Thalantyr's shop for the first time. Sell off some junk, buy a potion case.
The last notable enemy here is a spider in front of the nearby cabin. It gets three drain spells and a broken sword:
In service of that goal, we head south. Some hobgoblins ambush us on the way, and the first enemy after arriving is a lone wolf.
That wolf, of course, is the guard for Melicamp. We pick up the chicken, to deal with when we next head back to town.
The next notable fight is a pack of wolves. A Horror gets them all ... and they just keep attacking anyway.
Another pack gets a fireball.
As a side note, check out the difference between the damage dealt to the one that saved and the two that didn't. That's some interesting luck on the damage rolls.
Not far from there, two enemy groups join together - hobgoblin elites and ghasts. Xzar goes for a Skull Trap.
After a rest, we head back out to where we were. With a stop at High Hedge along the way.
We resume our clearing with some ghouls, which pose no trouble. Then comes a trio of named hobgoblins.
The next fight is a pack of wolves, not worthy of a picture. But Dorn dings on them, reaching level 6. 3 HP gained, plus bastard sword specialization. A very poor roll there.
Before long, we come to the area's final serious encounter. Montaron takes the lead here.
We open with a Fireball and a Minor Drain. They fail to interrupt his Rigid Thinking, which catches Montaron. Then a Hold Person...
You may notice the reduced party in that last picture? That's a little game I like to call "hide the drow". Dismiss our two drow party members, see reputation rise by 4 (to 10), and shop with the improved prices. Then Baeloth talks to the protagonist and is allowed to rejoin, and we invite Viconia to return. Our reputation returns to where it was, and the only lasting effect is the shopping we did with considerably improved prices. It's still pretty expensive buying things without a discount from high reputation, though.
That's it for this segment. Next time, the party continues south.
Our exploration continues south of Beregost. Sod passed through, but avoided all encounters. Dorn's party engages everything. Including the fights that could be avoided.
And then Shar-Teel does something stupid.
But, sadly, I can't continue from here. Shar-Teel hasn't become re-selectable, even after that chat. And so, I reload. I'm not even sure how this one broke.
That reload is from the autosave back in Beregost, so we repeat the area. This time around, Hold Person catches all three of those flaming idiots:
Getting off the road, we run into some hobgoblins. Shar-Teel gets some nice boots out of the deal.
Then, just as we finish the area and head back to sell the junk we've picked up, Viconia is struck by lightning. Ouch.
Back in Beregost, that fight between Dorn and Shar-Teel triggers again. This time, Dorn doesn't get a crit.
At the Burning Wizard, Zhurlong gets to see his boots. He doesn't get to keep them.
We also return a scroll to Mirianne and earn that second +1 ring. The party's equipment continues to improve. With that done, we head out again, farther south this time.
That second road area is pretty uneventful, and we soon turn west. After killing some ogres, a group of named bandits brings a level for Shar-Teel:
Some gnolls get a Color Spray...
Next up, we threaten a hobgoblin into spilling his guts metaphorically.
Finally, this area's biggest challenge.
Oh, wait, Drizzt has healing too. One Cure Medium Wounds, which he casts once he gets down to half. I should have saved that Absorb Health to disrupt it.
There are still a few dangers out there in this area, like this pack of ogre berserkers.
Back in town, we report to Bjornin. Our reputation dropped to 4 killing Drizzt, and it goes back up to 5 with that. Also, Montaron gets a shield upgrade from the reward. And selling Twinkle is good for 5500 gold.
Now that everyone has magical melee weapons, we head over to the temple area. Those vampiric wolves shouldn't be a problem now.
I get in a bit of spell damage anyway before it all dissolves into a confused melee. And with the first vampiric wolf's fall...
Now, to take those levels. Montaron goes to thief level 6, gaining 2 HP (roll 2/3) and boosting his trap-finding skill to 75. Xzar goes to mage level 6, gaining 3 HP (roll 3/4) and adding sling proficiency. Sling bullets stack better than throwing daggers and come in magical forms, after all.
Cattack's bunch try their luck...
So there it is. Some of the cheesier ways of killing Drizzt have been patched out, but you can still beat him and take his stuff. You just need to now how to fight unfairly.
Next time, the party heads north for some unfinished business.
After looting the unattended chests in the Friendly Arm, we continue north to where the road meets the river. A farmer asks for help with his missing son - sure, we'll investigate. No promises, though.
The lightly-armored half of our party, though, stays back. They're vulnerable to critical hits, and a lot easier to hit in the first place. Well, Shar-Teel gets some backstabs in. In the cave, fighting one ankheg at a time, it works perfectly.
Up on the surface, the ankhegs come in packs. That makes a considerable difference.
We return the body and stash the shells. Farmer Brun does not receive an additional gift from us, as we're not interested in the reputation gain right now.
A storm is running, so we take our leave and head north. I don't remember whether it was this visit or a previous one, but Dorn has talked to the fishermen. Time to confront a priestess.
With that revelation, we have a choice to make. Side with the lay followers of Talos, or with the divinely empowered priestess of Umberlee? We choose the latter. Her god is considerably more likely to be paying attention.
After killing one more ankheg, we head north to talk to a farmer about a reward. And loot his house for a cloak of protection, because it wasn't a very impressive reward. Then it's Ulgoth's Beard for a bit more looting - I'll save the shopping for later.
Back at the farm, a little intimidation gets us the bowl.
Back to Tenya, then, to return the bowl.
As for the reward ... in 2.6, the XP reward depends on how many fishermen are still alive. 1000 base, plus 500 for each survivor. Leaving them alive is definitely worth more than the paltry reward for killing them, with the exception of Sonner's loot.
If you side with the fishermen, it's 1000 XP plus 650 for killing Tenya. She also has a set of AC 7 bracers.
On the way back south ...
The gold for raising Xzar is no problem, as we've been picking up a good amount. Plus the ankheg shells; we reach Beregost without further incident and sell twenty of them to Taerom.
Our next destination is to the west. On the way there, some random undead ambush us:
After dealing with a pack of dire wolves, we meet the nereid Shoal.
So, then, we attack. Shoal calls in Droth, and I go for the backstab...
Then Droth arrives. I cast a Command, a Spook, and a Horror. Saves failed.
The next fight is a big group of ogre-kin further south. I get a good scout in on them.
The other berserker gets in a solid hit on Dorn, but that's it. A Horror from Xzar neutralizes any threat the others could offer.
Talk to Mad Arcand ... no dice. You need a good reaction score to get his quest. We could kill him for 2000 XP and his potion, but he's an innocent. I'd rather not lose reputation right now.
The last threat around here is a trio of sirines. I open with a backstab...
Also, I tried to neutralize Monty with a Spook. It got him, but he just kept attacking us.
Well, at least there's some free healing around.
The party returns to High Hedge, and skeletons show up behind them...
Now rest, and end the session. After some ghasts on the first attempt, the second succeeds. Dorn is just short of 50K experience.
With the party rested, we're ready to move out again. This time, to Seawatcher further down the coast. Of course, it's a long way to travel, and the party is already facing fatigue when we arrive. Not that I let that stop me from killing some hobgoblins.
After coming back and resting again, no more hobgoblins remain in the north. Instead, we face some worgs.
After that, it's sirines. They're resistant to fire, so I open with a different type of area damage
On the new try, the random packs roll dread wolves and tasloi instead of tasloi and worgs. A bit more XP there. And then there's a pack of hobgoblin archers before the sirines.
But wait ... they're not mages. And Baeloth has Dispel Magic. Cast the spell ... what do you mean, I canceled the order? Grr. Plus Dorn gets charmed again.
Still, we manage to get through the fight without too much pain.
After crushing some carrion crawlers, it's time for Sil's trio. I go for a double backstab this time.
Flesh golems hit very hard in melee, so I have Dorn get out the +1 arrows. After Montaron disarms the first two traps under stealth, anyway. The first golem runs low on HP, but I can't finish it without running out of cave to retreat to, and it doesn't follow Dorn out. All right, Montaron, you try it.
Shar-Teel has now reached 20K experience as a thief, enough for level 6. And she's still staying at level 3. One more level, and it'll be time to finally hit that button.
For the second golem, Dorn has a bit more room to work with, and the arrows do the whole job. Baeloth reaches level 7 with this, gaining the full 6 HP and taking spells Sleep, Invisibility, and Spell Thrust.
Montaron accidentally trips the Dire Charm trap instead of disarming it. Oh well, no harm done - just have to wait the five rounds, since he can't see anyone.
Finally, Dorn shoots down the last golem and claims the treasure. 15 Con for him
The rest of the area is easy enough. Provoke Arkushule, kill some wolves... hey, what's that you're asking?
On to the next area. We meet Ba'ruk first, and the kobold commandos interrupt Baeloth's fireball. They don't get Xzar, though.
After that, there's a pretty substantial pack of gnolls, including a rare gnoll chieftain.
Next up, we have some unprovoked bear-killing.
With the wildlife pacified, we move on to the dig site.
Outside, we hand over the idol to Gallor ...
That leaves us to fight the Doomsayer. It's vulnerable to magic damage and backstabs, so we can do pretty well despite its exceptional AC.
And then something weird happens. I try LMD on it, and Xzar's spell fails (race GOLEM) but Dorn's spell succeeds? They have the exact same race-based immunity effect, but somehow one worked despite that. Then, bamboozled by this glitch, I try Absorb Health on it as well. Nope. Still, we win through despite my mistakes.
And with that quest, our reputation is down to 1. Towns are definitely not safe places for us. Not that I'll let that stop me.
Skipping Brage, I head over to the Nashkel carnival to sell our junk. And I notice something about my settings:
Also, never try to buy anything at reputation 2.
Entering some tents, we find a battle.
The area also includes some wilder parts with random spawns. Including these ogre berserkers:
All right, now we head over to Nashkel. My reputation precedes me ... now where's that bounty hunter? Ah, there he is.
But - that's not the only low-rep hazard here. Some patrolling soldiers spot us and go hostile. I send the bounty hunter after them, and then realize something. The soldiers are all pre-placed. If I just kill them now, they won't be a problem in the future. And I only have one reputation point to lose.
With the reputation hazards dealt with, I visit the inn. Hi, Neira.
And one last thing to do before we move on - visit Oublek.
Also, Viconia dinged on Neira. She takes level 7, gaining the full 8 HP.
And so our party finds itself facing the forces of law and order for the first time. Certainly not the last. Next time, we continue our western exploration.
West of town, we encounter a rugged area holding an xvart village. There are a lot of them, but we have Sleep now.
The toughest fight around is that shady "merchant" Borda.
The next area is tougher, with dangerous enemies like ogre berserkers common. One such fight is interrupted by the bandit Neville and his hobgoblin friends ... oh, just hit them with a fireball.
Then there's the paladin Laurel and her gibberling hunt:
Lightning strikes Viconia; with the party out of healing spells, I take that as a sign to rest. Our first attempt is interrupted.
After waking, we kill a few more monsters, including that polar bear. But we don't go back to Jared just yet - there's something we have to do first.
Instead, we move on to the fortress. Clear out Gnarl and Hairtooth, give Baeloth the 18 Dex gauntlets (everyone else has 16 or more already), and head down to the xvart caves. Dorn claims the charisma tome, raising him to 17. In combination with Algernon's cloak, that's a total of 19 - which makes a considerable difference from the 18 he had before.
Now, we can go back to Jared. Hide the drow, talk to him...
We still can't walk around towns safely, so we head back to the Nashkel carnival to sell some junk and rest outside. Then it's back into the wilderness, for the two remaining unexplored areas in the west.
In the first such area, Vax and Zal are our first real fight.
Then it's Sendai's bunch.
Finally, we kill Rufie - we met Albert and dropped that silly chew toy earlier. Report back to Albert for the XP, and move on.
In the next area, we soon have to rest. That attempt ...
The second rest attempt brings gnoll elites, and the same double-Sleep move. The third finally works.
Once rested, the party helps out a dryad:
Clear out some minor threats, return Drienne's dead cat.
The remainder of the map has some winter wolves and gnolls, but nothing really notable. At least the pelts bring in some good cash.
Now, back to Nashkel before we take one last trip out west. And for this one, I leave Baeloth behind - we're doing Edwin's job. Edwin levels to 5, gaining 19 HP (rolls 11/16).
The gnolls are very little challenge at our level. Normal attacks and the occasional Sleep are plenty. Well, OK, I do use a Skull Trap against the chieftain.
On the way back to Nashkel, a half-ogre ambushes us. Trivial, but still enough to put Xzar over the level 7 threshold. 2 HP gained, plus level 4 spell slots that he can't fill because he doesn't know any. We'll have to go shopping in Ulgoth's Beard to deal with that issue.
Baeloth rejoins the party, and we're finally ready to investigate the mine.
Checking the shed, Sod's body is still where we left it. Neat.
Then we get to clearing the area. While fighting some ghasts, a soldier comes up to talk:
There's nothing too notable otherwise, until we get to Prism.
Down in the mine, the kobolds are trivial. Xzar is the only truly squishy party member with 19 HP and AC 5, and he's wearing the girdle of piercing for AC 2 against kobold attacks. Most of the party can't be hit except on a critical. Of course, we'll still use plenty of stealth tactics to reduce the threat further.
Down past the working mine, the kobolds have traps. When there are both traps and guards in the same place, I go for overkill.
Baeloth's fireball lands for 35, 20, and 8 damage on the three kobolds it reaches. The third saved and rolled low ... but kobolds only have 4 HP.
Montaron gets in lots of stealth attacks, but doesn't bother positioning for backstabs except for the few non-kobold foes. The kobolds are guaranteed to die in one hit anyway.
For the last group on this level, I use a Sleep.
Then comes Mulahey. I go for the free backstab...
Well, he's not hostile yet. So I set up for a second try, and land it for 22 damage. It doesn't take long from there.
We exit the mines through the lower passage. Once we're out, ankhegs are the first threat we find:
Farther south - well, we're not passing up a weapon upgrade for Xzar. The revenant must die.
More ankhegs follow, and then Narcillicus. Provoke him ...
With this battle, Montaron reaches fighter level 6. He gains 4 HP (roll 3/5) and takes longbow specialization. Not that he uses it much, but it's nice to have the option.
Clearing the area exhausts most of our daily resources; Baeloth uses all twelve of his first-level spell slots. By the time we reach the last serious encounter, there's nothing left to do but use second-level spells.
In Nashkel, we hand in a bunch of quests. Joseph's ring, a bounty on Prism's emeralds, reporting to the mayor (reputation up to 6). And then, Nimbul.
After a rest, we're off to Beregost. Elminster greets us there, with some nasty things to say about Dorn:
Tranzig goes down easily to a double backstab:
The next round of shopping is at High Hedge. Scrolls, the Claw of Kazgaroth, stacks of elemental darts and bullets (26400 gold). Shar-Teel wears the claw, and our casters get the ammo.
Then it's the temple at the Friendly Arm. Potions of genius and mind focusing, for 3840 gold.
And finally, Ulgoth's Beard. More scrolls, the Cloak of Displacement, Aule's Staff, and the Wand of the Heavens (16740 gold). Xzar drinks a pair of potions and scribes everything he can - those level 4 spell slots are actually usable now.
We rest at the inn, and Dorn dreams again. He has a second instance of LMD now.
Upon waking, the party decides to try out Shandalar's quest. Mages await, starting with a trio of them. I go for backstabs...
That was Andris casting that spell. He's not visible in the shot, since he's in the room the party came from. Beyn follows up with his spell, also a Confusion...
Dorn takes out Beyn, then turns his attention to Montaron. Andris charms Xzar. Viconia gets held. And then I get control back.
I reload, back at the inn. This party isn't ready for this TotSC content yet. We'll come back to it later.
Before we take care of the bandit problem, we'll clear out the areas in the east. Though first, we revisit an area that we already cleared.
Now, for something new - Ulcaster.
After waking, a halfling tries to sell us a "gem of true seeing" for 1000 gold. How about we just take it instead?
Around this time, I start wondering about the activated ability on Baeloth's ring. I'd been playing with it, to unexciting results. Then I looked it up ... 38% to get a gem of some kind, but it's only ever a Fire Agate, a Lynx Eye, or a Turquoise. 2, 5, or 7 gold to sell. Boring. The damage is an equally unexciting 1-3 total of various elements. The idea percolated; while I didn't apply it to this run, that inspired the component "Barrityl's Bigger and Better Burden" in my tweak mod. In it, I upgrade the ability so that it can create gems up to a Black Opal (150 gold to sell). I also apply a corresponding increase to the damage the ring can do - gamble at your own risk.
After a trip back to town to sell off the bows and bastard swords we've been picking up, we head up to the plateau.
Some random undead follow, and then it's time for the dungeon.
After that, it's basically all wolves, and smooth sailing. Viconia gets her first Turn Undead capture on a Dread Wolf, and Xzar tries out his new necromancy spell on the vampiric wolf:
Gullykin comes next, though not before a trip to town and two ambushes. We kill some ghouls, and then find a group of hired killers hanging out in the gully.
Dorn gets entangled and has to stick to the bow for the whole fight. Montaron takes damage from our own fireball and then a melee hit from Morvin. Everything else goes well for us.
With that taken care of, we head to the village. And being rude to Gandolar Luckyfoot doesn't pay off.
For that, Montaron goes and loots all the homes. Well, he would have done that anyway, but it's a matter of principle. Nothing too great, but we do pick up a second +1 sling so Xzar can have one.
Into the ruins, then, starting from the winery entrance. We go for the less kobold-filled path first. This area is excellent for stealth tactics with the narrow corridors and corners, so Montaron is in his element; he clears the first group of six kobold commandos on his own.
The undead knight, though, is more dangerous.
More traps and many more kobold commandos follow. We make steady progress and do our best to prevent them from taking shots at us.
Before long, we reach the end of the dungeon. Scouting sees enemies from both sides - this is a spot for a fireball.
With the ogre mage's support thinned out, it's time to attack.
Examining our loot ... 98 fire arrows. We killed 49 kobold commandos in that dungeon. And picked up the bows to sell. The entire party's inventories are completely full.
Back in town, I consider buying the +1 shortbow for Shar-Teel, but decide against it. She just won't get much use out of it. Instead, we just head back out, to the area formerly inhabited by basilisks. We have some unfinished business here.
With that battle, Shar-Teel reaches the critical threshold of 40K thief XP. It's finally time to level up.
From now on, Shar-Teel is a melee fighter with a strong focus on backstabs, wielding Varscona. And at 24-45 slashing plus 1 cold damage, her backstabs are very powerful. They're not done improving, too.
This update is a bit short, but Shar-Teel's build maturing felt like a natural stopping point.
Now that Shar-Teel's build has matured, we're ready to enter Durlag's Tower. At least, the exterior and upper levels. We also take this opportunity to sell Baeloth's old +1 staff; it has the "stolen" flag, and the merchant here is the only fence outside the big city.
What's so special about now? Well, the outside is guarded by Battle Horrors. And backstabs are one of the best ways of handling them efficiently.
She misses. And misses again. What does it take to hit these things? Dorn is the one to finally get a good hit in:
Some stats here: Battle Horrors have -2 base AC, plate mail for a -3 slashing modifier, and 17 Dex. Montaron has base THAC0 15, 16 strength, specialization, and a +2 piercing weapon. Shar-Teel has base THAC0 15, 18/58 strength, high mastery, and a +2 slashing weapon. On a stab, Montaron gets +7 to hit against that -2 AC, so he hits on a 10. Shar-Teel gets +11 to hit but suffers -3 from the plate mail; she hits on a 9. So, she missed a 60% chance three times in a row. Oof.
Without the backstab bonus ... Montaron hits on a 17, Shar-Teel hits on a 16 (or 20 off-hand), and Dorn hits on a 17. Conventional melee against these things is not a good plan.
There are more battle horrors and doom guards on the battlements. Fortunately, they're easier to get the drop on.
That's level 7 for Dorn; he gains the full 11 hit points (roll 10/10) and gets that warrior bonus to APR.
The other side has a doom guard with more freedom of movement. It chases the party inside and even gets a hit in on Dorn before Shar-Teel can stab it down.
Dorn takes the opportunity to use his drain spells against the basilisk and recover nearly all of his lost health. Then the last basilisk switches to melee and erases most of his progress.
Now for the ghasts.
Fortunately, no more ghasts spawn when I rest. Viconia has healing spells for the new day, and we use them.
The ghasts in the cellar go down easily, and we head up to the third floor. No negotiation with Riggilo. Just kill him.
Well, there's one trap we can't disarm. Baeloth trips that altar trap to claim the wisdom tome, and Dorn uses it. He's greedy that way.
There's one more foe on this floor - the ghost Daitel. It's a scary opponent, so I use the stairs against it. And take the time for some more looting on other floors as I wait for its illusion defenses to expire. Once I'm ready, I bring in everybody.
Finally, the top floor. There are more ghasts here, which go down easily. It was only that second floor that got us; we couldn't move well, and they kept flanking the party. As for Kirinhale ... I go for a backstab, and Shar-Teel rolls a 2. Missed. Then she hits Dorn with her Energy Drain spell and her Charm.
I go for a Command, but Dorn saves. All right, retreat for a few rounds to regroup.
The succubus goes invisible, so I can't backstab her without bringing up some mage support. I decide to do that, sending Baeloth up to cast Detect Invisibility.
Still, I persevere. She seems to have run out of charm attempts, and Dorn comes to his senses in time to deliver the final blow.
In the new session, I head south. First to Gullykin, then through the ruins to Firewine Bridge. There are plenty of kobolds around, but the first serious fight is Meilum.
The gauntlets go to Shar-Teel. She has the highest APR of any of my front line with her dual-wielding, and the +2 damage is multiplied in backstabs. She now deals 30-51 +1 damage on a backstab.
And then, Kahrk. A truly dangerous foe.
Then the rebound comes.
You know, I saved just before this. Let's go back to that. And this time, wait out the Minor Globe. Our initial moves will go much more smoothly if we don't have to spend mage time on taking that down. Also, I apply a buff - haste up the party.
The remainder of the area holds little of interest; mostly just kobolds and lesser undead.
Moving on to the next unexplored area, we run into Sarhedra first. She tells us of some ogres...
We report our success to her, and rest.
Next up, it's a farmer beset by xvarts.
Some ogre berserkers get Xzar's Emotion spell for the day, though the ones that didn't go down still inflict some hits on our melee line.
Some bandits accost us ...
Some more ogres go down as we clear the area ... and presumably Arghain with his +1 two-handed sword, but my log has no mention of him.
There's one more area to explore in the south, but we have business back in Nashkel first.
The area pointed to is that last unexplored area, also notable for the deserter Samuel and a lot of gibberlings. 16 hours of travel later, we're there.
After dealing with some skeletons, we rest. Talk to the local Flaming Fist officer ... a 50 gold bounty for handing over a deserter? That doesn't sound like a very good deal.
Then comes Kryll.
Also, those names? She really should have turned them into zombies instead.
Kryll gets in a Slow before going down. It doesn't slow us enough to matter.
And then, Dorn monologues.
After dealing with the gibberlings, we talk to Lena.
On the way north, I stop to close out a quest.
That drops our reputation from 7 to 6 - a bit more room between us and the rep-10 threshold for Bhaalspawn abilities.
Handing over Samuel at the Temple of Wisdom brings our reputation back up to 7, and adds two useful potions. Xzar pipes up with "Must we be so insufferably charitable?", which I must disagree with. We were paid well for this errand, with both the ring and the potions.
As I'm in the area already, I pick up Neera for her quest. Neutral party members are fine, but I won't accept anyone good into the party even temporarily as long as Dorn is in charge. Baeloth takes a break to make room.
After a zombie interrupt, we rest at Firewine Bridge. Dorn has something to say about betrayal:
That brings us to Adoy's enclave. It's pretty harmless, until you reach the cave. And even Rogdok is still easy.
And then there's the real boss fight.
Only the bodyguards got any damage in; one hit on Viconia. They also got me looking at bugs; they're barbarians and they raged, but a Hold Person spell still caused a "Held" message in the combat log on one of them.
On the way out, I slaughter all the goblins and return Rilsa's ring to Magreb. There's a ten-bandit ambush, which doesn't kill anyone. And a rest, which brings another Dorn monologue:
Back at the Friendly Arm, Neera leaves and Baeloth returns. I also take this opportunity to have Xzar learn three new spells and memorize Stoneskin. Next time, we'll finally get to that bandit plot.
All right, what's going on with that "Held" string and barbarian rage? It turns out that two different bugs are involved. First, the Hold Person spell has two "Held" strings when it's successful. One is system generated, one is an explicit effect of the spell. Second, barbarian rage doesn't block some of the cosmetic effects it should - including that string. Both of these bugs now have fixes in my tweak mod.
Before I continue with the plot, I visit an area I've already mostly cleared. There's a bounty to cash in.
And then Brage.
We rest in Nashkel, buy some more elemental darts and bullets at High Hedge, and then head out to the Wood of Sharp Teeth. The bandits are going down.
Larswood is first. We've been here before, but only covered a bit of it so we could recruit Baeloth. And this time ... no random bandits, just animals and gibberlings. We do run into some druid trouble, though:
There is one group of bandits around, at least.
With Larswood clear, we head east to the unnamed spider-infested zone. The big group gets a fireball:
The other big fight in this area is the group of Red Wizards. For that, I buff. Haste, Remove Fear, and Holy Power.
Haste wears off and the party is fatigued - but we have one more thing to do before we go.
That just leaves Peldvale. It's another place we've briefly visited before to recruit Viconia, but now we're clearing it out. The bandit presence makes itself known here. I go to sneak up on a pack of Blacktalon elites... and they shoot at Shar-Teel? Apparently, she's not invisible despite the stealth indicator; a problem related to the area transition. I reload to get that right.
Ah, that's better.
After dealing with some spiders, we loop back to the southern edge and find more Blacktalons.
There's a fourth group in the southwest corner:
The north brings two more Blacktalon groups - they're pretty routine by now - and some regular bandits. We're running out of space to carry all those bows, and we have more than enough magic arrows to go around given that none of our party uses bows regularly.
Finally, there's Raiken's bunch.
After selling off the bows and bandit scalps, we have one more encounter that's only available in chapter 3.
Deke is a bit obscure, but he's there as an alternative to Tranzig; he'll tell you where to find the bandit camp. My in-game time speedrun route makes use of him, as fireballing those bandits is faster and safer than fighting Tranzig, and I need to pass through the area anyway as part of my minimal travel time route.
Now, the bandit camp. The hobgoblin side is easy as always, though Shar-Teel has some fun backstabbing:
As we cross over to the Blacktalon side, Shar-Teel sets a new record:
Taurgosz Khosann is more of a threat; he saves against Command and Hold Person, and we don't get a backstab in.
Oddly enough, we don't have any immediate use for that full plate. Montaron and Shar-Teel want stealth, while Viconia doesn't have the strength. We'll save it for later.
I buff thoroughly before entering the final tent.
Clear out a cave full of gnolls, loot the camp, and end the session. We've explored all of the map that we could reach before, so there's nothing left to do next time but enter the Cloakwood.
Well, all right, there's one thing to do before entering the Cloakwood. We've left a quest unfinished in Beregost since the first time we visited. And since we need to go there anyway to sell off our bandit scalps...
Silke has some chapter 7 dialogue ... but really, we're best off just ending it now.
Upon entering the forest, Baeloth complains about elves. We don't meet any right away though, just animals and tasloi. Until we find ourselves in the middle of a conflict between druids and hunters.
All right, there's one elf in the area - but he just wants to hunt wyverns for a bounty. We're interested in the bounty, but not in his company. Goodbye.
The area is at least worth a good chunk of XP; many of the random encounter groups are dread wolves at 650 XP each. Aside from the Aldeth/Seniyad encounter, though, it's not very interesting.
The next area brings spiders, ettercaps, and web traps. Also, it's time to rest.
After waking, we push forward ... and my stealthed scouts have trouble finding the web traps before they trip them.
Spiders in ones and twos aren't that bad, but there's one place where they concentrate better - Spiderdome.
The party heads in and takes care of a few more spiders and ettercaps. Dorn gladly takes up Spider's Bane, putting Rancor to the side. Rancor is effectively +2 attack and +1 damage, while Spider's Bane is +2 attack and +2 damage; the Rancor attack bonus is not transferable to other weapons.
Finally, the northwest corner brings two phase spiders. Disarm the trap ...
Then the second spider manages a well-placed teleport that hangs up her escape, and rolls well on the bite. I have to spend an antidote. Which she's carrying.
In the next area, it's back to wolves and bears. Plus some rather aggressive druids.
In the cave, I can't line up a backstab - but I do still manage some big hits.
After that, it's just wildlife. Rest again, and continue on to the fourth Cloakwood area.
The first fight in this area is a hamadryad.
I go for backstabs in the wyvern cave...
The remainder of the area has a few Iron Throne guards and a lot of aggressive wildlife. No problem.
And with that, we come to the mine. The exterior brings a lot of those melee guards and a few of the more dangerous Blacktalon elites.
That brings us to the fortified area, and the big fight. I'm buffing for it. And opening with a free shot.
Our haste expires shortly after, and it's time to rest. Dorn dreams of power, slaughtering the bandits again - Horror gained.
For the mine itself, I start dipping into my supply of buff potions. Montaron drinks one for 19 strength. The first level, with lone guards, is trivial. The second is more troublesome, particularly Hareishan's room. So I apply fireballs.
The back paths are supposed to offer an alternative approach here, but in my experience they aren't a good one. You're just better off lobbing fireballs into that main room from the primary path, because of how the enemies are positioned. At least, if you can disarm the traps. If you can't, then the back paths are definitely better.
Finally, we meet Rill.
Yeslick gets to live; I talk to him and send him away.
We head down to the barracks level next. Montaron's potion wears off, and I replace it. Most of the foes here are hobgoblins, but there are a few other threats.
Then, something I hadn't realized before - if you don't give gold to Rill, there are living slaves in the ogre mage's room.
Down to the final level, where we whack a guard and prepare. Haste, Chant. Get Shar-Teel in place, then attack.
With the haste spell still active, we kill Mr. ReCap and the mustard jelly, and loot the place. Then we head up. Time to flood the mine.
Next time, we will finally be able to enter the city of Baldur's Gate. And the law won't be happy about it.
Exiting the forest is mostly uneventful. We face a wyvern ambush, but that's all. We stop in Beregost to sell some things and turn in quests ... oh. I make a discovery here; Officer Vai won't deal with you if your reputation is below 5. Instead, she goes hostile. So I reload, and play "hide the drow" in order to sell the bandit scalps I've picked up.
We turn north toward the city, and rest becomes necessary at Brun's farm.
The second try at rest succeeds, and I move on. This map and the one to the north have some unique low-reputation encounters - a ranger Nestor and a fighter/mage Tel-anon. Unfortunately, no matter what I do, those encounters don't trigger. On closer examination, it's that I've been through before. The traps to summon them don't reset, unlike those in cities.
There's one last encounter before we reach the city gates - Dorn's former companion Simmeon. He's on the west side of the bridge, so he can't be reached until chapter 5.
From here, it's a simple beatdown. Before long, it's over.
There's a post-battle dialogue between Dorn and Dorn. This includes the option to tell Dorn to leave ... which would be a very bad idea. Game over if I did that. No, he's staying.
We rest in town and end the session. Here, I take a look at reputation management. There are a lot of opportunities to gain reputation here, and a few places to lose it. 3 rep isn't bad enough to trigger the law, but 2 is. And I'd like to see that.
So, in the new session, I head over to one of those rep-loss options right away. Well, after setting some quests in motion first. Dorn uses the dexterity tome from the thieves' guild, bringing him up to 17.
The trouble we face is at the northern edge of the docks.
With our reputation down to 2, the Flaming Fist isn't far behind.
We're now at reputation 1, but the Fist won't come again for a few hours. And if I have my way, they won't come again at all.
While I'm in the area, I visit the Low Lantern.
And now, quests. We wander all over the city talking to people. Hand over an old dagger:
The poisoning quest is in motion, and we've been by the temple of Umberlee. Jalantha wants a book?
Since we're in the area anyway, we check in on Ragefast.
The quests continue with a stray basilisk in a warehouse:
Then, since night has fallen, we take care of some time-sensitive thieving matters. Shar-Teel hides for Narlen's first heist, and gets away clean. Montaron enters the house for the second.
Then it's telescope time.
We've already talked to the priest Tremain, and know about the dead kid. It's time to return to the Water Queen's House, and we're taking the violent approach.
With the geas scroll in hand, we return to Lothander.
Then it's back to Tremain for a substantial reward. Also, we use that tome; Dorn has wisdom 17 now. I can't afford to go to the Blushing Mermaid just yet, as the hostile Flaming Fist guy is still in the area. So, instead, I hit Ramazith's tower.
Upstairs, the mustard jellies don't cause any problems. The ghasts land two sickening hits on Montaron and a paralyzing hit on Shar-Teel; that penalty will seriously hurt Montaron's combat effectiveness for the next bit.
The next two floors have hobgoblin elites and kobold commandoes. I leave the mages behind for them, and don't have any problems.
That just leaves the top floor and its loot. Dorn gets both the +2 ring and the intelligence tome - Int 11. Also, Baeloth uses the last of his level 1 spell slots - no more identification until the next rest, except for what we can reach with lore.
I follow that up with Drelik and Jardak.
And now, the patrolman is gone. We can safely enter the Blushing Mermaid.
With the pressure to act quickly relieved a bit, that's a good place to end this part. Next time, the clearing of the city continues.
We turn our attention to the southwest sector now. The Seven Suns is easy to clear, and has an excellent reward.
With that done, I head for Oberan's estate for the last guild heist. With her stealth, Shar-Teel pulls it off while not being seen at all. They won't even know anything happened until they check the desk.
We turn in the goods to Alatos, and Narlen kills the Halruaan mage when he tries to betray us. You know, I don't think I've ever fought that mage myself. He is worth 4000 XP, and Narlen's heists aren't more profitable than doing it yourself.
We hand in the telescope next.
We visited the Three Old Kegs earlier, so upstairs it's Cyrdemac's turn.
I want to do some shopping, so I need one more point of reputation ... ah. There.
And then - I don't go shopping. Instead, I continue poking around.
I hadn't yet written that component when I played this part, though, so instead I played it safe. Dorn is poison-immune with Albruin, so the slimes can't hurt him at all. They don't even hit him, but hey - no risk is better than a small risk.
Next comes Sunin and his friends.
The Merchants' League estate follows, and it goes pretty smoothly until the top floor.
I do some smaller quests as well; Brielbara, Lusselyn and his mustard jelly, Cordyr:
Then Noralee. She raises our reputation to 7, and hands over some useless infravision potions. We respond by looting her warehouse; there are lots of potions there, and only the chest is alarmed.
Kill a stranded sirine, then return to the Low Lantern for Yago.
Loot some chests, then return to Brielbara and collect our pay. Reputation 8.
It's been a long day, but Xzar is getting close to level 9. I'd like to reach that point before I rest. So, more of the little quests around the city.
Laerta and Louise want a "bogeyman" dealt with? OK, we'll kill that mage. Then, since the druid didn't leave, we kill her too.
Deliver a "good luck charm", get an amulet that's even more useful for us. Reputation 9. That's getting uncomfortably high, so it's time to lower it again.
A trip to the sewers follows, to collect some bodies for Arkion. We enter near Schlumpscha and his sewerfolk.
Xzar reaches level 9 with this fight, gaining 4 HP and the ability to cast level 5 spells. He has exactly half as many hit points as Baeloth.
And then we head back up; the rest of the sewers can wait. Arkion gets two bodies:
And just a few more loose ends. Jacil, because we'll lock out that encounter when we next visit Ulgoth's Beard.
And then, the mages upstairs at Sorcerous Sundries.
I wanted to kill them, so I reload. And this time, remove Montaron and Xzar before going up. The fight goes smoothly, except for Shar-Teel failing her save against Horror. Head back down, bring those two back in, and proceed.
Xzar drinks two potions of genius, identifies a bunch of stuff with his boosted lore, learns a bunch of new spells, then shops for even more scrolls. Thirty new spells learned overall. We also buy a lot of +2 bullets and some specialized arrows (detonation and dispelling). Overall, it costs about 40K gold.
And with that, I bring this adventuring day to a close. The party rests, and I end the session. Next time, we do some traveling.
Now that they've done the initial rounds of Baldur's Gate, and there aren't any quests with time pressure hanging over them, the party takes their leave of the city. There's some business to be done outside, particularly in Ulgoth's Beard. But before I go there, I head south to do some more trading. Sell surplus scrolls at the Friendly Arm. Buy elemental darts and bullets at High Hedge. Sell ammo I'm not using wherever I can get a good price for it, including a trip all the way to the Nashkel carnival for the +1 arrows. Far too few shops in BG1 buy arrows.
Finally, the party returns north to Ulgoth's Beard and its weird map placement on the river instead of the sea. It's time to set some quests in motion, and take another crack at the ice island.
The first battle down in the dungeon is a very dangerous one, against three mages. SO I decide to give myself an initial advantage.
Uh ... Viconia? Are you actually casting anything? It turns out she isn't; she got hung up on nothing in particular and started going through the animation without actually being able to reach her target. I cancel out and lose the spell.
As the enemy mages have gone hostile but not acted yet - my party is out of sight - I just head up and rest. Let's give that another shot.
Then Andris casts Confusion, and Dorn fails his save. This could get messy.
We manage to take both Andris and Marcellus down, though not without some pain.
Montaron dings thief level 8 ... and I realize I have the settings wrong. Maximum HP is on. Oops. I reload because of that - back to before we entered the dungeon.
I come back ... eternal battle music. All right, just save and quit.
I don't take too long to return. I apply the same tactic, with a bit of a wait to beat a Minor Globe...
After some wolves and bears - now in white - we reach the next mage.
That brings us to the fight Andris' group yet again. I win pretty cleanly, and this time Monty rolls 2 out of 3 for hit points. Save. This will be the last repeat of that fight.
Back to Garan, and his confusion does even better this time.
With that, Shar-Teel reaches a milestone - enough experience for thief level 9.
Since the previous mages have instantly picked fights, I go for a preemptive strike on the next. Shar-Teel rolls terribly.
Then there's Tellan.
Finally, we head up with the cloak Shandalar wanted. The mage decides to just leave rather than giving us a reward ... OK, we'll take one.
After a talk with Therella, I spend some time setting up traps. Well, OK, I cheese it. Shar-Teel sets two traps, then I dismiss her and have her rejoin - resetting her kit abilities. Repeat until seven traps are in place in each of the three areas I'm interested in.
I wouldn't do this if there was any actual in-game time pressure; this is just shortcutting the rest mechanic, really. Since the party is free to rest as many times as they want right now, I'm fine with laying the traps all over Ulgoth's Beard.
After out last bits of business in town - arranging a tour with Ike, and speaking to Mendas - we head back to the big city. With a stop in Beregost to sell off the ankheg shells we picked up. On the way, Dorn pipes up with another monologue.
First order of business - acquire sea charts. The hard way it is.
Fatigue catches up soon after, as the party finishes clearing out the dangers in the eastern third of town.
After a rest, we head west. There's a group of ogre mages in the docks:
Anyway, the battle. Our warriors use bows so they don't rush into the line of fire, and the mages deliver some pain:
Next up, it's some thieves.
After that, Areana.
And Dorn's in a good mood, so he helps out a little girl.
Then there's Pheirkas. You want a look at my cloak?
Finally, we visit Entar Silvershield's estate. Do we have legitimate business here? No, not really. Killing the guards here won't hurt reputation, but we at least try to be sneaky about it. And go to a bit more effort than that, even.
Upstairs, all it took was speed to get away with the loot from Skie's room. Downstairs, there's a guard watching the good chests ... OK, charm him and move him out of the way.
Nearly all of the city is taken care of. It's just the sewers, the iron Throne, and the quest for Balduran's relics left. We'll handle that next time.
We'll start this sequence with Degrodel. His place is well guarded, but we have the tools for that. And with it getting so late in the game, it's time to start using our stores - Montaron drinks a giant strength potion.
As a whole, our party now has one member at 71 HP, one at 27, and the remaining four in the 53-55 range. Somehow the sorcerer, the cleric, and the two fighter/thief combinations all ended up in the same place.
With the guards dealt with, we can talk to Degrodel. He offers his quest, and a stack of Stone to Flesh scrolls to help with it. We return those statues to life, then make demands.
Now for the Maulers of Undermountain.
That brings us back to Degrodel. On the way, Montaron's potion expires and I upgrade to strength 20, since I'm out of strength 19 potions. He hands over a lot of gold for the the helm, then unleashes more guards.
The remaining monsters inflict some damage and we have to drink some potions, but it doesn't go too badly even crammed in there with them.
That's where I call it for the session; with Dorn at 153717 XP, the next session sould mark the beginning of my "ironman" segment. No more loading saves, unless the game crashes.
But for the narrative, I'm keeping to the same part. We take to the sewers first, starting with the eastern sector.
Then when I came back to the intersection after some exploring, Shar-Teel took a hit and got paralyzed. Her poor death saves are a weakness some enemies can exploit.
Montaron's potion runs out again in the middle segment, though I don't renew it right away.
I do some more shopping after that sector for potions. Especially giant strength potions, as our warriors have a lot to gain from them.
The western sector brings phase spiders - and a corner that gives Shar-Teel exactly what she needs to backstab with impunity.
We report our success, and it's on to the Iron Throne.
The guard in the basement doesn't like us either. Tough. We're taking that loot, and you're not stopping us.
Soon, we reach the top floor and the big fight. It's avoidable - all you need here are the documents in the back - but why would we avoid a fight?
Then there's Thaldorn.
Then there's one last little quest in the city. Nemphre wanted me to pick up a trinket...
Then Nemphre calls Dorn a fool? She can die too.
After a rest and a stop to sell things, we return to Eltan. The Iron Throne is at Candlekeep, so we need to go to that mysterious fortress of learning.
I'll skip most of the in-game dialogue here, as it doesn't make sense given Dorn's stolen destiny. We rest at the inn, and Dorn dreams again. Vampiric Touch is his.
Well, all right, one conversation makes sense.
In the library, Dorn finds a letter. It's not addressed to him, but it does explain his newfound power. A god's blood? Now that is true strength.
For once, I accept the ring from "Koveras". Vengeance? Now that's something Dorn can get behind. Although he doesn't really care about that attempt on poor Sod's life - it's all those hired killers coming after Dorn since then that really bother him.
As we head over to confront the Iron Throne leaders, Dorn takes the time to compliment himself.
Leaving gets us arrested, and Ulraunt explains the frame job - the ring "Koveras" handed us apparently belonged to a Shadow Thief assassin, so Amn could be blamed. It's an insult to not be credited properly for the murders we committed.
That brings us to the catacombs, as Tethtoril is more interested in foiling this plot than our rightful punishment. More battles follow, as do some excellent items. Dorn takes a third wisdom tome, bringing him to 18.
The phase spiders at the end of the hall are the first serious threat, but I have Shar-Teel.
The +2 cloak goes to Baeloth, and the strength tome to Dorn. 20 for him, and that's the last of the base stat improvements. He can only get better with equipment now.
The rest of the level just brings a few ghasts and some lesser treasure. On to the next, and the doppelgangers. A few of those, a couple skeleton packs fireballed, and Xzar reaches the XP cap. All six party members are at 161K total XP now.
The toughest fight of this level is the greater doppelganger taking Elminster's form, but I have an answer for that.
The caves follow, starting with a dangerous fight.
The bulk of the level is full of spiders. They don't land a single hit, as I use Shar-Teel's backstabbing power to its full potential. Then I send her after the basilisks.
Chapter 6 ends with us killing Diarmid, and we head east. Durlag's Tower, and the remainder of the TotSC content, come next. Xzar learns three new spells, we rest in Beregost, and I end the session. Without actually quitting the game - ironman mode is on. Dorn is at just over 172K XP, even if only 161K of that is visible in the game.
After a few minor encounters, we reach the tower and head in. Some tourists get incinerated, and it's time for us to visit the dungeon.
Since combat will be intense here, I get the strength potions going again for Montaron. We start on the left side of the hall, with the path leading to a trio of greater doppelgangers. Stab one, retreat. The victim panics and is easy prey, but two more remain. And now they have mirror images. Wait for those to wear off, then head in again:
A fun little trick here: greater doppelgangers cast the normal wizard Haste spell. If you wait the eight rounds for it to wear off, the fatigue penalty will hit them. And that stacks with multiple spells. Three spells is a total of +12 fatigue on them, for a -6 luck penalty. If you bait them into using their spells and dodge out of sight, then wait the spells off, that takes them from THAC0 7 and 6.5 average damage per hit to an effective THAC0 of 13 and 2.25 average damage per hit. Even with their 4 APR, that's nothing. Ettercaps hit harder than that.
Anyway, I get back to the stabbing. Kill the wounded one with another backstab, then hit the last one from the front to make it move so I can finish it properly.
I continue counterclockwise. Fear and pride handled. The skeleton warrior falls easily, and a mustard jelly approaches...
There's a second jelly. It only takes 59 stab damage. Not quite enough for a one-hit kill, because of the 30% slashing resistance.
The rest is routine. We take some pain from the flesh golems, but nothing too bad. And now, the warders.
We start near Love, and it falls quickly to our combined might.
On to the second floor, where Dorn drops some more exposition about his backstory:
The original four BG2 romances all have race checks; humans, half-elves, and halfings are eligible for all, full elves are eligible for all but Viconia, Aerie appreciates gnomes, and Viconia will go for half-orcs. And yes, this will matter when we get there.
The Beamdog romances don't bother with race checks. Rasaad and Hexxat will go for female characters of any race, Neera will go for a male character of any race, and Dorn will bang anything that moves. Including himself, though I don't intend to follow that path on this run.
Dorn follows that up with a rather prophetic comment:
The challenges of this floor are almost all greater doppelgangers - these taking dwarven forms and acting out scripts that have lost their relevance long ago. The first two solo doppelgangers are easy. Then there's the helmet room. Move to the end to face one doppelganger, and wait out the clouds.
For the next room, I pre-place Shar-Teel.
On the other side of thing, the room with the lava pit brings trouble. The doppelgangers there start moving before I'm ready for them.
Once that's done with, I return. No problem. That just leaves one doppelganger in the lava room, currently in Islanne form. I go for a backstab...
And now, the Dwarven Doom Guards. I always like to start things out with some lightning.
Still, that activates them, and the hallway has some much better spots for lightning bolts. Shar-Teel moves in for a backstab, which doesn't kill its target but does get them moving. And then Baeloth unleashes a second bolt.
Since I was cheated out of some XP earlier by that self-killing doppelganger, I deliberately trigger the false stair trap. It doesn't reset in the EE, but three skeleton warriors are worth a lot if you can handle them.
After that, it's just a few ghasts, a few traps, and some treasure. Next time, we continue down to finish the dungeon. 194755 XP for Dorn.
This next level has three paths through it, but I pretty much always take on the wyverns first. That way, I can come at the other two paths from the back, which I like better. Open with a backstab:
Before taking on the third and last of them, we heal up. For free, with the repeating fire trap. If you equip over 100% fire resistance (we have two 40% rings, a 50% scimitar, and a 20% helmet), the fire damage heals you.
That third wyvern goes down easily, to two backstabs.
That just leaves some heroes to summon and kill. Only the ogre Hack poses any issue, and that because Shar-Teel critically missed her backstab on him.
Then comes the back corridor, and the greater ghouls there are worse. Despite me setting up for a backstab, Shar-Teel reveals herself too early and takes three hits. It could have been worse, too - paralysis and ensuing death were very likely.
I leave the middle path to the mages. Specifically, their wands of fire.
That was a trivial series of "fights", but all is not well. Shar-Teel's selection circle has vanished, and only that "X" indicator of where she's going remains. Errors are starting to accumulate...
Finally, we reach the garden. And those dreaded backstabbing ashirukuru. I could use Baeloth to cast Detect Invisibility - he has all his second level slots available - ut I go for a purely physical solution instead. I set Dorn up to tank - switch the girdle of piercing over, so he's at -11 piercing AC even on a backstab. Against their stealth THAC0 of 4, that means they need 15 to hit.
Naturally, the first one rolls a 19.
Now that the enemy is visible, Shar-Teel's counter-stab kills it.
And again, greater ghouls are trouble. Shar-Teel backstabs one for a free kill, then retreats as the other one in the pair charges...
Five other greater ghouls are in the area. Most of them go down cleanly, but Shar-Teel's stab on the last isn't quite lethal, and it turns around for an immediate counterattack...
I clear out the traps, and then all that remains are two more of those backstabbers hiding in corners. Dorn plays bait again...
I have Dorn sit in the fire for a bit, and then head for the elemental rooms. Starting from ice.
I give it another round of healing once the battle ends. Plus a round of hauling stuff up to our ground-floor stash.
Next, Slime. I turn the AI off and use wands for this.
On to Air. The Air Aspect isn't bad when softened by a backstab, but invisible stalkers are nasty in groups.
Finally, fire.
That brings us to the chess game, where I follow a strategy best described as "flip over the board and set it on fire".
Then ... I really should have turned off AI. I send my bishops Xzar and Baeloth forward to shoot down a rook with wand scorchers, which doesn't go well when Xzar gets hung up on nothing. The other pawn charges and dies, but Dorn charges out for no good reason and the king gets involved...
The final floor is open, and we start clearing. Two helmed horrors to start - one goes down to a backstab, while the other lands two natural 20s on Dorn before falling. Then I face the spiders.
Riddles are answered, loot is gathered. Montaron's strength potion runs out again, and so do the mages' Stoneskins. It's been a long adventuring day. I'll reapply the strength boost once I reach the crawlers and ghouls, but Xzar doesn't have another Stoneskin in reserve.
This area does have some distressingly large groups. With the damage that even two greater ghouls at a time can inflict, I don't intend to play fair.
The next trio of enemies gets fireballs instead.
Some more small groups follow, easily eliminated, and I reach another trio of ghouls with a crawler.
At this point, everything that remains is behind acid pools. I get out the acid protection scrolls for Dorn, so he can grab loot and draw out enemies. Grael's bunch cause serious trouble:
There's only one more group after that. Montaron's strength potion lapses again - my stealth-heavy tactics do take up a good deal of in-game time - but I don't renew it. I have a plan for the demon knight, and he'll be using a bow for it.
Specifically, for this plan, I looked at the demon knight's AI. The script:
1. Cast Remove Magic and Fireball at the first PC it sees.
2. Cast Power Word Stun at the the first PC it sees. Attack the nearest enemy for a round.
3. Cast Power Word Kill at the nearest enemy.
4. Cast Remove Magic at the nearest enemy and Fireball at the the first PC it sees. Attack the nearest enemy for two rounds.
5. Cast Power Word Blind at the the first PC it sees. Attack the nearest enemy for two rounds.
6. Cast Symbol: Fear at the the first PC it sees. Attack the nearest enemy for two rounds.
7. Cast Symbol: Pain at the the first PC it sees. Attack the nearest enemy for two rounds.
8. Attack the nearest enemy. Repeat until either the demon knight or all enemies are dead.
All spells are instant and uninterruptible. That last symbol isn't a spell players can use; it imposes a penalty to dexterity and base THAC0 for four hours. But then, it's very unlikely the script will get that far.
So, what's the strategy? I equip Dorn to protect him, and play bait. Dispel-proof fire immunity, drink a fortitude potion after the first Remove Magic for PW: Stun immunity, and otherwise just keep the enemy's attention while the rest of the party delivers ranged attacks. He's permanently immune to fear, so all he has to watch for is keeping his hit points up for power word protection. Don't get hit by too many melee attacks. The strategy in action:
The remainder of the session is all housekeeping; scribing scrolls, selling loot, resting. And then the game crashes; I get the black portrait death. There's one autosave and one quicksave after the battle, from which I'll restore the XP. Dorn 218675, Montaron 216649, Shar-Teel 185547+32000, Viconia 216873, Baeloth 222610, Xzar 214185. If we didn't have the XP cap in place, Shar-Teel would have her tenth thief level.
I take this opportunity for a real break, and for the computer to cool down a bit. Next time, we'll return to Ulgoth's Beard.
I get one last ten-bandit ambush on the way north. That has me take a trip back to Beregost, and, well ...
After that detour, we're back on the road. Trouble greets us immediately in Ulgoth's Beard.
Rest, and continue to the next fight.
Entering the formerly guarded building brings another fight, after a brief chat.
Still, now that they're visible, we clean them up easily. Heal up, add a few more buffs, and head down.
In the basement, our third set of traps goes off.
We gang up on Tracea and eliminate her fast, then add a volley of fireballs for the guards in the back...
The greatest threat in this fight is Aec'Letec's Death Gaze. You can save against it , you can dispel it (with a tough level check, since it's a level 10 effect), you can block it with potions of mirrored eyes (this party did), but you can't survive it. Not even Story Mode will save you from being replaced with a ghast.
Well, that's changing. One component of my tweak mod gives death magic protection such as the Death Ward spell and Story Mode the ability to block that gaze. This will also be included in the EE Fixpack currently under construction, and hopefully future patches as well.
Now that the cult is dealt with, we head over to "Mendas" and deliver the sea chats. We have an island to explore.
The village itself is quiet; the only threats on their side of the island are some random animals:
As we transition to the northern half of the island, I apply potions. Heroism for the three warriors, 20 strength for Montaron, 21 strength for Shar-Teel. My two main tanks get the slashing AC belts; with the belts, it takes a 17 (Montaron) or 18 (Dorn) for a standard wolfwere to hit them. Protection from Evil would help further, but we only have one instance of PfE 10' memorized. I'm saving that for later.
The first encounter here is Palin's ambush.
For the sirines, I split the party. Dorn and the casters take on the queen, while the backstabbers hang back for the regular sirines.
The remainder of the outside area is no trouble. A few wolfweres, but mostly animals. They all die. We pick up the stuff from Dradeel's cabin, and head to the ship.
In the ship itself, I have Shar-Teel handle things alone. Backstab, retreat. Rinse and repeat.
Out potions expire, so I renew them. I've used the last of my strength 20 potions, so Montaron upgrades to strength 21.
The second deck brings more of the same tactics - but this time, it doesn't go as well.
On the third deck, the first trip goes badly ... but I get lucky.
For her second trip, she takes down her vampiric target but then can't reach the stairs cleanly. Send in Dorn and Montaron again.
The top deck gets the same repeated backstab treatment. Shar-Teel takes a couple of hits, but that's nothing.
So of course, she crit-misses him on the first attempt. Back down to hide again.
The second time's the charm.
Back at the village, the other shoe drops.
Well, we could just run for the exit and avoid fighting the ones that aren't in our way, but why would we do that?
It doesn't take long. The werewolves don't gather in large groups, and we easily overwhelm them. The caverns are no more difficult, and neither is Kaishas. We take the occasional hit doing this, but we have plenty of healing potions.
Finally, we return to Ulgoth's Beard to face Selaad and his man Baresh.
Dorn ends up getting both of the kills, though we take significant damage and have to spend some healing spells. And with that, TotSC is done. All that remains is the endgame in Baldur's Gate.
One last note - ever wonder what those Belladonna Flowers are good for? It turns out that you can put them in your quickslots and use (eat) them. If you do, the flowers poison you and transform you into your base form; a poor man's "Natural Form" ability. Unfortunately, this is essentially useless. It doesn't help at all against the werewolf curse, as that removes affected characters from the party entirely if it triggers. It doesn't help enough against effects such as Polymorph Self, as the BGEE version of those spells/abilities has debilitating effects that aren't tied to the transformation weapon. And there's no point with voluntary transformations, as you still have a real "Natural Form" ability.
Hopefully, that should change with the EE Fixpack currently being worked on. I should get back to my work on polymorphs...
After a brief trip south to restock on elemental darts - they're only sold at High Hedge - the party returns to Baldur's Gate. It's time to hunt down Sarevok and his minions. We reach the city on day 170.
Since the Flaming Fist patrols the streets searching for us, we take to the sewers to avoid their attention. Naturally, this leads to some issues with the resident creatures.
The Flaming Fist castle is our destination, with the mercenaries inside guarding it. As there's a patrol nearly in sight of the door to the northeast, I have the warriors sneak in one by one. Then we use fireball necklaces.
Shar-Teel delivers Eltan to the harbormaster with her stealth, and we move on to the Iron Throne. Cythandria awaits.
We head down through the basement, and take the sewer shortcut to the Undercellar. Krystin and Slythe await. Our potions expire, but I don't renew them; instead, I apply spell buffs for this fight. We're resting afterwards anyway because this party fatigues easily.
Then Dorn casts Detect Invisibility, and Krystin falls in moments.
I head up to the Blushing Mermaid, wait for haste to expire, and rest. The palace comes next.
Rather than triggering the event immediately, I have the thieves sneak around to the other floors and loot the place, There's quite a lot of stuff there, after all. Shar-Teel drinks some master thievery potions for the occasion.
I even manage to loot the treasury in the basement without getting caught:
The loot from upstairs also included two wands of sleep. We'll use them for this fight, as they're completely useless for anything after it.
Back on the ground floor, I upgrade to strength 23 potions for all three warriors and summon some monsters. Let's roll.
Dorn gets the first kill. Baeloth gets the second. The third and fourth go to Belt. Viconia gets the fifth, and Montaron the sixth. On our side, only one ogre summon died.
And so we reach the thieves' maze. I take a break to collect myself, and then return for the final segment of play. Buy a few things from Black Lily and head down.
Oozes come first, and they're easy. Doom Guards get backstabs.
The remainder of the area goes easily. Skeleton warriors, doom guards, invisible stalkers. Since they come one at a time, they don't manage a single hit on us. And with every path and dead end cleared, we continue past Winski to the Undercity.
The first threat is the party standing in our way. I have Baeloth cast Invisibility on Dorn, and sneak all three warriors into their midst.
Only one living foe remains down here.
For the various undead scattered around, I have Dorn and Shar-Teel use scrolls of protection. We slaughter them with no resistance.
We enter the temple, and make one final save. The final fight is here, and it's time to buff to the skies.
Also, here's Dorn's inventory. I plan to "import" that to BG2 along with the stat boosts he's picked up.
I open the battle with a trio of exploding arrows. And then the phase spider gets to Angelo.
Also, that's Semaj teleporting over in this shot. He's next.
Checking my final experience, I didn't get credit for Angelo. The spider that did him in got squashed before its poison could finish working, so I missed out on that 9800 XP. But the 15000 from Sarevok and the 16000 from four Battle Horrors are still there, so I can't complain too much.
Final save XP totals: Dorn 270769, Montaron 268726 (virtual level 8/9), Shar-Teel 237555+32000 (virtual level 6/11), Viconial 268875 (virtual level 9), Baeloth 274561 (virtual level 10), Xzar 266006 (virtual level 10). Without the cap, everyone but Dorn would have earned at least one level.
Dorn will get better stats all around but 7 fewer base hit points than his level 8 BG2 version. He'll also start with all that gear I showed, and 270769 XP. Viconia will start with 268875 XP and 12 more base HP than her level 8 BG2 version, but no equipment at all. The others won't be joining in the BG2EE portion of this run.
The final kill stats, in marching order:
Dorn: 872 kills for 354318 XP. Strongest kill Greater Basilisk (7000).
Montaron: 505 kills for 197555 XP. Strongest kill Demon Knight (15000).
Shar-Teel: 766 kills for 500382 XP. Strongest kill Aec'Letec (16000).
Viconia: 192 kills for 89604 XP. Strongest kill Drizzt (12000).
Baeloth: 329 kills for 106292 XP. Strongest kill Davaeorn (6000).
Xzar: 192 kills for 67585 XP. Strongest kill Sarevok (15000).
Friday's post will be an interlude. Then it's back to Dorn's story on Monday.
You see, while the final save shows up from the BG2 import menu, there aren't any actual importable characters on it. Dorn isn't starting out in that cage.
Actually, here's what that save looks like:
Also the alliterative arcanist I would like to see your services.
The other four party members' names would come through cleanly; the original BG1 strings were included in BG2, but the new EE material uses string numbers that were already in use in BG2 - so those string references become random nonsense when interpreted in the other game. One of the classic pitfalls of cross-game modding; all those text elements are references to a list of strings, and you can't trust things to be in the same place in different games.
First, some housekeeping. It was a long time between playing the end of the BGEE portion and starting BG2EE - long enough for me to put together a tweak mod, release it, and install it for this. Then, after something like a month, I restarted BG2EE with version 2 of my mod.
Aside from that mod, I have two additional tweaks - an ad-hoc tweak to HAPPY.2DA so that neutral NPCs don't leave at reputation 1, and a fix for the giant pile of portraits I had dumped in my portraits folder. Now it's a much more manageable 300 or so each male and female, instead of over a thousand portraits not sorted by gender and with each picture repeated at multiple resolutions.
My WeiDU log, for the record:
~JTWEAKS/SETUP-JTWEAKS.TP2~ #0 #10 // Wilson's strength doesn't stack indefinitely: 2.0
~JTWEAKS/SETUP-JTWEAKS.TP2~ #0 #20 // Vernus can be raised: 2.0
~JTWEAKS/SETUP-JTWEAKS.TP2~ #0 #40 // Enchant Weapon works in contingencies: 2.0
~JTWEAKS/SETUP-JTWEAKS.TP2~ #0 #50 // Joinable NPCs don't have null kits: 2.0
~JTWEAKS/SETUP-JTWEAKS.TP2~ #0 #60 // NPCs don't go in inaccessible locations: 2.0
~JTWEAKS/SETUP-JTWEAKS.TP2~ #0 #70 // Close polymorph immunity loopholes: 2.0
~JTWEAKS/SETUP-JTWEAKS.TP2~ #0 #81 // Shapeshift corrections -> All transformations: 2.0
~JTWEAKS/SETUP-JTWEAKS.TP2~ #0 #90 // Wish Hardiness doesn't stack with itself: 2.0
~JTWEAKS/SETUP-JTWEAKS.TP2~ #0 #100 // Hold Person doesn't display multiple strings: 2.0
~JTWEAKS/SETUP-JTWEAKS.TP2~ #0 #120 // Dueling fireshields don't go infinite: 2.0
~JTWEAKS/SETUP-JTWEAKS.TP2~ #0 #140 // Inquisitor True Sight is consistent with other versions of the spell: 2.0
~JTWEAKS/SETUP-JTWEAKS.TP2~ #0 #150 // Temple cures work better: 2.0
~JTWEAKS/SETUP-JTWEAKS.TP2~ #0 #160 // Bala's Axe dispels reasonably well: 2.0
~JTWEAKS/SETUP-JTWEAKS.TP2~ #0 #170 // Celestials cast all of their spells at high levels: 2.0
~JTWEAKS/SETUP-JTWEAKS.TP2~ #0 #182 // Antimagic Ray and Spell Shield -> Spell Shield blocks one antimagic ray: 2.0
~JTWEAKS/SETUP-JTWEAKS.TP2~ #0 #200 // Elemental protection spells increment resistances: 2.0
~JTWEAKS/SETUP-JTWEAKS.TP2~ #0 #210 // Vorpal weapons don't chunk: 2.0
~JTWEAKS/SETUP-JTWEAKS.TP2~ #0 #230 // Loosen restrictions on what clones can do: 2.0
~JTWEAKS/SETUP-JTWEAKS.TP2~ #0 #250 // Loosen NPC item restrictions: 2.0
~JTWEAKS/SETUP-JTWEAKS.TP2~ #0 #260 // Green Slime poison can be cured: 2.0
~JTWEAKS/SETUP-JTWEAKS.TP2~ #0 #280 // Allies against Bodhi are better prepared for vampires: 2.0
~JTWEAKS/SETUP-JTWEAKS.TP2~ #0 #290 // Noober's Game: 2.0
~JTWEAKS/SETUP-JTWEAKS.TP2~ #0 #300 // Slightly improved party AI: 2.0
~JTWEAKS/SETUP-JTWEAKS.TP2~ #0 #330 // Randomize battle music: 2.0
~JTWEAKS/SETUP-JTWEAKS.TP2~ #0 #350 // Bigger random spawns: 2.0
And now, on to the game.
We begin with a Patsy.
Her weapon proficiencies are sling, hammer, and shield style. She has 57 HP, representing rolls of 43/56.
But then, Patsy met a half-orc warrior who asked for a favor. Just hold a few things for him while he travels to Amn, and she will be paid handsomely...
That was then. Now, she finds herself waking in a cage to the torments of a vile mage. Fortunately, the man is distracted, and a rescuer comes.
Indeed, there are more adventurers being held in cages nearby. Patsy and Imoen rescue them, and the party swells to four. With the dearth of equipment, the group decides that it would be best for the druid Jaheira to transform and enhance her attack abilities as a bear.
After killing a couple mephits and turning off a strange machine, the party reaches their first serious fight.
Some pain ensues as we push forward - a goblin archer lands a maximum-damage critical hit (16) on Jaheira. But Patsy has healing spells memorized and we have potions, so that doesn't stop us. More equipment is gathered; we add bows for Imoen and Minsc, plus a few magical melee weapons. Including a unique +2 hammer "Ashideena" for Patsy.
The next serious fight is a group of duergar. They get lightning bolts.
Then comes the cambion. And it hits hard.
As we move on to the air room, Patsy reaches level 8. 6 HP gained (roll 4/8) and an irrelevant proficiency. Just before the big group of mephits, I have Jaheira turn human and use her healing spells. Then, since the rest of the spells she has are useless, she turns into a black bear. Imoen summons some fodder, and we engage.
This group has a steam mephit, and the fodder serve their purpose by absorbing the Boiling Rain Storm. The actual party only takes a few small healing potions worth of damage.
Run around some more, clearing out and looting the floor. Even the jailkeep golem is dead, as we have two magic blunt weapons.
The second floor brings a new addition in Yoshimo. He sleeps through his first fight (the mephit portals), but he should be useful in general. Jaheira is still our best source of damage, tearing through the portals with brutal efficiency.
Continuing on, Patsy finds a use for her second lightning bolt:
Then there's Ulvaryl. It's always a gamble if you can kill her - we get lucky.
That brings druid level 8 for Jaheira, with 5 extra HP (roll 3/4).
After a rest and some healing with Patsy's refreshed spells, the party exits to the sunlit world. The mage Irenicus returns, and a group called the "Cowled Wizards" drag him and Imoen away.
This also grants a pile of experience. Fighter level 7 for Jaheira (+2 HP, roll 1/5) and level 8 for Minsc (+10 HP, roll 8/10). With that, the group goes their separate ways. Minsc and Yoshimo head to the Copper Coronet, Jaheira goes to the docks, and Patsy heads out alone to find Dorn and give him a piece of her mind. He said he would be near the temples...
While passing through the temple district, Patsy comes across an odd scene. A new cult, recruiting in sight of the established faiths?
A mechanical note: the Stormherald (or the High Mornmaster) will only give the quest if the protagonist is a cleric. If your protagonist stops being a cleric between the first meeting with one of them and the follow-up in the temple, you're locked out of the Unseeing Eye quest - and only becoming a cleric again (completing the dual?) can unlock it. After all, the generic option Oisig isn't even spawned in.
Once the quest is given, your class doesn't matter anymore. Even getting the cleric stronghold doesn't check your class unless you're doing it with Helm.
And then, Patsy meets Dorn.
A conversation ensues, and Patsy relays what she knows about this "Irenicus" and her new quest to dispose of a cult. Then she asks some tougher questions, and Dorn moves things to an out-of-the-way spot...
Despite that critical miss to start things off, Patsy doesn't land any blows. Her end comes in an explosion of bloody chunks, as a brutal blow tears her body apart.
The choice of names for the initial "protagonist" here was easy, especially as I already had the gender locked in for mechanical reasons later on. The class choice was so I could go with the Talos side of the temple quests, just because I felt like it. Patsy may be dead, but she leaves a lasting influence behind.
While Dorn is fully equipped, he had to leave his gold behind to arrange travel to Amn. And while his level of 8 was impressive in Baldur's Gate, this city is far more dangerous. Dorn needs experience and gold as soon as possible.
In my previous attempts at this, I tried starting with the temple district sewers. That didn't go well; many reloads ensued at the hands of the bandits there. This time around, I skip that and try a less combative approach. Dorn head over to the government district and recruits Jan. It's 20K free experience just for taking him on, and he levels to mage 8/thief 9 immediately. 4 HP gained (rolls 3/5) and 25 points into Pick Pockets for a total of 105. A potion of master thievery ... not quite enough to shoplift his way through the Promenade. He'll need to boost that with a potion of mind focusing, or to grab a little more experience.
With the plans in place, I head for the promenade. And immediately, we are waylaid.
Also, while it doesn't come up in a static screenshot, this first combat outside the started dungeon has my battle music randomizer pay off. It plays a song I had never heard before, normally used only as battle music for the shopping area in Neera's ToB quest.
Anyway, that Horror gets nearly all of them.
While the Horror fades before battle's end, we still come through without a scratch.
Arriving at the promenade, I check my stash. 66K scroll XP, not enough for Jan's next thief level. Quest time, then. We enter the circus tent after talking with a few people.
Slice up some shadows, poof some werewolves with Jan's skill, and head in. Kill a pair of fake peasants and free Aerie.
More shadows and illusions follow, with a few low-level scrolls to loot. And then, Kalah.
- The version you fight is a clone of BG1's highest-level version of Quayle. Spell memorization for a level 6/5 cleric/mage (the illusionist bonus slots aren't filled), a sling and bullets equipped, a flail in inventory, and even the same 24 gold. Then he's set to be a level 8 single-class mage, given an AI that doesn't use the cleric spells, and given the altered animation and missile resistance.
- The current BGEE version of that level 6/5 Quayle actually has too many spells memorized; four second-level mage spells instead of three. And the flail is swapped for a club, because he doesn't have the strength to wield a flail.
- Kalah dies twice, which is why he drops that sling, bullets, and flail twice. Plus two piles of gold, the second larger. The second version of Kalah is of course the one with all the good stuff. The first version's stuff should probably be flagged as undroppable, actually.
The moment we go back to the normal tent, before the second version of Kalah can talk and die... Dorn starts talking to himself. And I lost the picture. It's the first talk on his romance track - "We are a formidable pair, you and I". And it's a short one, since with only two party members the "other companions" part of the talk isn't available.
Now, it's only about 30K XP to Jan's next thief level. That, I can manage. It's time to horribly abuse the system. I sell my scrolls to the fletcher Perter, then have Jan drink a potion of master thievery and steal them back. Over 3000 free gold, and now he can scribe them for the XP. Spend 912 gold on a pair of potions of genius, and get to it. The first round before any erasing brings him to 313125 total XP, just short of the 160K thief XP needed. Erase and re-scribe spells he doesn't have memorized - make that 326125 total XP. Thief level 10 achieved, and another 25 points into Pick Pockets. 170 skill is enough to safely loot everyone on the Promenade that can be shoplifted from.
Then I spend his memorized Identify on Arbane's sword and scribe that spell too. Loot Galoomp, scribe - Dorn's at 400K XP before I even start erasing anything. Then Lady Yuth, after the slightly risky non-store pickpocket on Ribald. Ring of Regeneration obtained.
More scribing. Thief level 11 for Jan, and another 25 PP. Mage 10 for Jan. Blackguard 10 for Dorn - he's past the HP rolls now, and into the flat 3 HP bonuses. I briefly unpause, and Dorn talks again, about something that definitely didn't happen.
With the scroll collection down to one of each, plus necromancy scrolls and scrolls that would require forgetting a memorized spell, I stop. Dorn is at 740K XP, so he can easily reach 750K on his own before any further recruiting.
Before I ditch Jan, I take advantage of his skills for a few things. Sell the one-charge wands and steal them back. Sell a couple dispelling arrows to Perter and steal back a full stack of 80. Steal a bit of +2 ammunition from Maheer. And some armor from Arnolinus - full plate and +2 shields.
We reach the slums without incident, and part with Jan after stashing some stuff.
The opportunity for that last bit of experience Dorn needs comes up immediately, with the duel against Amalas.
The music randomizer picked another rare battle song for the Copper Coronet - Black Pits music this time.
And now, with just over 750K experience, it's a great time to start recruiting. The first new party member is right there.
Nalia ... OK, we'll take your quest. See you at the keep.
Then, a thief.
We open up the back rooms, then head out to pick up some of my stashed stuff. Korgan is properly armored now. And then, we go to the government district.
Then, before she can retreat to set up her next stab, the fanatic turns around and lands a 14-point crit on her. Ouch. I persevere to set up another stab (30 points) and am going for a third when the battle ends.
Viconia joins, and another round of save-editing boosts her from her BG2 standard of 42 HP to the 54 she had at the end of BG1. Going up to level 11 earns her another 12 HP with a perfect 8/8 roll.
Before I can even leave the area, Dorn and Viconia have a banter.
After a false start - I played the next session in the wrong install without my mods, so I had to retcon it - I return. And this means Viconia has to reroll her levels; only +11 HP this time, on a 7/8 roll.
We head to the graveyard, to deal with Dragomir's tomb right away. Immediately on arrival...
The scene at the entrance to Dragomir's Tomb actually gets me the experience for unlocking it twice - "Hexxat" gets there before the scene to unlock it, the scene opens, re-closes, and re-locks the door so she can unlock it again during the battle, and finally the script unlocks and opens the door once the battle is won.
But before entering that particular tomb, we visit one unmarked tomb.
Coming to this place before 1 million protagonist XP, it's pretty tame. No Devil Shades yet. The shadow fiends inflict a bit of damage, but nothing too bad; even the time they paralyze Dorn, Korgan picks up the slack and keeps them off him.
Next up, Burich.
The toughest fight in here, at least at this level, is Dragomir himself. Hard-hitting melee attacks, domination, regeneration, serious armor, and he requires +2 to hit. But the script on that domination use is dumb; it uses a "!HasImmunityEffects()" check, which looks for immunity to anything. Since Dorn is immune to fear and level drain, no point in trying to dominate him.
And so we reach the end, and Hexxat's ploy is revealed. She used a patsy just like Dorn, and leaves poor Clara dead in here. Naturally, I let her join at the first opportunity. Five levels gained, to 13. +10 Open Locks to 95. +15 Find Traps to 100. +100 Pick Pockets to 140. All of those stats are with the cloak off, of course. 14 HP gained (rolls 8/12) and longsword proficiency.
Our newly revised party of four heads out to deal with the other toms and minor quests in the area.
After that, it's Nevin and his Uncle Lester.
For a more serious fight, there's the Crypt King.
There's one last occupied tomb before the big one.
The skeleton warrior gets some absurdly good luck, hitting Korgan seven out of seven tries despite his full plate and +2 shield. By my calculations, it needed 12 to hit - and it rolled at least that well every time. By the time we can finally kill it, he's in the red.
Still, we press on. The ring of regeneration will do its work while we move.
The big tomb brings several packs of spiders, and then a room of webs in the middle.
And now, on to the lower level where the treasure Korgan seeks is hidden.
The initial ambush goes down easily, though the Vampyre gets away. On to the corridor, with its mummies and spectral undead:
A few more undead go down, and we reach Korgan's objective.
The skeleton warriors here drop high-level random treasure - in this case, one of them drops a +1 composite longbow. A nice upgrade for Korgan, when he feels like delivering a special arrow.
The moment I reach the surface ...
On our way to the temple district ...
... Wait, what?
The ambush is defeated without any trouble, and we pick up Renfeld. Grab a stash - Ashideena, Gift of Peace, Claw of Kazgaroth - on the way to Pimlico's place, and then keep going because the man is dead. Hexxat gets the Claw, because its downsides matter very little to her.
Korgan's crew are on top of the Copper Coronet as he predicted - but they're not talking?
Well, all right, he triggered a couple spells to start combat. Magic Resistance (irrelevant) and Cloak of Fear (only Korgan had any risk, and he saved easily). The remaining goons are just basic melee fighters, and they go down easily.
With that, I bring this part to a close. The party still has quite a bit of work to do before they can recruit their next member, but these four are coming together well.
Since we're in the area anyway, I head into the Copper Coronet for a few things. Talk to Firkraag to pick up a quest, then check in with Salvanas. I tried talking to him with the fake Hexxat earlier, but he didn't have anything to say to her. How about the real thing?
While I'm here, I pick up the pickpocket gloves and visit Llynis.
I leave the rest of the back rooms alone for now, and instead head out to visit Arledrian. Viconia speaks up here with a serious backstory dump:
After a misstep - forgetting to take off the Cloak of Dragomir and missing a trap that got Arledrian killed - I reload and deal with him properly. He doesn't keep a single magic item.
And now, there's something time-sensitive in our packs. We do need to take care of Renfeld before he becomes a real corpse. Our first visit to the docks comes next.
A mad cleric accosts us...
We deliver the poisoned man, then start back...
The Harpers ask us to deal with a pair of mages...
And then, one dodge is a little too slow.
I talk to the Shadow Thieves next, starting up the Mae'var quest line. Also, loot the Black Market Thief for a whole bunch of scrolls and a few other things. As night has fallen, I get started on Mae'var's tasks - burglarizing the Lathander temple is easier when it's just the night shift of guards. Indeed, Hexxat gets in and out without being seen at all; the one guard in the vicinity of the container just walked away.
After delivering the statuette, it's back to the Harpers. Xzar was a companion longer than Edwin, after all. And now, it's past midnight:
The Harpers let us in now, so I find the bird and deliver it.
If our reputation were one point worse, Lucette would have attacked us as well. Instead, she just leaves.
Dorn doesn't get to make any choices for his level 11. Viconia takes flail proficiency for her level 12. Hexxat's level 13 adds another 10 points of Pick Pockets (170 with gloves, allowing her to loot almost all Athkatla merchants without a potion) and puts the remaining 15 points into stealth.
Now, Edwin's tasks. We have a mage to kill first - one who keeps his home guarded. The mephits aren't too bad, but the stone golems?
Finally, Rayic himself. I try to neutralize him with Hexxat's Blood Drain - no, he saved. That leaves stair dodging and normal weapons.
Up next, there are a lot of options for getting the documents off Marcus. I go for a nonviolent option, letting Viconia use the Ring of Human Influence for a charisma boost.
Then Mae'var sends us right back to the Sea's Bounty. I try to pick Embarl's pockets for potions before talking to him.
We're now at the point that we could recruit Edwin, but Dorn is only at 927K experience. I want an even 1 million before I go through with it. So, back to the slums. After looting Gorch and the skill testing room, anyway. Some thugs pop up at the edge of the docks, and the bag's full - we need to visit our stash and sell some junk to a merchant soon.
As I'm doing this, I notice someone I rarely see.
With that taken care of, we head into the back rooms.
Guards accost us farther back, and pick a fight.
Then I realize something. Bernard's store will fully reset when we finish this quest. SO if we loot him now ...
Hexxat drinks potions of perception and master thievery for a PP score of 230. And I even get something I wasn't expecting - a scroll case, which the later version of the store doesn't have.
All right, back to Hendak.
I've been stealing potions for a while now, and I really should use some of them. Dorn drinks a stolen oil of speed as we head back for the Beastmaster.
You know what? I'll give it another stab. Hexxat drinks a (stolen) potion of invisibility, then stabs again on the next round.
We head back to free the slaves, then kill the guards in their way ... hey, where's Hendak?
Since Hexxat's potions are still going, I loot Bernard's store again - though he can keep some of the ammo this time. Three out of four party members get new weapons from the improved store, and Dorn's getting one soon.
We're heading down through the sewers next, but Viconia has something to say first.
Now, on to the fighting. Some hobgoblins come first, and we open with a backstab as always.
Some more monsters follow. Oozes and an otyugh can't do much against a poison-immune Dorn (from Albruin). The mustard jelly rolls a 20, but he saves against the Slow effect. Another jelly, a carrion crawler ... the Oil of Speed wore off already? Time flies.
Also, just one carrion crawler? Back in the BG sewers, we saw whole packs of them. I thought I installed a component for that ...
Looking at the spawn point - encounter difficulty 2? Most BGEE spawn points were at 200. And most BG2EE spawn points seem to be at 2 like this one. My understanding of the system isn't there yet as I play this, but it's percolating.
Beyond that point, it's another pack of hobgoblins. They go down easily.
I talk to Quallo about the treasure, and Korgan gets impatient.
Instead, the party heads up to face the slavers.
Then we head back down to fight in a more favorable location. The priest casts a spell ...
Also, that critical backstab from Hexxat? The slaver in question would have gone down in one hit even without the crit.
Once we finish with this crowd, the captain is alone upstairs. He goes down easily without his support, though he does land a hit.
Viconia's romance continues, with an apology of sorts.
We deal with the trolls here - Korgan has a flaming axe to execute them - and free the slaves. That earns a point of reputation (up to 7) and complaints from multiple party members. Don't worry. I won't let it get too high.
After clearing out some traps and a pair of yuan-ti, we reach another group of slavers. This one with a pair of wizards.
The second wizard does manage some spells before falling; I had trouble getting the party to focus properly. One of those spells is a Confusion.
As we leave the ship ...
Then that last slaver guard goes hostile, Hexxat backstabs him, and Brus shows up to update his side's offer.
Finally, the reward.
Korgan passes a million as well here, and takes level 12. He's specialized in dual-wielding now, so he puts a second axe in his off hand instead of a shield.
Next time, this party grows to five. We're still not ready for the sixth.
On the way to meet Edwin again, Viconia speaks up, telling stories of her past and trying to provoke a reaction.
And then we arrive.
Edwin goes up to 1 million experience and mage level 12. He gains 6 HP from those three levels (roll 2/4) and takes sling proficiency. And then I feed him a pair of Int-boosting potions and start scribing. Also, sell and steal back the scrolls I've found out in the world, for 13K free gold. I'll allow plenty of shoplifting, but I won't allow stealing back something that was already stolen from a fence - no infinite loops.
The first round of this scribing, before I even get to the erasing and re-learning, is good for 61K experience. Each. And since I'm planning to rest immediately afterward, no reason not to scribe everything; that's about another 115K each. Viconia reaches level 13, Hexxat reaches level 15 (all skill points to stealth), and Edwin reaches level 13. We memorize spells, rest at the Sea's Bounty, and end the session.
After the rest, Hexxat gets a word in.
Also, I forgot to turn off automatic spellcasting on Edwin. Doing that now. I'll accept that Stoneskin, but no more spells without my explicit choice.
The new session comes, and I start with a bit of shopping - actually paying for goods this time. Since we're at reputation 8, hiding Viconia gets us to neutral rep and the best prices we're going to get.
From Ribald, we buy the girdle of hill giant strength, a gem bag, The Victor, a rod of resurrection, and the AC 3 bracers. That costs over 30K total gold, bringing us down to almost nothing. Quick, sell some stuff... jewelry, miscellaneous junk, and magic items to Galoomp. And then steal back the good stuff so I can sell it again to a fence later. That brings enough gold for one more expensive item - the Robe of Vecna - and 15K gold to spare.
Then I drop below 15K gold buying a few potions of genius and mind focusing. Edwin's future scribing sessions deserve that coverage.
And now, back to the action. Well, there was a visit from Habib and his unconventional tithe, and an encounter with some thugs, but nothing too serious.
As you can see there, Dorn chose to pick a small fight - but not to make the whole wedding hostile.
He follows up with the chaotic choice at the main event:
Once that's done with, Dorn gets down to business.
Then things break worse.
I try again. This time, Bollard fights back, but the cutscene still hangs. This one's repeatable; clearly, Dorn being player 1 has broken the cutscene.
All right, plan B. I'm just going to avoid that cutscene and make it a general fight.
Also, the unconscious person is that way from a hit with Viconia's melee weapon "The Sleeper".
Kill a few stragglers...
That clock is a seven-day timer. I'd like to be at just over 1.25 million XP when it ends, for the recruitment trigger. That's not far from where we are already - so we're not doing any major quests. Instead, we clear out a few small things.
First, we head back down below the Copper Coronet.
Lilarcor is, of course, an upgrade over the plain +3 two-handed sword Dorn had. To celebrate its acquisition...
Next, we return to the temple district to start a side quest.
Sir Sarles is exactly how he usually is, though our party does have some suggestions:
We visit Jerlia, setting things in motion for both real and fake illithium. Check in with Unger, and then visit the Bridge District for the first time.
I run into a little oddity - the mugger ambush runs into Neera's introductory scene, so the cutscene plays with the battle music.
Also, darkness falls in the middle of the scene, and that little movie plays. The only problem with it all is that Hexxat loses her stealth and can't sneak behind that mugger (visible in the picture).
Then we get on with an investigation. Gather evidence, confront tanner...
As you can see, Dorn has leveled. That's level 12, which brings dual-wielding specialization. He'll use two bastard swords in melee; for now, his off hand is Kondar.
Down below, several party members interject.
AI off. Look for traps before going anywhere. Then disarm, loot, and head down. It's a battle.
Fortunately, that was a minimum-damage roll. And now he's visible with no tricks available. He goes down fast. And then the second wave arrives.
On the way back to Aegisfield, Edwin pries.
That brings 45K experience, and a reputation boost to 6. Now, since we're in the area anyway, we check out some unmarked buildings:
We open with Chaos, Horror, and cancel the Greater Command. With the mage confused and panicked already, we don't need it. The priest takes a backstab from Hexxat and a crit from Dorn - dead. The enemies flail a bit in their confusion, but don't deal any damage.
The cutpurse in the west holds more scrolls to steal. And as we're handling that...
Then, we enter the building to confront Neb. He goes invisible immediately after speaking. But Albruin has an ability...
I move toward an inn ...
And then, I realize there's still something I meant to do before the rest.
Viconia interrupts with another romance talk:
Then we go upstairs.
And now, we finally rest. Dorn is just 675 XP away from the key threshold. Time to start killing time; a random encounter will probably come along to cover that last bit. Head to the city gates to open up travel ...
With travel opened up, we head to Watcher's Keep. Buy the potion case, don't go in. Travel back and forth between Watcher's Keep and the slums, for four round trips at 20 hours each. The timers run down.
Oh, and that bit with the broken cutscene in Dorn's quest? We'll come back to that. We dodged this problem, but it doesn't stop here.
The party enters the Copper Coronet, and immediately performs that final recruitment.
Anomen is, of course, not the easiest to get along with in an evil party. He has two conflicts with Dorn we need to avoid.
The first comes up immediately if Anomen and Dorn are both in the party and Dorn's plot is still on the wedding crash. You can choose between Anomen and Dorn, but the one you don't choose goes hostile. That is, of course, why we waited so long to recruit Anomen; we needed the variable set in that last Dorn dialogue to dodge this conflict.
The second comes randomly if Anomen passes his knighthood trial, with a banter. It can be resolved without a fight, but that's still Anomen leaving forever or Dorn returning to the Temple District - not an option in this party. Of course, this one's far easier to avoid. We weren't going to let Anomen pass his trial anyway.
Then, of course, the romance track begins immediately.
After preparing spells and resting, we head out. It's time to earn our keep.
With that, we arrive at the keep. And find trolls. Outdoors, it's one troll or one ice troll per spawn point - laughably easy. Once again, it's that "Encounter Difficulty" of 2 breaking things.
Meet with Nalia, get the full picture. And some fire arrows we won't use. Inside, the first troll brings level 13 for Korgan:
We talk to Daleson...
We head through the secret door for the first flail head. While we could activate the forge at no cost, it isn't worth it; we need at least two heads before the flail is worth using at all.
The first serious fight is a big pack of trolls in the main hall.
Dorn takes a significant chunk of damage in this fight, though I don't spend any healing resources. Just pass that regeneration ring around.
Once the ground floor is clear, I head outside.
Kill some dogs, open the gates.
Back inside, the guards join in against one new troll. Then we head up the stairs. More scattered trolls await, plus one more dangerous monster.
Breach is a seriously unfair spell in the vanilla spell system. Only Spell Shield or full level 5 spell immunity can block it, and the latter is only available for liches and rakshasas unless you use a super-rare scroll of protection from magic.
Continuing on, we meet the most annoying noblewoman. Four out of five companions have something to say:
That opens the way to the golems, and I start bashing.
Next up, Glaicus. Normally, I'd cure him with a dispel. But this is an evil party.
Still, despite that blindness, he manages to hit Korgan twice before going down.
There's a bit up on the roof too, and night has fallen. Hexxat can take off the cloak.
All right, back to the iron golem. We have the full Flail of Ages now, which will be Viconia's melee weapon. I take the hammer ... no action. Another melee weapon we can use in the fight; golems count as "giant humanoid". Dorn has Lilarcor, Korgan has Stonefire, Anomen has Kneecapper (but he's merely proficient in hammers), Viconia has the Flail of Ages, and Hexxat has the Blade of Roses. Only Edwin completely lacks a usable weapon for this fight. Apply a few cleric buffs, then start the fight.
There are a few trolls to kill, umber hulks to feed, and loot to grab. Then comes the big fight.
Back again, from the start of the basement. With a slightly different buff set for the final fight.
With the quest essentially complete, I step outside.
Then we return to Nalia.
As a side note, one thing this quest provides? A massive abundance of magical ammo.
Before we can rest and prepare for the next challenge - the Haste we used fatigued some of our party - both romances continue.
In the new session, I return to Athkatla. Pick up the illithium alloy, get the order of things wrong ... well, if I'm in the temple district anyway, might as well talk to Telwyn.
Now, get things right and talk to Sarles.
Also in the area, I talk to Delon, Madeen, and Tolgerias. Korgan and Edwin have plenty to say in that conversation.
Since I'm in the building anyway, I hand in Neb's head for a 2500 gold bounty and a point of reputation. Up to 5.
All right, now we can go back to the temple of Talos.
I decide to actually use Ardulia's Fall for once; it'll be Anomen's default mace for a while. Hexxat reaches level 16, boosting her Set Traps score to 55 and taking katana proficiency. We don't have a katana for her yet, but that's on the docket sometime soon.
One last thing before we head to the graveyard - it's time to close out the business with Mae'var.
I start from the top.
In the basement, I go for a backstab on Mae'var. And he evades it - by walking slightly forward? Grr.
Even this party isn't much of a threat.
Note also the plus signs. Cleric level 14 for Anomen and Viconia, so they now have level 7 spells. The big reward from Renal (45.5K XP each) doesn't earn us any new levels beyond that.
And that's it for now. Next time, we head to the graveyard. We have some things to do in tombs.
We enter the graveyard at night, ready to speak with our mysterious contact - but other matters take priority.
In this case, the creatures in question are mind flayers. And umber hulks.
And then things go wrong. For some unknown reason, the monks all go hostile - my best guess is that a confused monk attacked an ally, and that got them all mad.
All of a sudden, things get worse. Keno lands a stunning blow on Viconia, and there's nothing we can do to protect her.
Cast that Raise Dead. And a Heal. Viconia is back to full strength. But we can't do that for Hexxat; only waiting out her one-hour timer will bring her back. Well, at least we can use that time for regeneration; 50 points to spread around our injured characters. The timer ends, and ...
There's one more thing to do over here ...
Moving on, Hexxat warns us about disturbing coffins. We ignore that. There's treasure to be found. Also mummies.
As a curiosity, most mummies can be defeated by casting Resurrection on them. The mummy is brought back to life as a human, who says a line and leaves. No experience reward. The rod of resurrection is not a valid substitute, as even in patch 2.6 it only casts the subspell with the effects - not the overall spell that the script checks for.
Up next, it's a fight against a full party of enemies. Well, we could just steal the key and skip it, but that's no fun. Prepare with buffs and summons:
By the time of the final fight, the haste has worn off and the party's feeling a bit of fatigue.
With the scepter claimed, we are transported back to Athkatla's graveyard. Edwin pipes up immediately.
And then, some romance.
Then, finally, the woman who has been waiting for us all this time gets a chance to talk to us.
Nevaziah is a lich, at least in appearance.
Dorn gained enough experience for a level from the ghasts and mummies just before, and then Korgan and Edwin do from Nevaziah himself. Blackguard level 13, berserker level 14, conjurer level 14. No decisions to make.
After a visit to our stash spot, it's off to the docks.
Arkanis does drop a unique item you don't find in the other path - the Rifthome Axe +3. Korgan appreciates it, though the "prefer melee" AI mode has a habit of switching to its melee mode instead of the more damaging Frostreaver. I don't understand that one.
With this battle concluded, we don't leave the docks. Instead, we head over to Cromwell.
Before we even leave, a romance timer runs down.
After a trip to the Promenade to loot Jayes - lots of scrolls, a Martial Staff for Edwin - we return to Bodhi to report success and pick up the next mission.
On the way over to the Government District, we run into some bandits:
That brings us to the Government District from a different entrance than usual. We come to the Vulova estate from the south ...
The guards exit through the nearest door ... the Waukeen temple, not Vulova's estate. I followed them before realizing my mistake.
The Shadow Thief dagger is a terrible weapon. 1d4 damage, no strength bonus. It got bonus APR in some versions of the game, but no longer does now. Still, Vulova only has 15 HP and is unarmed...
If Vulova sees you and you're close enough, he initiates dialogue to beg for mercy and sic his guards on you. We didn't give him the chance. And with the instant kill, the guards aren't even hostile yet. Hexxat switches to one of her good weapons...
We plant the murder weapon and the cloak in the fountain, loot the chest, and head out.
Before going back to Bodhi, we handle some other things. First, a romance talk that had me laughing out loud:
Looking at the dialogue, it's a reaction check. To get that line, either player 1 is a non-blackguard paladin or player 1 has a "friendly" reaction. Dorn is wearing the Nymph Cloak for 19 charisma, so that combined with his reputation of 5 is a +5 reaction score. Just barely enough for the "friendly" threshold.
And then, back to the temple of Talos.
That's it for now. Next time, we head out for Dorn's quest.