The enemies in the Vale of Shadows are immune to all sorts of disablers. But not Hold Undead and Web.[spoiler]
[/spoiler]Notice that Espellier and Fobie are both dead. This is because raising party members is ridiculously expensive in HoF mode, when your level is higher, and starting with a level 1 party and no gear means you're pretty much broke if you suffer too many deaths.
This is me underestimating the radius of a Fireball.
[spoiler]
[/spoiler]It seems that spell damage now bypasses Mirror Image.
Espellier, our only surviving sorcerer, has become an excellent tank thanks to Mirror Image. She gives us time to stack Web and Spike Growth spells. It's not enough to kill enemies, but it's enough to weaken them considerably.
[spoiler]
[/spoiler]Just not enough to keep Valos from getting blasted by spell damage when that Skeletal Mage survives.
This is me underestimating the radius of a Fireball. Again.
[spoiler]
[/spoiler]
But by using our spells a little less stupidly, we keep the rest of the enemies from crushing us.
[spoiler]
[/spoiler]
The Temple of the Forgotten God finally lets us put Chromatic Orb to good use again. And when we suffer a setback, Valos can switch to salamander form to gain undispellable immunity to fire. Even in HoF mode, Fireball is an amazing spell.[spoiler]
First, let me say I HATE the new forum image uploading system. It won't take the default bmp's, meaning everything has to be converted to jpg. This may discourage me from posting any more runs here. This is really, really awful.
Okay, I'll TRY to post what I wanted to post, for which I had a bunch of images.
You know what. It's late, and the "update" to the forum has killed my desire to post. I'll just summarize it and try to let the pictures tell the story.
It's the worst thing that can happen, with participants of this thread losing interest in reporting because of the forum software change. I can only say that I've got used to the Snapper program and can't imagine myself attaching bmp files to the reports. You know, there was an unofficial rule (even before the update) that images attached to the posts in this thread shouldn't be bmp because they're very large and it's hard to load pages in this thread full of bmp images.
You know, there was an unofficial rule (even before the update) that images attached to the posts in this thread shouldn't be bmp because they're very large and it's hard to load pages in this thread full of bmp images.
Agree wholeheartedly. On Bioware forums we mostly tend to follow the same rule as it could be really nerve-racking to watch the loading of pages full of (especially un-spoilered) bmp images...
@BillyYank , Thanks for pointing me to the Irfanview utility. That will make it a little easier, although still not as convenient as before.
@bengoshi , for some reason, when I try to use Snapper with my IWD:EE, it just makes blank white screens instead of a screen shot. At least it worked with MM6. Also, I didn't know about the difference in loading times for a bmp vs. a jpg, so thanks for educating me about that.
EDIT: @semiticgod , I've had a lot of trouble with Fireball radius in IWD, too. It seems it's a good bit bigger than in BG2, and it calculates the event horizon of the damage effect differently.
@bengoshi , for some reason, when I try to use Snapper with my IWD:EE, it just makes blank white screens instead of a screen shot. At least it worked with MM6.
I think it is not connected to IWDEE. It works fine for me no matter what I do: watch movies, browse Internet, play any game.
The Snapper only saves screenshots into a certain folder in the JPEG format, it doesn't change the view, it only makes a photo of what you see on you desktop. I would check the settings - check so that you have Entire desktop enabled, and a certain folder chosen as a saving place.
@bengoshi , nope. It just takes a picture of a big white square and saves it to the folder. The settings are fine. It's one of those mysterious computer incompatibility issues. The problem could be in my graphics card driver, my security software, Windows 8 settings, or almost anywhere. I don't want to spend time troubleshooting it further. I'll just use the Irfanview and do batch conversions. Thanks for trying to help, though.
Here's a screenshot. The first three are what it's doing with IWD. The fourth is a successful screenshot I just took from MM6. So why is it working with one game and not the other? [spoiler]
@BelgarathMTH: I've had the same problem with Snapper, which is why I hesitated to post screenshots of my IWD run before. I don't know what causes it.
On to Dragon's Eye. Web doesn't work against Lizard Men, but Hold Person and Charm Person still do, as does the Siren's Yearning. Marilyn Blueapple, our bard, plays an important role in reducing enemy pressure. [spoiler]
[/spoiler] As I mentioned before, Valos got chunked by a hostile Static Charge spell. Even in normal mode, Static Charge is highly effective at chunking party members.
I permitted myself a reload, as I had decided earlier on that I would not tolerate chunking. If there was a mod component to prevent it like there is in SCS, I'd have installed it.
Also, I was wrong before: I believe it is possible to prevent chunking with the Disable Permanent Death opcode. I just didn't set the right parameter to 1 before.
Valos is an important tank in Dragon's Eye because of his immunity to poison. Mirror Image and Stoneskin won't stop spider poison, which is invariably fatal for my sorcerers if left uncured. [spoiler]
[/spoiler]
When Espellier dies to poison again and the party has to retreat, a wall of enemies prevents Poppy from getting close enough to the exit for the party to escape. To move the enemies, we have to break invisibility. Valos does so, and our other party members form an invisible wall of our own to keep Valos from getting mobbed. But a couple of Phase Spiders just jump over the wall. Fortunately, spiders in IWD:EE aren't immune to poison, making Valos' spider form an excellent tool.
[spoiler]
[/spoiler] Dragon's Eye has some tough fights in it, but Web and Fireball are devastating in concert. Fireball just does so much damage, and with 3 or 4 characters able to cast Web (Avenger, sorcerer, sorcerer, and eventually bard), we can paralyze large groups of enemies at once. Note that Trolls are vulnerable to Web even though Lizard Men are not, despite being the same size. [spoiler]
[/spoiler] At the Eldathyn lair, I find that Emotion is virtually useless, as the projectile fails to make contact. It doesn't even display a successful saving throw--the spell simply does not hit. [spoiler]
[/spoiler] Out of four or five castings in different fights, I only see a single enemy even once make a save vs. spell. Over 90% of the time, Emotion does nothing. I can't believe the projectile doesn't work--this spell was perfectly functional, albeit not party-friendly, in vanilla. What happened?
On to Yxunomei's lair. Fireball kills almost everything before the fight with Yxunomei herself. [spoiler]
[/spoiler] I like that it's possible to upload multiple images at once, but I don't know why they appear out of order. Icewn039 comes in between Icewn015 and Icewn033.
Feeblemind plays an instrumental role in the fight with Yxunomei. But I'm not the first to use it. [spoiler]
[/spoiler] Luckily for us, Snowy Tae has Heal memorized, and so we can cure it. I almost memorized Wondrous Recall before deciding I probably wouldn't spend the time in-combat to cast it.
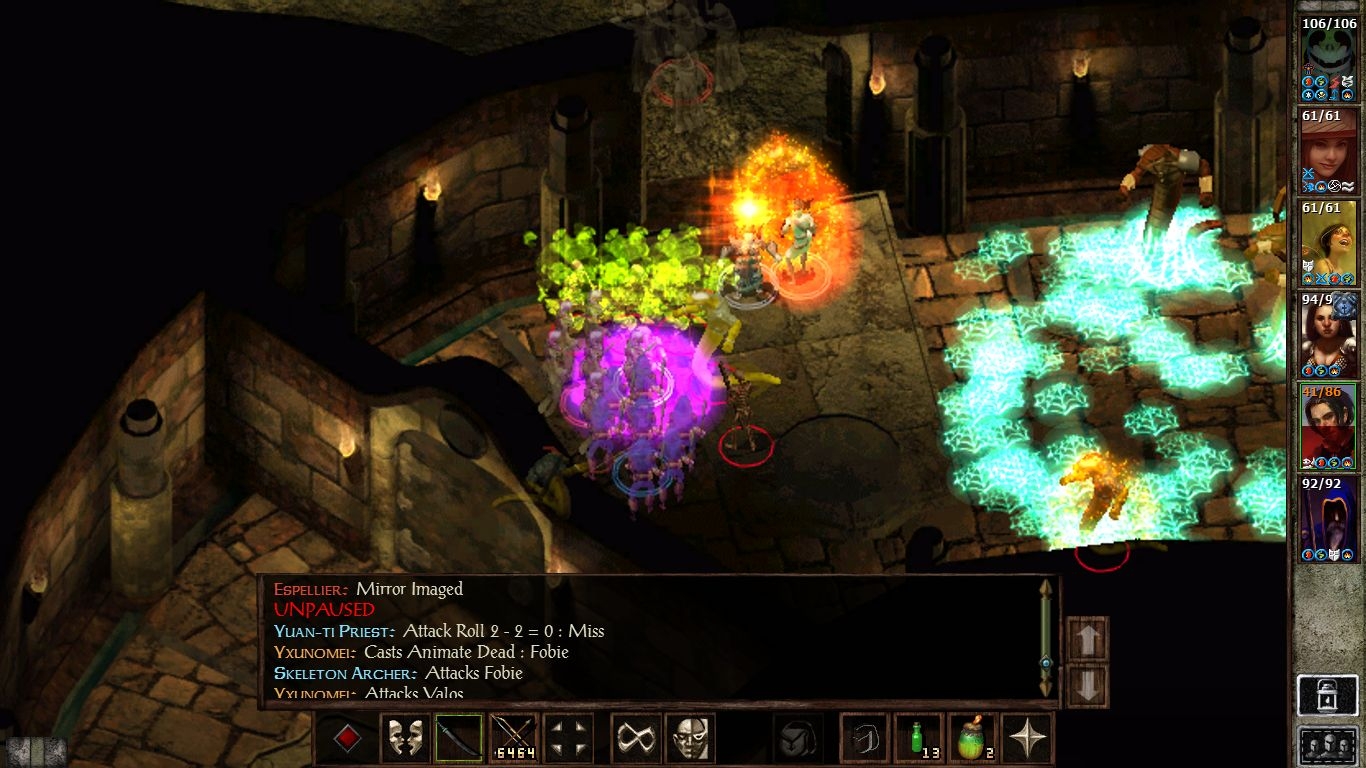
Yxunomei puts skeletons right on top of us. Summoning spells are terribly strong in HoF mode, and not just for the party. Yxunomei's skeletons are no longer just minor annoyances; they are powerful and long-lived enemies. [spoiler]
[/spoiler] After some failed attempts, Yxunomei fails a save against Feeblemind, her MR already reduced to zero. [spoiler]
Here we are trying to escape being trapped enemies who can mysteriously see through invisibility and teleport across the dungeon during area transitions. [spoiler]
[/spoiler] Here we are preparing to take vengeance on said enemies who gave us so much trouble. [spoiler]
[/spoiler] Here we are torching said enemies. [spoiler]
[/spoiler] And finally, here we are nuking the crap out of everything else in the dungeon. [spoiler]
Here, I *finally* Silence the second skellie mage after *three* casts. Trying this sort of thing legitimately (i.e. without using metaknowledge) is very dependent on having a character who can stealth and scout ahead, to determine the visual perimeter and exact location of enemies. So far, Imoen has managed it. Minsc could do it better, but I need him to stay in plate mail. [spoiler][/spoiler]
Disaster! Jaheira gets killed by skeleton knights and archers before I realize she's in trouble. Retreat! As we fight while falling back, Minsc is almost killed. Dynaheir saves him by killing the spectral knight that was about to kill her Warder with Magic Missiles. She basically had to unload her whole first level spell book on it, but she did it. [spoiler][/spoiler]
Back to Kuldahar to raise Jaheira. We return after days of recovery and travel to attack Kresselack's remaining army again. We basically lather, rinse and repeat the same strategy we used with the last skeleton mage. Imoen stealths and spies out his exact position. I stand behind her mark and cast Silence. Again, it takes three casts before he fails his save. Once he does, the rest is relatively easy. [spoiler][/spoiler]
Now for Lysan. Dynaheir casts two Webs to hamper both Lysan and her Yeti army, finally beginning to earn her keep. I read a Chant scroll, which turns out to be a mistake. I had wanted to cast Hold Person and Silence at the beginning of this fight, and I forgot that Chant disables further spellcasting. Also, I figure out the hard way that Lysan is immune to normal weapons when I start getting "weapon ineffective" messages on all our attacks. So, we concentrate on the Yeti while Lysan keeps getting held in the Webs. At last, my Chant wears off, and I can cast Hold Person at Lysan. It works! The battle is effectively over. [spoiler][/spoiler]
I had to stop using Shillelagh with Jaheira because of a game-breaking bug with the spell, where the "magical weapon in use" flag becomes permanent. I managed to repair the game by casting Doom on her and paying the temple to cast Dispel Magic. But, it means we can't use the spell any more, as we will soon be far away from easy access to the temple. That's a shame, because Shillelagh would have been very helpful against all the mummies and spectral undead in Kresselack's chambers. I managed to sell a bunch of potions and magic weapons to make enough money to buy the Spider Crusher club for Jaheira, though, so that will mitigate the loss of the spell.
Update on the BG canon party in IWD. We have finished the Temple of the Forgotten God.
Verbeegs hit really hard, and without skald song to increase AC by 2, they hit a lot more often than I'd like. This is making us use healing potions and other healing resources like crazy. It's also making Jaheira's Goodberries pretty darn useful for in-between combat top-offs. I feel really useful as a cleric, because I often stand behind Jaheira and Minsc and cast Cure Light Wounds during combat on whichever one of them needs it, and I can join the front line in a pinch.
In the long corridor, we use our usual tactics. Early on, Jaheira, Dynaheir, and Imoen all get Held, but I have gained access to 3rd level spells, and have prayed for Remove Paralysis and Exaltation. Via Remove Paralysis, the Hold Person is a non-issue.
After we get to the place in the corridor where we all "have a bad feeling about this", I have Imoen go into stealth mode and scout ahead. As usual, she finds the exact positions of the enemy party, and falls back to place a mark for our spellcasters. We practically empty our spell books at them. Dynaheir casts Stinking Cloud and Web. I cast Silence. Dynaheir casts her newly mastered Skull Trap spell. The enemy doesn't stand a chance.
Well, things are going well so far. Yay for Dynaheir and Stinking Cloud. I take back everything I ever said about her being useless. Sorry, Dynaheir, you're starting to save our butts again and again.
Oh how I hate beetles. Bad Beetles! Minsc and Jaheira are stunned by Beetlejuice and are almost dead. Dynaheir casts another Stinking Cloud. Well, what do you know? Beetles are susceptible to their own stinking hi-jinks. Take that, Bad Beetles! Thank you again, Dynaheir.
See Bad Lizard King and his Army. See Bad Lizard King's lizard wizards get Silenced by the Holy Roller (Me!). See Bad Lizard King and his Army get defeated by yet another Stinking Cloud. Thank you yet another time, Dynaheir.
This deserves a triumphant victory portrait. See our party standing over the dead Bad Lizard King in beautiful ROYGBIV rainbow formation.
Uh oh, Jaheira just inexplicably and suddenly died. Bad Game. (I can see no reason why this happened. She was at almost full hit points, she failed a save against disease, and bang, sudden death.) Oh well, back to Kuldahar to get her raised again.
Now back to the Dread Dragon's Eye. What will happen to us?
Next up:
Bad Beetles, Boorish Trolls, and Bogus Painbearers
On to Dorn's Deep. I usually deal with the Ettins using Chromatic Orb, but since I've been getting terribly impatient with the pace of this run, I have been spamming Fireballs with Improved Alacrity on every low-intensity fight to speed things up. It takes ages to kill stuff in Heart of Fury, and our strategy is kind of monotonous. All I have to do to win almost every fight is throw out Fireballs every round for 6 rounds... which isn't particularly interesting when you do it enough times.
Anyway, Dorn's Deep has some very high-intensity fights that I often struggle with. The Drow Vanguards, Drow Spellswords, and Drow Sorcerers are all nightmares. At 66 magic resistance, they're very hard to hurt with my normal magic-heavy parties, and they are inexplicably immune to the Siren's Yearning, as well as Greater Command. Worse yet, the Drow Sorcerers spam Magic Missiles, which can be devastating at high difficulties like Heart of Fury mode. The Drow Vanguards, with their Bolts of Biting, pose the same problem. And the Drow Spellswords come buffed with Stoneskin--they're that much harder to kill.
But Entropy Shield blocks Magic Missiles as well as bolts. Although Insect Plague doesn't have much impact on the first fight, Valos tanks the enemies admirably, and Web and Death Fog are very effective once Espellier has cast Lower Resistance on the drow. When the battle drags on and the Drow Sorcerers won't go down, Fobie tosses a Special Snare from the hallway and holds them.
In the next fight, I pay too little attention to our own sorcerers' defenses and both Poppy and Espellier get killed. I consider running away and resting, but decide to go ahead and try to finish off the remaining enemies. Between Webs and Special Snares, we weakened the surviving drow enough to polish them off.
Krilag, as always, is a cinch. Big melee enemies like him are easy to knock out with Chromatic Orb. Fobie also lands a 122-damage backstab on him, not that it was really necessary.
Snowy Tae has hit level 14 and can now cast Symbol of Hopelessness, one of the best disablers in the game. Unfortunately, now we have to fight Terikan the lich and his Greater Mummy buddies, who are immune to Symbol of Hopelessness... and can cast it themselves.
I never knew how to handle hostile Symbols of Hopelessness, since I had heard that in IWD2, only Exaltation could cure it. That doesn't hold for IWD. Symbol of Hopelessness in IWD uses the sun opcode, so a Free Action spell can easily block it.
Unfortunately, Poppy still gets disabled by a Symbol of Hopelessness spell in the fight with Terikan, as Terikan apparently can cast magic attacks, including Breach. She loses all of her defenses. We struggle to bring down Terikan and interrupt the Greater Mummies' spellcasting (they also cast Symbol of Pain, against which we have no defenses besides our saves) at the same time. Eventually, we paralyze one of the mummies with Hold Undead and trap the other one with a level 16 Special Snare from Fobie. We gradually wear down Terikan and quickly loot the nearby coffins before Terikan can come back. Terikan, unlike all other liches in the IE games, actually comes back until you destroy his phylactery, and it only takes him a few rounds.
He also reappears in the next chamber and starts summoning undead again. Plus, the rooms nearby are often occupied by more Greater Mummies, and I always forget which room has his phylactery and which room can destroy the phylactery. This is a long fight that really taxes your resources, but thankfully Terikan didn't put much pressure on us, and so Valos and Snowy Tae had time to run around with the Boots of Speed while under the effects of Improved Invisibility and Sanctuary and search every room to find the phylactery.
As usual, we had trouble with the Bronze Sentries that appear after Terikan has fallen. They're immune to fire, so our Fireballs are useless. We had to rely on Web and Death Fog instead, and the Bronze Sentries wouldn't stay in the Webs.
Shortly after we start working on the Snow Trolls and Ice Trolls in the next area, Poppy and Espellier hit level 14. Our sorcerers can now pick level 7 spells. I've been waiting for this for a long time.
For those of you who aren't aware, it's possible to produce an extremely powerful stream of fire by bouncing Agannazar's Scorcher spells between two mages with (Minor) Spell Turning active. It also works with Lance of Disruption, but since the loop eventually hits the mages despite the spell turning effects, it can be suicidal, as it's hard to make mages immune to crushing damage (Stoneskin won't last forever). It may also work with Lightning Bolt in IWD:EE, but I've found it ineffective in BG2:EE (in vanilla BG2 it works fine).
Minor Spell Turning will only bounce 4 spell levels, which means an Agannazar's Scorcher spell or Lance of Disruption won't be duplicated that many times. But Spell Turning, the level 7 version, bounces 12 levels, and is far, far more effective for producing the scorcher loop. It's a huge game changer. Also note that if you put two Agannazar's Scorcher spells in a Minor Sequencer, it will only count as one spell, and will therefore bounce just as many times as a single scorcher spell (as opposed to burning through the spell turning effect twice as fast).
I discovered this trick a while back--I call it the scorcher loop--and have been looking for a time to put it to good use. And the spell is so powerful that it's really better suited for Heart of Fury or Nightmare mode--which I haven't played in a long while. I try it out against the trolls.
The scorcher loop in IWD:EE appears to behave a little differently than I'm used to. It begins fairly weak, only striking several times per round. But close to the end, when both mages' Spell Turning spells are running low, it suddenly strikes many, many, many times at once... so many times, it seems, that it instantly kills even enemies at full health.
This behavior is similar to the BG2-exclusive Death Ray Zorcher, which is what you get when you use the Wand of Lightning trick to duplicate the effects of a Spell Turning scroll (or the Book of Daily Spell, if it's on the Spell Turning page) on two characters while a third one hits both of them with an Agannazar's Scorcher spell. Testing found that the Death Ray Zorcher, once it got going, could slay Nightmare mode Adalon in a single round once I brought the flame across her.
I don't think this scorcher loop is quite that strong. The Death Ray Zorcher strikes thousands of times and lasts several rounds. But our version is enough to kill Joril and his Frost Giant Guards in seconds.
Valos hits level 15, and somehow gets struck by his own Static Charge the instant he levels up. A save vs. spell kept him alive. Level 15 in IWD doesn't grant HLAs like it does in BG2, and the druid's spell slots are equivalent to a cleric's, instead of far superior. Level 15 also comes at 1.8 million XP instead of 3 million. But it's still a huge game-changer because it grants access to Water Elemental form, with its notorious 75% resistance to physical and acid damage (and an extremely dangerous vulnerability to electricity and cold damage). It's excellent for tanking, as long as you're only dealing with physical damage dealers.
But I'm not going to use it in this area, even though Armor of Faith and the War Chant of the Sith could make Valos immune to physical damage in Water Elemental form (and his vulnerability to Winter Wolf breath could be remove using Protection from Cold and the Mantle of the Coming Storm). Instead, I incinerate almost every Frost Giant and Winter Wolf in the area with one single scorcher loop.
I pull the same trick on Kontik and her Black Ice Knights. Kontik has no defense against it--or even against physical attacks, as she arrives without Stoneskin. She and all of her associates are dead in seconds.
But the scorcher loop is extremely party-unfriendly. I allow two of my characters to go without fire immunity when we're taking on the Kerish and the Frost Salamanders, in favor of cold immunity, and when Fobie and Snowy Tae run afoul of the scorcher loop, they die instantly.
It costs 10,000 gold to bring back Snowy Tae so she can resurrect Marilyn Blueapple.
Bad Beetles weren't so bad. We used Dynaheir's Stinking Clouds and Fireballs, Magic Missiles, and lots of ranged fire. One mishap caused me to need to cast Remove Paralysis.
Jaheira died again to wraith spider bites. I was watching for her to get a disease icon on her portrait, but it never showed up. Reviewing the transcript, she did get diseased three times. So, I can't watch the portraits for that. These wraith spiders are like mind flayers. Three hits against Jaheira's 15 strength is a kill. I'll have to start checking character records after every hit, just like with mind flayers.
Against Boorish Trolls and Bogus Painbearers, however, things really started to go downhill.
Here, Dynaheir tries to start it all off with a Stinking Cloud and a Fireball. So far, so good.
Shoot, Jaheira and Khalid get Held. This was after the priest who cast it passed out in the Stinking Cloud while casting the spell. When he finally made his save and got back up, his spell completed. Hmm. It seems to me like the game is cheating, but whatever.
I save Jaheira and Khalid with Remove Paralysis. Meanwhile, Dynaheir finishes the offending priest with Magic Missiles.
Minsc is in trouble already. His AC of 2 simply cannot tank trolls. They are owning him. A priest gets off a Recitation, buffing the trolls and debuffing the party. We are in big trouble. Time to retreat. In hindsight, if Dynaheir had cast Haste, this could have turned out very differently. In our panic, she forgot to cast it.
We retreat far enough to get Minsc healed. We're ready to rally.
Sigh. Minsc gets Held. As you can see, the cleric that did it is caught in a Web. The spell went off anyway. Passed concentration checks while Held in Web? Okay, if you say so, Game. I started a Remove Paralysis, but in panic, I also started a Cure Light Wounds before it fired. My fumble costs Minsc his life. Dynaheir had tried to cast Haste, but she got stuck for some reason, with the icon on her portrait to indicate she should be casting it, but the round went by, and she just stood there. I had to have her move and start it again, but it was too late. We have to get the heck out of there.
Okay, we retreat back to Kuldahar in shame. Upon returning, we have Dynaheir cast Haste, this time successfully. Unfortunately, now *Jaheira* gets Held, just as I get my own Hold Person to disable the priest who cast it. We pick up Jaheira's belongings and body, but this time, since we have Haste, I order the party to keep attacking the three trolls. With Haste, we manage to take them down. But the priest is still there, so I order a new retreat. We have a dead party member, and I do not press forward under those circumstances, no matter how tempting it might be to press a perceived advantage.
After we return, it turns out that that lone priest and one troll were all that were left. So it's over. Imoen hit level 7 while we fought the beetles earlier, so, with great trepidation, I dualed her to mage to keep her in canonical form. While we were in Kuldahar, I bought a 600 gp Potion of Clarity for her and had her fill up her spell book with first and second level spells. She also summoned a familiar.
Jaheira and I have memorized several Find Traps spells to try to survive without Imoen's thief skills. I know that there are very deadly traps below. Some of them we can maneuver around if we see them in time, and some of them that are unavoidable we may be able to tank and deal with in a controlled manner.
I am terrified of Yxunomei, given our bloody humiliation at the hands of these priests and their trolls. I will pray to Lathander for strength and courage, as well as magic. Perhaps with His blessings and help, we may yet prevail in this horrible place.
After paying for three Raise Deads and a Potion of Clarity for Imoen, we are flat broke. If someone else dies, we may not have money to raise them. Lathander help us.
@BelgarathMTH: I was in the same boat. My party was broke for much of the early game as well. Dragon's Eye in particular cost me a lot in resurrections.
Make sure you cast Find Traps, since Dragon's Eye has the worst traps in the game, and you no longer have a thief to disarm them for you. You'll have to maneuver around them.
And don't forget to memorize Chromatic Orb before you open the last door.
@semiticgod , I've never been much of a believer in Chromatic Orb, since in IWD, if the save is made, it does nothing. However, I had forgotten about Dynaheir's minus 2 to saves bonus, from being an invoker, so there's a shot in hell it might actually work, especially if Jaheira and I cast Doom first. Do you know if Doom stacks?
I'm pretty sure we're not going to have access to Greater Malison by then.
My canon BG-in-IWD party is "living in interesting times", indeed.
However, this experience is really making me respect @Ygramul 's "Way it's Meant to Be Played" philosophy in his old IWD thread. If you want a challenging but manageable experience without mods, just avoid the + and - buttons on character creation, and take what comes, just like in pencil and paper. I'm actually thinking now about trying to roll for BG:EE 2.0 and SoD without using + and - to min-max.
@BelgarathMTH: Doom does not stack with itself, but it will stack with Greater Malison just fine--although Doom in IWD does have that very long casting time, and GM only lowers saves by 2 in IWD. Also, both of them may fail against Yxunomei's magic resistance, so it may be worth it to cast Doom more than once.
Chromatic Orb indeed does nothing if the target makes its save. But if you're level 5 or 6, a failed save means being stunned for 3 rounds. That's a lot of free hits on Yxunomei, and a lot of attacks she won't get to make. And if you're level 7 or higher, Chromatic Orb can paralyze the target for <i>13 rounds.</i> It's basically a death sentence if it makes contact, and mages can cast a lot of Chromatic Orbs before running out. Without Doom or Greater Malison, a normal Chromatic Orb only has a 10% chance of hitting Yxunomei, and a normal level 7 mage can only cast it 4 times, meaning you only have a 35% chance of success if you cast them all. But Dynaheir as an Invoker will have 5 castings with a 20% chance of success each, or a 67% chance of success if you cast them all. If Dynaheir uses all of those spell slots on Magic Missile instead, it would only do 21 damage to Yxunomei on average.
Chromatic Orb has a 67% chance of killing a 91 HP target outright. Magic Missile has a 100% chance of removing only 21 HP. On average, we're looking at 60 damage versus 20.
If Dynaheir isn't at level 7, though, it may be worth it to save those level 1 spell slots for Magic Missile, because 3 rounds of stun isn't going to be a death sentence for the likes of Yxunomei.
Thanks to fixes from @subtledoctor I've managed to install the SCS (v.30) on my current BG2EE beta. So this problem seems to be solved now.
Which means, among everything, that as soon as the Monty Python crew finishes BGEE and survives in SoD, it will continue in BG2EE with the new version of the game and SCS.
Dynaheir and Imoen use Web and Fireball to clean the house of cold wights. I stay mostly in Turn Undead mode, and I can Turn a lot of them, and chunk some of them. Having pure class clerics and mages in the party is very helpful here.
Jaheira uses Find Traps to, well, find the traps. Then she bravely tanks them. The traps in the western half of the dungeon all Cause Disease. I have her use our last two Mummy's Tea's against the first two of these she tanks. On the third one, I figure I'll have her trip it and then wait out the disease. Whoops. I find out the hard way that this disease is permanent and fatal, and cannot be cured without Mummy's Tea or a Remove Disease spell. I have no choice but to trek back to Kuldahar to get Jaheira raised. There is no money to pay Mother Egenia. In Kuldahar, we sell a lot of potions to get the money to raise Jaheira. I will keep at least one Cure Disease spell memorized from now on. Diseases in IWD are a LOT more serious than in BG.
We go back, and I use my Cure Disease spells to help Jaheira tank the last two Disease traps. Now we move to the western part of the dungeon. All the traps here are Skull Traps. Jaheira finds and tanks a couple of them, before we pull all the poison zombies and wights. The three wights with Magic Missiles throw their whole arsenal at Imoen. She survives. We retreat back over the bridge to a more defensible position. From there, it's not too hard to finish this mob. My Turn Undead is chunking a lot of them.
Now for Presio. I have decided to allow Jaheira to use Beetles, because this game is freaking hard enough without restricting what spells I can use. So, she summons and sends in the Beetles to start harassing Presio and her remaining army.
My strategy is to try to Silence her. First try doesn't work. Second try, from a scroll, does the trick.
Umm, no, too risky. Or is it? We come back later, armed with Dynaheir and Knocks. We eventually get the treasure here. Imoen will wear Presio's robe, which should come in handy when she finally gets her thief levels back.
Against the false Eldathians we go. Not much to worry about here. Our usual tactics work well.
Jaheira tanks a trap and gets locked in. Luckily she has a corner next to the locked door where she can escape from the Cloud.
Jaheira dies to a Static Charge. Luckily she didn't get chunked. Back to Kuldahar we go.
Damn it! Hold Person did it this time. That's TWO more Raise Dead. Sigh.
Okay we're back. The traps here are permanent without a thief, so we have to keep maneuvering around them. What a pain in the behind! I will never again voluntarily dual class Imoen. She will stay a thief in BG1, and make whatever level she makes. Hopefully SoD will let her preserve her thief levels when they do whatever they're going to do to her in SoD. (Don't spoil me if you already know.)
The battle we've all been dreading. The strategy is to summon Beetles, and three Invisible Stalkers via High Summoner's Staff. Avoid the traps. Cast Haste. The door locks behind us after Jaheira triggers the fight. (That didn't happen in my last run - not sure why - I had some Tweaks, while this run is unmodded?)
Dynaheir's Haste gets messed up in the chaos. Only she and Imoen are Hasted, the two who need it the least. Jaheira and I both cast Doom, hoping at least one lands. Dynaheir then starts casting Chromatic Orbs at Yxunomei. Khalid is firing +2 arrows. The summons do a pretty good job of keeping the yuan-ti mages at bay. Webs and Fireballs are cast. Finally, Yxunomei succumbs to a Chromatic Orb from Dynaheir. Yay! (Thanks so much for the advice on Chromatic Orbs, @semiticgod .) CO's don't have a +6 to enemy save penalty like in BG, and Dynaheir gets her Invoker bonus. This spell is now paralyzing enemies almost every time Dynaheir casts it.
One more ROYGBIV party rainbow portrait, because I like rainbows.
We encounter the Voice of Durdel Anatha. I don't know this quest, so I look it up and apparently we need to talk to Nym to keep Durdel Anatha from attacking us over and over again. To bring him down for the first time, Espellier lowers his resistance and we blast him with the scorcher loop. Turns out he's vulnerable to fire, despite using the same animation as the Bronze Sentries and Tarnished Sentries nearby, which are completely immune to fire.
The scorcher loop won't work against the Salamanders and Tarnished Sentries in this area, so I hit them with Web, Symbol of Hopelessness, and Death Fog instead. Standard tactics bring down the Myconids, Minotaurs, and Umber Hulks in the next area.
Our sorcerers hit level 16 and get their level 8 spell picks. Apparently there's a bug in which you can lose access to your spell picks by exiting the level up screen early. I correct it with EEKeeper, and also replace the bugged Emotion spell with Polymorph Other. Testing found that IWD:EE's Power Word Blind does not affect party members, so we have to use Doom and then Blindness on Fobie (his base save vs. spell is now 0) to let him set traps in battle.
Buffed to the max, Valos has about -18 AC and can therefore tank the Iron Golems very effectively. Snowy Tae spends one of her precious Boon of Lathander spells to help bring down the Iron Golems faster, while the Umber Hulks behind them die in the Iron Golems' Cloudkill spells. Fobie tacks on a bit of damage with his regular traps, which currently do fire damage.
Malavon's clone awaits us in the next room. He arrives unbuffed, so we kill him with the scorcher loop.
Then the real Malavon appears, heavily buffed. My approach is very disorganized and I expose my party to Malavon's Invisible Stalkers, but I don't get punished for it. I send in Valos alone with a Moonblade.
Moonblade causes 100% spell failure on hit for one round. It's a horribly broken spell that's only balanced by a druid's low APR. But it doesn't work on Malavon--his Minor Globe of Invulnerability blocks the effect outright. Interestingly enough, Malavon's Breach spell also fails to work on Valos. Malavon gets the spell off the ground without disruption, but it just doesn't remove any of Valos' defenses.
After clearing up the Invisible Stalkers, I bring in the rest of the party to deal with Malavon. I remove Malavon's MGOI with a Secret Word from our bard, Marilyn Blueapple, then hit the drow with a triple Lower Resistance Spell Trigger from Espellier. Finally, while Malavon is a short distance away, Valos casts Nature's Beauty. Malavon is permanently blinded.
We're having trouble with a couple of Malavon's Earth Elementals, so Fobie uses a Maze trap to remove them. A Phase Spider remains, which we decide to ignore for the time being (Chromatic Orb unfortunately does not work on IWD:EE spiders).
Without his MGOI, Malavon is vulnerable to Moonblade. Valos repeatedly disrupts his spellcasting. But we get in trouble. I accidentally leave the game unpaused while distracted and Poppy loses a lot of HP to Phase Spider poison, but an Elixir of Health and some running keeps her safe.
Espellier, however, is not so lucky. Valos fails to hit Malavon, allowing him to get a Cone of Cold off the ground, slaying Espellier. I finally remember to use Power Word: Silence from Marilyn Blueapple, Malavon loses his Stoneskins, and eventually falls to a backstab from Fobie.
We kill Fleezum and Flozum with the scorcher loop just to keep things simple. We find the Morningstar +4: Defender as a random drop. It goes to Snowy Tae.
Valos drinks a couple of Potions of Genius to make sure he can ask Marketh for his equipment (character with certain stats can take his items, but don't ask him to hand over his ring). Then thieves and Kraken Society Mages descend upon us. Things go well for a moment. The scorcher loop is very effective against the thieves, as Evasion doesn't work against it, but then Espellier gets hit by Breach, which apparently bypasses Spell Turning. She becomes vulnerable to fire while the scorcher loop is still active, and our own weapon takes her down to 3 HP. She only survives thanks to a Potion of Invisibility.
Seven Eyes keeps the Kraken Society Mages alive and well against Symbol of Hopelessness and Fobie's normal snares. We struggle to bring back the scorcher loop, only to see Poppy Breached. We keep making progress despite being hit by Mordenkainen's Force Missiles, Cone of Cold, and Horrid Wilting from the enemy mages.
But then Poppy gets chunked by another Cone of Cold spell, despite being at full health. Per the rules of my run, I reload to prevent the chunking.
The next time around, we rely heavily on Web and Death Fog. We still get very badly hurt by Cone of Cold, but with multiple Webs on the map, the enemy just can't cast that many spells. It ends with a single mage who escapes our Webs and Death Fog spells, only to fail a save against Chromatic Orb. We free Ginafae and gain even more levels. Dorn's Deep appears to be much more dense with XP than previous dungeons. We've been gaining levels a lot faster than in the past.
Finally I go to talk to Nym. But I accidentally choose the wrong dialogue option and turn him hostile, and when I lower his magic resistance and try to charm him in the hopes that I can use him to continue the Durdel Anatha questline or barter some stuff, I find that Nym is immune. I assume he had a unique immunity, but the reality was simply that he, as an elf, was 90% immune to charm spells. I would have had a decent chance of charming him had I continued, but I'm not sure if that would have made much difference anyway.
We can no longer complete the Durdel Anatha questline, nor can we buy any of Nym's goods. And I never decided this was a cause for reloading, so we're stuck with the loss. We paralyze him with Chromatic Orb and kill him.
I might not go into Heart of Winter. I've grown tired of this party and want to get this run over with, and HoW would just slow us down.
@semiticgod , I'm sorry your run is not going to your liking.
I'm still having a lot of fun with mine, though.
Here, we are ambushed by a huge pack of undead worgs. Wait, did you say undead? That's my speci-a-lity. I basically save our butts here with Turn Undead.
You see, this is why you want pure-classed clerics and mages throughout the game. Multi-classes are *always* one full spell level or one full Turn Undead level behind what they're supposed to be in relation to the game content, FOREVER. Dual classes are even worse. Don't even get me started on how I hate dual classes, after what we went through in Dragon's Eye with a gimped Imoen!
Here's another battle where Minsc is about dead to Skeletal Warriors, Bone Golems, and Wraiths. Things are looking bleak. But then, (angel choirs sing "Ahhhhhh"), my appropriately leveled Turn Undead turns Bone Golems and Wraiths into cowering, helpless, pitiful things before the Light of God. I find this quite satisfying, and a vindication of my faith, and my devotion completely to it, at the expense of martial melee skill.
@BelgarathMTH: Mostly it's just the fact that Heart of Fury mode, like Nightmare mode, is miserably slow. HoF is basically the only way to maintain game balance with high-level parties, but it comes at the cost of long, drawn-out battles that make trash mobs a time-consuming chore.
The other factor is the strategy I'm using. This was an experimental run in the sense that I wanted to play a HoF run without the obligatory summoning spells, but it involved little new tactics. For instance, I relied very, very heavily on Chromatic Orb, Web, and Fireball, which have traditionally been my IWD mainstays, whether I'm in normal mode or HoF mode. In that sense, the gameplay hasn't been very new to me.
My favorite parts so far have been the times when I've had an excuse to pull out the scorcher loop. Although the setup is kind of elaborate, it's very entertaining to see massive swathes of powerful enemies fall to a single loop.
More Dorn's Deep. Nature's Beauty slew the archers in the tower near the girl without a tongue. Note that Nature's Beauty in IWD:EE has a 30' radius for both the death effect and the blindness effect. Shikata failed a save against Chromatic Orb, while his Salamander buddies failed saves against Fobie's level 21 normal snares, dying instantly. The Fire Giants were more complicated.
Normally I talk my way to Maiden Ilmadia and fight my way out from there, but this time I decide to antagonize the Fire Giant guard at the entrance. Chromatic Orbs repeatedly fail to paralyze the giants as they come, and Symbol of Hopelessness and Fobie's normal snares also fail to harm them, but our sorcerers' Symbol, Stun spells hold a few of them in place, trapping a couple of the others behind them. I flood the area with Death Fog spells, only to see Maiden Ilmadia march right through to intervene.
To my surprise, Ilmadia fails the first save against Chromatic Orb, dooming her. Fobie hastens her demise with backstabs; he is blind in all of our fights now and can hide in plain sight. The giants survive the multiple Death Fog spells, but are weak enough for us to finish them off using melee attacks, our least powerful option when enemies aren't disabled.
Ilmadia's Cleric/Mage allies remain, but have not joined the fray. I go after them, but Valos quickly runs out of Ironskins and dies the same round a new Ironskins spell gets disrupted. A scorcher loop, amazingly enough, fails to impact the elves at all--they seem to be immune to magic (they only have 76 base MR; I assume the complete lack of damage was due to luck on their part). And although I can Maze the two Fire Giants that join the fight, I can't Maze the elves; one of their defenses appears to have blocked the trap projectile.
We are low on spells, low on defenses, and our enemies are protected against both our weapons (Stoneskin) and our spells (magic resistance). For the first time ever, I cast Protection from Magical Weapons, allowing my sorcerers to cast Lower Resistance on the elves, and prepare another pair of Spell Turning spells, without risk of disruption or death. Meanwhile, Snowy Tae, our Cleric of Lathander, casts Wondrous Recall to memorize a pair of Protection from Fire spells, and one of the Fire Giants rejoins the fight.
With the elves' magic resistance lowered somewhat, I can now hit them with the scorcher loop. One of them dies outright; the other barely survives. While the Fire Giant and cleric/mage are distracted, Snowy Tae runs in to cast Protection from Fire on the Fire Giant, lowering its fire resistance from 100% to 80%. Another scorcher loop kills both the giant and the elf.
I seek out the last Fire Giant and disable him with the last of Espellier's Symbol, Stun spells. Soon he is dead. The only fights left in Dorn's Deep are with the Idol and Poquelin. Then we will be back in Easthaven to face Belhifet.
Our sorcerers hit level 18. Although I originally planned on having Poppy and Espellier strike Belhifet with Black Blades of Disaster during Time Stop, I decide that Wish would be the safer option in the long run. Projected Images should help keep us alive in the long fight with the final boss.
The fight with the Idol isn't too special, save for one detail: the Voice of Durdel Anatha reappears, but this time, we're able to reason with it. Apparently you don't need to keep Nym alive to complete the quest. Merely speaking to him lets you tell the Voice of Durdel Anatha the information necessary to put him to rest. So killing Nym didn't prevent me from completing that quest (though it could have, if I killed Nym before talking to him). A scorcher loop fails to destroy the Idol and Valos makes a save against Flesh to Stone (I forgot the Idol even cast that spell), but it goes down with a few Death Fog spells, taking the Zombie Lord and Greater Mummies along with it.
I neglect to look up how to complete the Durdel Anatha quest. You're supposed to take his remains somewhere, but I never did. I just fight Poquelin instead. I could kill Poquelin with a scorcher loop had I lowered his fire resistance using Protection from Fire, but after suffering a bit of damage from melee attacks, he teleported us to Easthaven.
Pomab's fight was buggy. Typical. All that's left is Belhifet.
I fought Belhifet for about an hour and I am too tired to post in detail. Also, I'm missing some screenshots, so instead of my normal round-by-round explanation of the fight, I will post a .zip with my existing screenshots and describe the fight in broad strokes.
Belhifet was a nightmare. I thought the Dispel Magic effects in this fight were limited to the traps, which I hoped to avoid using the Detect Traps cleric spell (you can't disarm them and our thief is blind anyway, so he couldn't detect them on his own), but apparently the fight begins with Remove Magic. I forgot to buff with SI: Abjuration, so we lose all of our buffs, from the potions we drank to our normal buffs to the extra stuff like universal Chaotic Commands, Death Ward, Protection from Cold, Protection from Fire (mage version), Protection from Lightning, Protection from Acid, and Free Action, which I put on everybody on the grounds that Wish-resting could let me cast however many buffs I wanted.
Espellier panicked and wandered off, getting crushed moments later. Valos held the fort in Water Elemental form with Armor of Faith to boost his damage resistances to 100, but apparently shapeshifting removes a druid's immunity to poison and poison damage, making him vulnerable to Belhifet's disease effects.
More than once, I've criticized the idiocy of the fight with Belhifet. The guy has more immunities than Kangaxx and Demilich put together (yes, really) and inflicts a permanent poison or disease effect (50% chance each), with no saving throw, that deals 1 damage per round, forever. This is why I made sure I had 20 Elixirs of Health and 20 Philters of Purification before the fight. He is immune to all spells--seriously, every spell in the game, no matter what it is--and on top of that, he has a roughly 100% chance of disrupting his target's spells. The only way to avoid disruption is to play a Cavalier (who doesn't rely on spells anyway) who has immunity to both disease and poison.
Anyway, Valos clings to life while our remaining sorcerer, Poppy, tries to cast Wish via Project Image. Meanwhile, Fobie runs to the other corners of the battle to set special traps to Maze Belhifet when he teleports around (turns out Belhifet is immune to such traps, though the Cornugons and Iron Golems are not).
I get a Wish-rest early on, which means I can send Valos into Water Elemental form once more later on (the shapeshift lasts forever, but the Armor of Faith does not). To the side, Snowy Tae casts Raise Dead on Espellier and Heals her.
Further attempts to Wish-rest fail. Espellier loses a Project Image clone early on and tries to create a new one, but it turns out that re-casting Project Image is impossible while the duration is still in effect, even if your clone died many rounds ago. Espellier loses two or three castings of Project Image before I realize it's having no effect.
Valos dies. It seems that Cornugon's bleeding effect, which deals slashing damage over time, bypasses immunity to slashing damage. Valos bleeds to death in Water Elemental form.
I bring back Valos with Raise Dead and Heal and attempt to make progress on the enemy. We kill an Iron Golem early on, but the remaining golem and the two Cornugons remain very healthy. We tank them with Espellier using PFMW (who has nothing better to do since she can't cast Project Image yet), Valos using Water Elemental form (the previous Wish-rest let him do so once again), and Snowy Tae, by stacking Armor of Faith with Defensive Harmony and Entropy Shield and Draw Upon Holy Might, which put her AC down to -27. Which still isn't enough to hold off the enemies, as her buffs don't last long and Belhifet has a habit of landing critical hits.
Knowing that re-casting Project Image early is impossible, I keep Poppy's clone alive, using it to Feeblemind a Cornugon (they don't have the demon immunities they have in BG2, and are therefore vulnerable to Feeblemind). Despite many castings of other spells, Poppy's clone has a very small impact on the enemy.
Finally, Poppy's clone vanishes. She can re-cast it and try to cast Wish four more times. But a Cornugon attacks the original Poppy, and the slashing damage, which apparently can bypass Stoneskin sometimes, disrupts her Project Image spell while still preventing her from re-casting it.
Espellier re-casts Project Image. It fails to get any Wish-rests. We got one such rest early on, but every time since then, we've failed to get much of anything useful besides party-wide Improved Haste. Then her clone gets killed. And not only does this mean we lose access to some spells--it also means that we don't know when Espellier can re-cast Project Image, because our only indication of it is the clone running out its duration. We have to guess when she can cast it again. And if we guess wrong, we lose another 4 castings of Wish.
Fobie runs out of traps. By now, I know that his Maze traps have no effect on Belhifet, and he already used up the others on Belhifet's goons. Then he gets targeted by both Cornugons and two of Belhifet's three summoned Shadows. Realizing that he is little use to us anymore, I send him off to the west to lure the enemies away.
The Cornugon rolls a 2 and chunks Fobie.
Per the rules of my run, I could reload, but I'd rather not, since I wasn't planning on raising Fobie anyway, and there is no fight after this for which we might need him. I decide to roll with the loss.
Poppy mis-times a Project Image spell and wastes it. Snowy Tae nearly dies (our only source of Raise Dead, though I didn't realize the importance of this at the time), but Valos rescues her with a Heal spell.
Round after round after round, we struggle to get a Wish-rest so Valos can start properly tanking again. Finally, finally, we get our wish.
We gradually take down Belhifet's allies, using every tiny spell we have to try and hasten their fall. The sooner they go down, the less time Belhifet has to destroy us. At last, Belhifet is on his own.
He nearly kills Snowy Tae multiple times, landing hits with 18s, 19s, and 20s. With Valos in Water Elemental form and Snowy Tae stricken by disease and poison, we have nobody to cast Heal on her, so it takes an extra round to down an Elixir of Health before she can get back on her feet.
Eventually, Belhifet gets weaker, while our party maintains its position. By keeping our sorcerers and our bard out of the way and refreshing Snowy Tae's buffs, we avoid getting destroyed. Our many Elixirs of Health prove instrumental in surviving Belhifet's poison and disease. Heavily buffed, Snowy Tae hits hard, albeit with low APR. Valos is the same way. Although we have terrible luck with Project Image and Wish, our tanks are strong enough that Belhifet cannot regain the upper hand. The demon falls.
One no-reload level Heart of Fury run of IWD without summons, complete.
Very exciting, @semiticgod I always thought the final fight of iwd was very lack-luster, but ofcourse I never played on hof. It seems fun, in hof mode. Most impressive.
I have to say I find the challenge in both your and @BelgarathMTH runs quite complementary and satisfying. They illustrate how to construct a challenge with a consistent self-imposed ruleset.
My pure class cleric Charname's Turn Undead made this whole dungeon kind of easy.
Against this room full of elf-ghost archers, I manage to get all of them Turned just in time to save Dynaheir's life. About half of them targeted her as soon as we entered the room, and she had no chance to live, even with Mirror Images and healing potions. (In IWD, enemies have a chance to hit the real mage even with Images still active.) I've found running around rooms of undead mobs with Turn Undead activated to be a great tactic. It forces them to run as far as they can away from me, which allows me to herd them wherever I want them, like a sheepdog herding sheep.
It turns out that wraith spiders have magic resistance in IWD! And, they can't be Turned, or at least I couldn't Turn any. These pesky creatures are *much* more dangerous in IWD than in BG. Imagine if the Cloakwood spiders in BG were of the IWD species! Yikes!
Against the penultimate elf-ghost mage mob, I manage to get the first group Turned before they can do much damage. One of them gets a Slow to land before catching a glimpse of my shining holy symbol and screeching away. In the next room, the most powerful ghost-elf mage gets his Ice Storm off into the center chamber before I can Turn him. The rest of the party, especially Dynaheir, has to scramble out of that chamber. Next round, he's Turned, and we can wait out his Ice Storm. The rest is easy.
A word of caution to cleric-lovers: Do NOT enter the astrolabe room with your Turn Undead ability active. It chunks Larrel and breaks the game. I allowed myself a courtesy reload here. Chunking Larrel means he can't use the Heartstone Gem to trigger the next chapter of the game. He should be immune to Turn Undead to prevent this, but he's not. An oversight by the devs, I rule.
We went pretty easily through the first level of Dorn's Deep. Jaheira is wearing the armor that makes her immune to most of what the myconids can do to her, that only a neutral or evil character can wear (i.e., only Jaheira in our good party). Once or twice she gets Panicked, but my Exaltations and Remove Fears put a stop to that. I saw a use here for Remove Fear over Exaltation - Exaltation requires a touch, which is very hard to execute on a Panicked character. So, Remove Fear is better, since it has a range of "sight of character". But, even with that, the Panicked character might run out of the range of the epicenter of your cast, which happened to me once.
I discovered for the first time that there IS a way to rest on this level without causing the entire level's worth of myconids and ettins to respawn. There's a cave near Bandoth's home filled with orogs, and if you kill them and rest there, you can rest safely without causing "Mass Respawn". This will be very helpful info for future runs, since any other rest strategy on this level, including the usual "retreat back outside", causes the "Mass Respawn". No other cave on this level permits this, except the one next to Bandoth.
I learned the hard way from my last "easy run" (due to using BG2 kits and maxing the DEX stat on the party), that you need a high charisma character in the lead position in order to complete Bandoth's side quest involving the extract he wants, found in one of the caves southwest of his home. Otherwise, he becomes hostile and attacks you as soon as you give him a "wrong answer". You also have to tread very carefully in his dialogues with your highest charisma character, to get the quest in the first place.
The next great thing about Bandoth is that he has some of the only fifth level scrolls you can get in the pre-expansion game. They're all summoning spells, except for one, Summon Shadows, which is necromantic, meaning Dynaheir with her restriction against summoning can still use this one. (Yay!)
I drink Potions of Clarity and Genius for both witches, and have them scribe bunches of spells. Now, Imoen can summon Fire Elementals, and Dynaheir can summon Greater Shadows. (As a good cleric, I prefer to think of them as "Spirits of the Heroes", so I can look the other way about that "Necromancy" thing. )
As we move back to the bridge to the second level, Khalid levels as a fighter, and gains Grandmastery in longbows. He now has Thac0 5 and FIVE attacks per round, using the Longbow of Sseth. I really don't understand people who knock Khalid. He has the potential to be the best archer you can get in BG, using his fighter mastery in longbows. I think people who don't like Khalid are actually just prejudiced against him because of his charming, stuttering personality, or else they don't understand the potential of a so-so Strength fighter who uses his fighter perks to master archery. (And Khalid has a pretty good Dex to support his focus on archery, to boot.) As you can see from the "Information" screen, Khalid has a solid 33% kill rate in our party of six, over the whole game so far.
As we move into the level two kill zone, Dynaheir's Greater Shadows come in very handy. Somehow, I get most enemy aggression onto myself, and I have to fall back to heal myself. Khalid and Imoen concentrate on the orc archers we can't get to, while Jaheira and Minsc tank the spiders and elf Stoneskinned fighters. All and all, this was not as hard as usual, thanks to Dynaheir's Greater Shadows. That's going to be a *quite* useful spell.
Comments
[/spoiler]Notice that Espellier and Fobie are both dead. This is because raising party members is ridiculously expensive in HoF mode, when your level is higher, and starting with a level 1 party and no gear means you're pretty much broke if you suffer too many deaths.
This is me underestimating the radius of a Fireball.
[spoiler]
[/spoiler]It seems that spell damage now bypasses Mirror Image.
Espellier, our only surviving sorcerer, has become an excellent tank thanks to Mirror Image. She gives us time to stack Web and Spike Growth spells. It's not enough to kill enemies, but it's enough to weaken them considerably. [spoiler]
[/spoiler]Just not enough to keep Valos from getting blasted by spell damage when that Skeletal Mage survives.
This is me underestimating the radius of a Fireball. Again. [spoiler]
[/spoiler] But by using our spells a little less stupidly, we keep the rest of the enemies from crushing us. [spoiler]
[/spoiler] The Temple of the Forgotten God finally lets us put Chromatic Orb to good use again. And when we suffer a setback, Valos can switch to salamander form to gain undispellable immunity to fire. Even in HoF mode, Fireball is an amazing spell.[spoiler]

[/spoiler]@bengoshi , for some reason, when I try to use Snapper with my IWD:EE, it just makes blank white screens instead of a screen shot. At least it worked with MM6. Also, I didn't know about the difference in loading times for a bmp vs. a jpg, so thanks for educating me about that.
EDIT: @semiticgod , I've had a lot of trouble with Fireball radius in IWD, too. It seems it's a good bit bigger than in BG2, and it calculates the event horizon of the damage effect differently.
The Snapper only saves screenshots into a certain folder in the JPEG format, it doesn't change the view, it only makes a photo of what you see on you desktop. I would check the settings - check so that you have Entire desktop enabled, and a certain folder chosen as a saving place.
Here's a screenshot. The first three are what it's doing with IWD. The fourth is a successful screenshot I just took from MM6. So why is it working with one game and not the other?
[spoiler]
On to Dragon's Eye. Web doesn't work against Lizard Men, but Hold Person and Charm Person still do, as does the Siren's Yearning. Marilyn Blueapple, our bard, plays an important role in reducing enemy pressure.
[spoiler]

[/spoiler]As I mentioned before, Valos got chunked by a hostile Static Charge spell. Even in normal mode, Static Charge is highly effective at chunking party members.
I permitted myself a reload, as I had decided earlier on that I would not tolerate chunking. If there was a mod component to prevent it like there is in SCS, I'd have installed it.
Also, I was wrong before: I believe it is possible to prevent chunking with the Disable Permanent Death opcode. I just didn't set the right parameter to 1 before.
Valos is an important tank in Dragon's Eye because of his immunity to poison. Mirror Image and Stoneskin won't stop spider poison, which is invariably fatal for my sorcerers if left uncured.
[spoiler]
When Espellier dies to poison again and the party has to retreat, a wall of enemies prevents Poppy from getting close enough to the exit for the party to escape. To move the enemies, we have to break invisibility. Valos does so, and our other party members form an invisible wall of our own to keep Valos from getting mobbed. But a couple of Phase Spiders just jump over the wall. Fortunately, spiders in IWD:EE aren't immune to poison, making Valos' spider form an excellent tool.
[spoiler]

[/spoiler]Dragon's Eye has some tough fights in it, but Web and Fireball are devastating in concert. Fireball just does so much damage, and with 3 or 4 characters able to cast Web (Avenger, sorcerer, sorcerer, and eventually bard), we can paralyze large groups of enemies at once. Note that Trolls are vulnerable to Web even though Lizard Men are not, despite being the same size.
[spoiler]
[/spoiler]
At the Eldathyn lair, I find that Emotion is virtually useless, as the projectile fails to make contact. It doesn't even display a successful saving throw--the spell simply does not hit.
[spoiler]

[/spoiler]Out of four or five castings in different fights, I only see a single enemy even once make a save vs. spell. Over 90% of the time, Emotion does nothing. I can't believe the projectile doesn't work--this spell was perfectly functional, albeit not party-friendly, in vanilla. What happened?
On to Yxunomei's lair. Fireball kills almost everything before the fight with Yxunomei herself.
[spoiler]

[/spoiler]I like that it's possible to upload multiple images at once, but I don't know why they appear out of order. Icewn039 comes in between Icewn015 and Icewn033.
Feeblemind plays an instrumental role in the fight with Yxunomei. But I'm not the first to use it.
[spoiler]
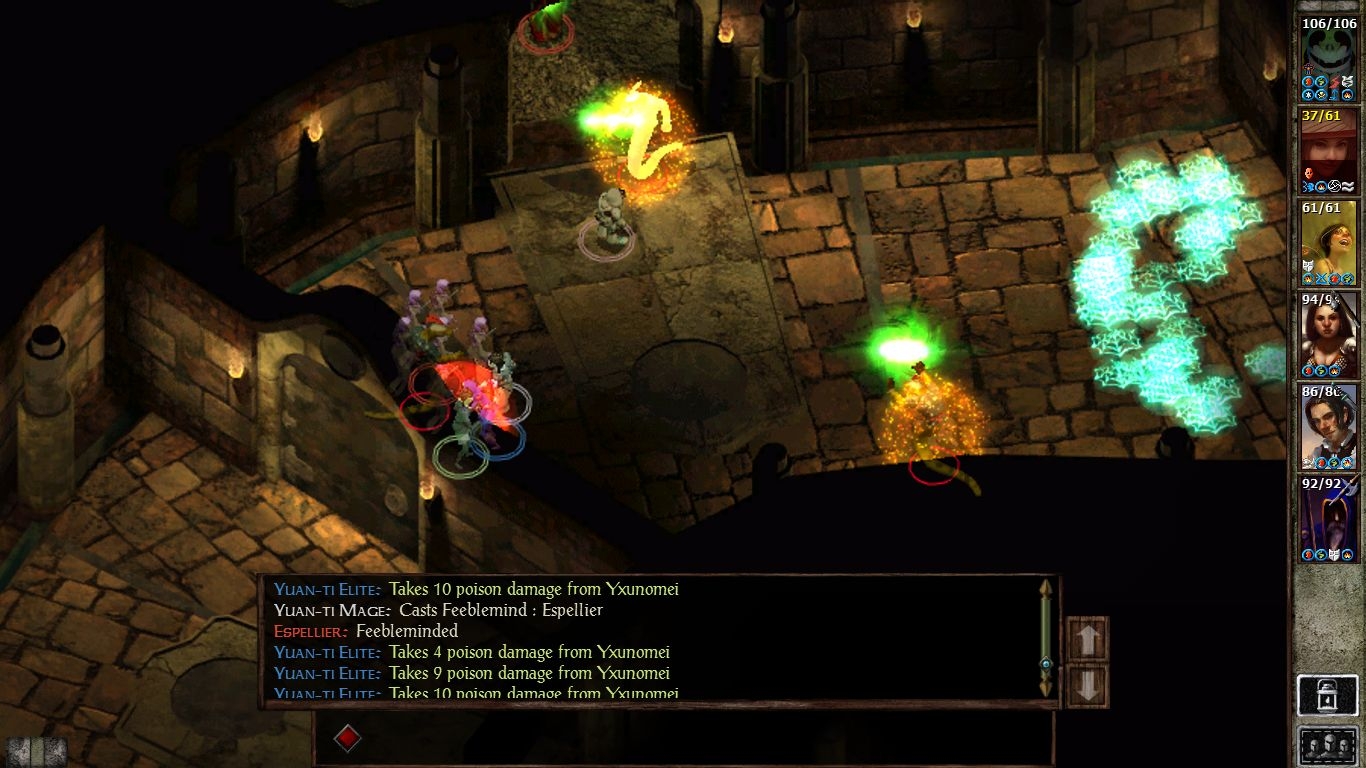
[/spoiler]Luckily for us, Snowy Tae has Heal memorized, and so we can cure it. I almost memorized Wondrous Recall before deciding I probably wouldn't spend the time in-combat to cast it.
Yxunomei puts skeletons right on top of us. Summoning spells are terribly strong in HoF mode, and not just for the party. Yxunomei's skeletons are no longer just minor annoyances; they are powerful and long-lived enemies.
[spoiler]
[/spoiler]After some failed attempts, Yxunomei fails a save against Feeblemind, her MR already reduced to zero.
[spoiler]

[/spoiler][spoiler]

[/spoiler]Here we are preparing to take vengeance on said enemies who gave us so much trouble.
[spoiler]

[/spoiler]Here we are torching said enemies.
[spoiler]

[/spoiler]And finally, here we are nuking the crap out of everything else in the dungeon.
[spoiler]
[/spoiler]
We have completed the Vale of Shadows.
Here, I *finally* Silence the second skellie mage after *three* casts. Trying this sort of thing legitimately (i.e. without using metaknowledge) is very dependent on having a character who can stealth and scout ahead, to determine the visual perimeter and exact location of enemies. So far, Imoen has managed it. Minsc could do it better, but I need him to stay in plate mail.
[spoiler]
Disaster! Jaheira gets killed by skeleton knights and archers before I realize she's in trouble. Retreat! As we fight while falling back, Minsc is almost killed. Dynaheir saves him by killing the spectral knight that was about to kill her Warder with Magic Missiles. She basically had to unload her whole first level spell book on it, but she did it.
[spoiler]
Back to Kuldahar to raise Jaheira. We return after days of recovery and travel to attack Kresselack's remaining army again. We basically lather, rinse and repeat the same strategy we used with the last skeleton mage. Imoen stealths and spies out his exact position. I stand behind her mark and cast Silence. Again, it takes three casts before he fails his save. Once he does, the rest is relatively easy.
[spoiler]
Now for Lysan. Dynaheir casts two Webs to hamper both Lysan and her Yeti army, finally beginning to earn her keep. I read a Chant scroll, which turns out to be a mistake. I had wanted to cast Hold Person and Silence at the beginning of this fight, and I forgot that Chant disables further spellcasting. Also, I figure out the hard way that Lysan is immune to normal weapons when I start getting "weapon ineffective" messages on all our attacks. So, we concentrate on the Yeti while Lysan keeps getting held in the Webs. At last, my Chant wears off, and I can cast Hold Person at Lysan. It works! The battle is effectively over.
[spoiler]
I had to stop using Shillelagh with Jaheira because of a game-breaking bug with the spell, where the "magical weapon in use" flag becomes permanent. I managed to repair the game by casting Doom on her and paying the temple to cast Dispel Magic. But, it means we can't use the spell any more, as we will soon be far away from easy access to the temple. That's a shame, because Shillelagh would have been very helpful against all the mummies and spectral undead in Kresselack's chambers. I managed to sell a bunch of potions and magic weapons to make enough money to buy the Spider Crusher club for Jaheira, though, so that will mitigate the loss of the spell.
Next up: The Temple of the Forgotten God
Verbeegs hit really hard, and without skald song to increase AC by 2, they hit a lot more often than I'd like. This is making us use healing potions and other healing resources like crazy. It's also making Jaheira's Goodberries pretty darn useful for in-between combat top-offs. I feel really useful as a cleric, because I often stand behind Jaheira and Minsc and cast Cure Light Wounds during combat on whichever one of them needs it, and I can join the front line in a pinch.
In the long corridor, we use our usual tactics. Early on, Jaheira, Dynaheir, and Imoen all get Held, but I have gained access to 3rd level spells, and have prayed for Remove Paralysis and Exaltation. Via Remove Paralysis, the Hold Person is a non-issue.
After we get to the place in the corridor where we all "have a bad feeling about this", I have Imoen go into stealth mode and scout ahead. As usual, she finds the exact positions of the enemy party, and falls back to place a mark for our spellcasters. We practically empty our spell books at them. Dynaheir casts Stinking Cloud and Web. I cast Silence. Dynaheir casts her newly mastered Skull Trap spell. The enemy doesn't stand a chance.
Next up: The dreaded Dragon's Eye.
We enter the dreaded Dragon's Eye.
Well, things are going well so far. Yay for Dynaheir and Stinking Cloud. I take back everything I ever said about her being useless. Sorry, Dynaheir, you're starting to save our butts again and again.
Oh how I hate beetles. Bad Beetles! Minsc and Jaheira are stunned by Beetlejuice and are almost dead. Dynaheir casts another Stinking Cloud. Well, what do you know? Beetles are susceptible to their own stinking hi-jinks. Take that, Bad Beetles! Thank you again, Dynaheir.
See Bad Lizard King and his Army. See Bad Lizard King's lizard wizards get Silenced by the Holy Roller (Me!). See Bad Lizard King and his Army get defeated by yet another Stinking Cloud. Thank you yet another time, Dynaheir.
This deserves a triumphant victory portrait. See our party standing over the dead Bad Lizard King in beautiful ROYGBIV rainbow formation.
Uh oh, Jaheira just inexplicably and suddenly died. Bad Game. (I can see no reason why this happened. She was at almost full hit points, she failed a save against disease, and bang, sudden death.) Oh well, back to Kuldahar to get her raised again.
Now back to the Dread Dragon's Eye. What will happen to us?
Next up:
Bad Beetles, Boorish Trolls, and Bogus Painbearers
Anyway, Dorn's Deep has some very high-intensity fights that I often struggle with. The Drow Vanguards, Drow Spellswords, and Drow Sorcerers are all nightmares. At 66 magic resistance, they're very hard to hurt with my normal magic-heavy parties, and they are inexplicably immune to the Siren's Yearning, as well as Greater Command. Worse yet, the Drow Sorcerers spam Magic Missiles, which can be devastating at high difficulties like Heart of Fury mode. The Drow Vanguards, with their Bolts of Biting, pose the same problem. And the Drow Spellswords come buffed with Stoneskin--they're that much harder to kill.
But Entropy Shield blocks Magic Missiles as well as bolts. Although Insect Plague doesn't have much impact on the first fight, Valos tanks the enemies admirably, and Web and Death Fog are very effective once Espellier has cast Lower Resistance on the drow. When the battle drags on and the Drow Sorcerers won't go down, Fobie tosses a Special Snare from the hallway and holds them.
In the next fight, I pay too little attention to our own sorcerers' defenses and both Poppy and Espellier get killed. I consider running away and resting, but decide to go ahead and try to finish off the remaining enemies. Between Webs and Special Snares, we weakened the surviving drow enough to polish them off.
Krilag, as always, is a cinch. Big melee enemies like him are easy to knock out with Chromatic Orb. Fobie also lands a 122-damage backstab on him, not that it was really necessary.
Snowy Tae has hit level 14 and can now cast Symbol of Hopelessness, one of the best disablers in the game. Unfortunately, now we have to fight Terikan the lich and his Greater Mummy buddies, who are immune to Symbol of Hopelessness... and can cast it themselves.
I never knew how to handle hostile Symbols of Hopelessness, since I had heard that in IWD2, only Exaltation could cure it. That doesn't hold for IWD. Symbol of Hopelessness in IWD uses the sun opcode, so a Free Action spell can easily block it.
Unfortunately, Poppy still gets disabled by a Symbol of Hopelessness spell in the fight with Terikan, as Terikan apparently can cast magic attacks, including Breach. She loses all of her defenses. We struggle to bring down Terikan and interrupt the Greater Mummies' spellcasting (they also cast Symbol of Pain, against which we have no defenses besides our saves) at the same time. Eventually, we paralyze one of the mummies with Hold Undead and trap the other one with a level 16 Special Snare from Fobie. We gradually wear down Terikan and quickly loot the nearby coffins before Terikan can come back. Terikan, unlike all other liches in the IE games, actually comes back until you destroy his phylactery, and it only takes him a few rounds.
He also reappears in the next chamber and starts summoning undead again. Plus, the rooms nearby are often occupied by more Greater Mummies, and I always forget which room has his phylactery and which room can destroy the phylactery. This is a long fight that really taxes your resources, but thankfully Terikan didn't put much pressure on us, and so Valos and Snowy Tae had time to run around with the Boots of Speed while under the effects of Improved Invisibility and Sanctuary and search every room to find the phylactery.
As usual, we had trouble with the Bronze Sentries that appear after Terikan has fallen. They're immune to fire, so our Fireballs are useless. We had to rely on Web and Death Fog instead, and the Bronze Sentries wouldn't stay in the Webs.
Shortly after we start working on the Snow Trolls and Ice Trolls in the next area, Poppy and Espellier hit level 14. Our sorcerers can now pick level 7 spells. I've been waiting for this for a long time.
Minor Spell Turning will only bounce 4 spell levels, which means an Agannazar's Scorcher spell or Lance of Disruption won't be duplicated that many times. But Spell Turning, the level 7 version, bounces 12 levels, and is far, far more effective for producing the scorcher loop. It's a huge game changer. Also note that if you put two Agannazar's Scorcher spells in a Minor Sequencer, it will only count as one spell, and will therefore bounce just as many times as a single scorcher spell (as opposed to burning through the spell turning effect twice as fast).
I discovered this trick a while back--I call it the scorcher loop--and have been looking for a time to put it to good use. And the spell is so powerful that it's really better suited for Heart of Fury or Nightmare mode--which I haven't played in a long while. I try it out against the trolls.
This behavior is similar to the BG2-exclusive Death Ray Zorcher, which is what you get when you use the Wand of Lightning trick to duplicate the effects of a Spell Turning scroll (or the Book of Daily Spell, if it's on the Spell Turning page) on two characters while a third one hits both of them with an Agannazar's Scorcher spell. Testing found that the Death Ray Zorcher, once it got going, could slay Nightmare mode Adalon in a single round once I brought the flame across her.
I don't think this scorcher loop is quite that strong. The Death Ray Zorcher strikes thousands of times and lasts several rounds. But our version is enough to kill Joril and his Frost Giant Guards in seconds.
But I'm not going to use it in this area, even though Armor of Faith and the War Chant of the Sith could make Valos immune to physical damage in Water Elemental form (and his vulnerability to Winter Wolf breath could be remove using Protection from Cold and the Mantle of the Coming Storm). Instead, I incinerate almost every Frost Giant and Winter Wolf in the area with one single scorcher loop.
I pull the same trick on Kontik and her Black Ice Knights. Kontik has no defense against it--or even against physical attacks, as she arrives without Stoneskin. She and all of her associates are dead in seconds.
Bad Beetles weren't so bad. We used Dynaheir's Stinking Clouds and Fireballs, Magic Missiles, and lots of ranged fire. One mishap caused me to need to cast Remove Paralysis.
Jaheira died again to wraith spider bites. I was watching for her to get a disease icon on her portrait, but it never showed up. Reviewing the transcript, she did get diseased three times. So, I can't watch the portraits for that. These wraith spiders are like mind flayers. Three hits against Jaheira's 15 strength is a kill. I'll have to start checking character records after every hit, just like with mind flayers.
Against Boorish Trolls and Bogus Painbearers, however, things really started to go downhill.
Here, Dynaheir tries to start it all off with a Stinking Cloud and a Fireball. So far, so good.
Shoot, Jaheira and Khalid get Held. This was after the priest who cast it passed out in the Stinking Cloud while casting the spell. When he finally made his save and got back up, his spell completed. Hmm. It seems to me like the game is cheating, but whatever.
I save Jaheira and Khalid with Remove Paralysis. Meanwhile, Dynaheir finishes the offending priest with Magic Missiles.
Minsc is in trouble already. His AC of 2 simply cannot tank trolls. They are owning him. A priest gets off a Recitation, buffing the trolls and debuffing the party. We are in big trouble. Time to retreat. In hindsight, if Dynaheir had cast Haste, this could have turned out very differently. In our panic, she forgot to cast it.
We retreat far enough to get Minsc healed. We're ready to rally.
Sigh. Minsc gets Held. As you can see, the cleric that did it is caught in a Web. The spell went off anyway. Passed concentration checks while Held in Web? Okay, if you say so, Game. I started a Remove Paralysis, but in panic, I also started a Cure Light Wounds before it fired. My fumble costs Minsc his life. Dynaheir had tried to cast Haste, but she got stuck for some reason, with the icon on her portrait to indicate she should be casting it, but the round went by, and she just stood there. I had to have her move and start it again, but it was too late. We have to get the heck out of there.
Okay, we retreat back to Kuldahar in shame. Upon returning, we have Dynaheir cast Haste, this time successfully. Unfortunately, now *Jaheira* gets Held, just as I get my own Hold Person to disable the priest who cast it. We pick up Jaheira's belongings and body, but this time, since we have Haste, I order the party to keep attacking the three trolls. With Haste, we manage to take them down. But the priest is still there, so I order a new retreat. We have a dead party member, and I do not press forward under those circumstances, no matter how tempting it might be to press a perceived advantage.
After we return, it turns out that that lone priest and one troll were all that were left. So it's over. Imoen hit level 7 while we fought the beetles earlier, so, with great trepidation, I dualed her to mage to keep her in canonical form. While we were in Kuldahar, I bought a 600 gp Potion of Clarity for her and had her fill up her spell book with first and second level spells. She also summoned a familiar.
Jaheira and I have memorized several Find Traps spells to try to survive without Imoen's thief skills. I know that there are very deadly traps below. Some of them we can maneuver around if we see them in time, and some of them that are unavoidable we may be able to tank and deal with in a controlled manner.
I am terrified of Yxunomei, given our bloody humiliation at the hands of these priests and their trolls. I will pray to Lathander for strength and courage, as well as magic. Perhaps with His blessings and help, we may yet prevail in this horrible place.
After paying for three Raise Deads and a Potion of Clarity for Imoen, we are flat broke. If someone else dies, we may not have money to raise them. Lathander help us.
Make sure you cast Find Traps, since Dragon's Eye has the worst traps in the game, and you no longer have a thief to disarm them for you. You'll have to maneuver around them.
And don't forget to memorize Chromatic Orb before you open the last door.
I'm pretty sure we're not going to have access to Greater Malison by then.
My canon BG-in-IWD party is "living in interesting times", indeed.
However, this experience is really making me respect @Ygramul 's "Way it's Meant to Be Played" philosophy in his old IWD thread. If you want a challenging but manageable experience without mods, just avoid the + and - buttons on character creation, and take what comes, just like in pencil and paper. I'm actually thinking now about trying to roll for BG:EE 2.0 and SoD without using + and - to min-max.
Chromatic Orb indeed does nothing if the target makes its save. But if you're level 5 or 6, a failed save means being stunned for 3 rounds. That's a lot of free hits on Yxunomei, and a lot of attacks she won't get to make. And if you're level 7 or higher, Chromatic Orb can paralyze the target for <i>13 rounds.</i> It's basically a death sentence if it makes contact, and mages can cast a lot of Chromatic Orbs before running out. Without Doom or Greater Malison, a normal Chromatic Orb only has a 10% chance of hitting Yxunomei, and a normal level 7 mage can only cast it 4 times, meaning you only have a 35% chance of success if you cast them all. But Dynaheir as an Invoker will have 5 castings with a 20% chance of success each, or a 67% chance of success if you cast them all. If Dynaheir uses all of those spell slots on Magic Missile instead, it would only do 21 damage to Yxunomei on average.
Chromatic Orb has a 67% chance of killing a 91 HP target outright. Magic Missile has a 100% chance of removing only 21 HP. On average, we're looking at 60 damage versus 20.
If Dynaheir isn't at level 7, though, it may be worth it to save those level 1 spell slots for Magic Missile, because 3 rounds of stun isn't going to be a death sentence for the likes of Yxunomei.
Which means, among everything, that as soon as the Monty Python crew finishes BGEE and survives in SoD, it will continue in BG2EE with the new version of the game and SCS.
Dynaheir and Imoen use Web and Fireball to clean the house of cold wights. I stay mostly in Turn Undead mode, and I can Turn a lot of them, and chunk some of them. Having pure class clerics and mages in the party is very helpful here.
Jaheira uses Find Traps to, well, find the traps. Then she bravely tanks them. The traps in the western half of the dungeon all Cause Disease. I have her use our last two Mummy's Tea's against the first two of these she tanks. On the third one, I figure I'll have her trip it and then wait out the disease. Whoops. I find out the hard way that this disease is permanent and fatal, and cannot be cured without Mummy's Tea or a Remove Disease spell. I have no choice but to trek back to Kuldahar to get Jaheira raised. There is no money to pay Mother Egenia. In Kuldahar, we sell a lot of potions to get the money to raise Jaheira. I will keep at least one Cure Disease spell memorized from now on. Diseases in IWD are a LOT more serious than in BG.
We go back, and I use my Cure Disease spells to help Jaheira tank the last two Disease traps. Now we move to the western part of the dungeon. All the traps here are Skull Traps. Jaheira finds and tanks a couple of them, before we pull all the poison zombies and wights. The three wights with Magic Missiles throw their whole arsenal at Imoen. She survives. We retreat back over the bridge to a more defensible position. From there, it's not too hard to finish this mob. My Turn Undead is chunking a lot of them.
Now for Presio. I have decided to allow Jaheira to use Beetles, because this game is freaking hard enough without restricting what spells I can use. So, she summons and sends in the Beetles to start harassing Presio and her remaining army.
My strategy is to try to Silence her. First try doesn't work. Second try, from a scroll, does the trick.
Umm, no, too risky. Or is it? We come back later, armed with Dynaheir and Knocks. We eventually get the treasure here. Imoen will wear Presio's robe, which should come in handy when she finally gets her thief levels back.
Against the false Eldathians we go. Not much to worry about here. Our usual tactics work well.
Jaheira tanks a trap and gets locked in. Luckily she has a corner next to the locked door where she can escape from the Cloud.
Jaheira dies to a Static Charge. Luckily she didn't get chunked. Back to Kuldahar we go.
Damn it! Hold Person did it this time. That's TWO more Raise Dead. Sigh.
Okay we're back. The traps here are permanent without a thief, so we have to keep maneuvering around them. What a pain in the behind! I will never again voluntarily dual class Imoen. She will stay a thief in BG1, and make whatever level she makes. Hopefully SoD will let her preserve her thief levels when they do whatever they're going to do to her in SoD. (Don't spoil me if you already know.)
The battle we've all been dreading. The strategy is to summon Beetles, and three Invisible Stalkers via High Summoner's Staff. Avoid the traps. Cast Haste. The door locks behind us after Jaheira triggers the fight. (That didn't happen in my last run - not sure why - I had some Tweaks, while this run is unmodded?)
Dynaheir's Haste gets messed up in the chaos. Only she and Imoen are Hasted, the two who need it the least. Jaheira and I both cast Doom, hoping at least one lands. Dynaheir then starts casting Chromatic Orbs at Yxunomei. Khalid is firing +2 arrows. The summons do a pretty good job of keeping the yuan-ti mages at bay. Webs and Fireballs are cast. Finally, Yxunomei succumbs to a Chromatic Orb from Dynaheir. Yay! (Thanks so much for the advice on Chromatic Orbs, @semiticgod .) CO's don't have a +6 to enemy save penalty like in BG, and Dynaheir gets her Invoker bonus. This spell is now paralyzing enemies almost every time Dynaheir casts it.
One more ROYGBIV party rainbow portrait, because I like rainbows.
Next up: On to the Severed Hand
The scorcher loop won't work against the Salamanders and Tarnished Sentries in this area, so I hit them with Web, Symbol of Hopelessness, and Death Fog instead. Standard tactics bring down the Myconids, Minotaurs, and Umber Hulks in the next area.
Our sorcerers hit level 16 and get their level 8 spell picks. Apparently there's a bug in which you can lose access to your spell picks by exiting the level up screen early. I correct it with EEKeeper, and also replace the bugged Emotion spell with Polymorph Other. Testing found that IWD:EE's Power Word Blind does not affect party members, so we have to use Doom and then Blindness on Fobie (his base save vs. spell is now 0) to let him set traps in battle.
Buffed to the max, Valos has about -18 AC and can therefore tank the Iron Golems very effectively. Snowy Tae spends one of her precious Boon of Lathander spells to help bring down the Iron Golems faster, while the Umber Hulks behind them die in the Iron Golems' Cloudkill spells. Fobie tacks on a bit of damage with his regular traps, which currently do fire damage.
Malavon's clone awaits us in the next room. He arrives unbuffed, so we kill him with the scorcher loop.
Then the real Malavon appears, heavily buffed. My approach is very disorganized and I expose my party to Malavon's Invisible Stalkers, but I don't get punished for it. I send in Valos alone with a Moonblade.
Moonblade causes 100% spell failure on hit for one round. It's a horribly broken spell that's only balanced by a druid's low APR. But it doesn't work on Malavon--his Minor Globe of Invulnerability blocks the effect outright. Interestingly enough, Malavon's Breach spell also fails to work on Valos. Malavon gets the spell off the ground without disruption, but it just doesn't remove any of Valos' defenses.
After clearing up the Invisible Stalkers, I bring in the rest of the party to deal with Malavon. I remove Malavon's MGOI with a Secret Word from our bard, Marilyn Blueapple, then hit the drow with a triple Lower Resistance Spell Trigger from Espellier. Finally, while Malavon is a short distance away, Valos casts Nature's Beauty. Malavon is permanently blinded.
We're having trouble with a couple of Malavon's Earth Elementals, so Fobie uses a Maze trap to remove them. A Phase Spider remains, which we decide to ignore for the time being (Chromatic Orb unfortunately does not work on IWD:EE spiders).
Without his MGOI, Malavon is vulnerable to Moonblade. Valos repeatedly disrupts his spellcasting. But we get in trouble. I accidentally leave the game unpaused while distracted and Poppy loses a lot of HP to Phase Spider poison, but an Elixir of Health and some running keeps her safe.
Espellier, however, is not so lucky. Valos fails to hit Malavon, allowing him to get a Cone of Cold off the ground, slaying Espellier. I finally remember to use Power Word: Silence from Marilyn Blueapple, Malavon loses his Stoneskins, and eventually falls to a backstab from Fobie.
We kill Fleezum and Flozum with the scorcher loop just to keep things simple. We find the Morningstar +4: Defender as a random drop. It goes to Snowy Tae.
Valos drinks a couple of Potions of Genius to make sure he can ask Marketh for his equipment (character with certain stats can take his items, but don't ask him to hand over his ring). Then thieves and Kraken Society Mages descend upon us. Things go well for a moment. The scorcher loop is very effective against the thieves, as Evasion doesn't work against it, but then Espellier gets hit by Breach, which apparently bypasses Spell Turning. She becomes vulnerable to fire while the scorcher loop is still active, and our own weapon takes her down to 3 HP. She only survives thanks to a Potion of Invisibility.
Seven Eyes keeps the Kraken Society Mages alive and well against Symbol of Hopelessness and Fobie's normal snares. We struggle to bring back the scorcher loop, only to see Poppy Breached. We keep making progress despite being hit by Mordenkainen's Force Missiles, Cone of Cold, and Horrid Wilting from the enemy mages.
But then Poppy gets chunked by another Cone of Cold spell, despite being at full health. Per the rules of my run, I reload to prevent the chunking.
The next time around, we rely heavily on Web and Death Fog. We still get very badly hurt by Cone of Cold, but with multiple Webs on the map, the enemy just can't cast that many spells. It ends with a single mage who escapes our Webs and Death Fog spells, only to fail a save against Chromatic Orb. We free Ginafae and gain even more levels. Dorn's Deep appears to be much more dense with XP than previous dungeons. We've been gaining levels a lot faster than in the past.
Finally I go to talk to Nym. But I accidentally choose the wrong dialogue option and turn him hostile, and when I lower his magic resistance and try to charm him in the hopes that I can use him to continue the Durdel Anatha questline or barter some stuff, I find that Nym is immune. I assume he had a unique immunity, but the reality was simply that he, as an elf, was 90% immune to charm spells. I would have had a decent chance of charming him had I continued, but I'm not sure if that would have made much difference anyway.
We can no longer complete the Durdel Anatha questline, nor can we buy any of Nym's goods. And I never decided this was a cause for reloading, so we're stuck with the loss. We paralyze him with Chromatic Orb and kill him.
I might not go into Heart of Winter. I've grown tired of this party and want to get this run over with, and HoW would just slow us down.
I'm still having a lot of fun with mine, though.
Here, we are ambushed by a huge pack of undead worgs. Wait, did you say undead? That's my speci-a-lity. I basically save our butts here with Turn Undead.
You see, this is why you want pure-classed clerics and mages throughout the game. Multi-classes are *always* one full spell level or one full Turn Undead level behind what they're supposed to be in relation to the game content, FOREVER. Dual classes are even worse. Don't even get me started on how I hate dual classes, after what we went through in Dragon's Eye with a gimped Imoen!
Here's another battle where Minsc is about dead to Skeletal Warriors, Bone Golems, and Wraiths. Things are looking bleak. But then, (angel choirs sing "Ahhhhhh"), my appropriately leveled Turn Undead turns Bone Golems and Wraiths into cowering, helpless, pitiful things before the Light of God. I find this quite satisfying, and a vindication of my faith, and my devotion completely to it, at the expense of martial melee skill.
Next up: More Severed Hand
The other factor is the strategy I'm using. This was an experimental run in the sense that I wanted to play a HoF run without the obligatory summoning spells, but it involved little new tactics. For instance, I relied very, very heavily on Chromatic Orb, Web, and Fireball, which have traditionally been my IWD mainstays, whether I'm in normal mode or HoF mode. In that sense, the gameplay hasn't been very new to me.
My favorite parts so far have been the times when I've had an excuse to pull out the scorcher loop. Although the setup is kind of elaborate, it's very entertaining to see massive swathes of powerful enemies fall to a single loop.
Normally I talk my way to Maiden Ilmadia and fight my way out from there, but this time I decide to antagonize the Fire Giant guard at the entrance. Chromatic Orbs repeatedly fail to paralyze the giants as they come, and Symbol of Hopelessness and Fobie's normal snares also fail to harm them, but our sorcerers' Symbol, Stun spells hold a few of them in place, trapping a couple of the others behind them. I flood the area with Death Fog spells, only to see Maiden Ilmadia march right through to intervene.
To my surprise, Ilmadia fails the first save against Chromatic Orb, dooming her. Fobie hastens her demise with backstabs; he is blind in all of our fights now and can hide in plain sight. The giants survive the multiple Death Fog spells, but are weak enough for us to finish them off using melee attacks, our least powerful option when enemies aren't disabled.
Ilmadia's Cleric/Mage allies remain, but have not joined the fray. I go after them, but Valos quickly runs out of Ironskins and dies the same round a new Ironskins spell gets disrupted. A scorcher loop, amazingly enough, fails to impact the elves at all--they seem to be immune to magic (they only have 76 base MR; I assume the complete lack of damage was due to luck on their part). And although I can Maze the two Fire Giants that join the fight, I can't Maze the elves; one of their defenses appears to have blocked the trap projectile.
We are low on spells, low on defenses, and our enemies are protected against both our weapons (Stoneskin) and our spells (magic resistance). For the first time ever, I cast Protection from Magical Weapons, allowing my sorcerers to cast Lower Resistance on the elves, and prepare another pair of Spell Turning spells, without risk of disruption or death. Meanwhile, Snowy Tae, our Cleric of Lathander, casts Wondrous Recall to memorize a pair of Protection from Fire spells, and one of the Fire Giants rejoins the fight.
With the elves' magic resistance lowered somewhat, I can now hit them with the scorcher loop. One of them dies outright; the other barely survives. While the Fire Giant and cleric/mage are distracted, Snowy Tae runs in to cast Protection from Fire on the Fire Giant, lowering its fire resistance from 100% to 80%. Another scorcher loop kills both the giant and the elf.
I seek out the last Fire Giant and disable him with the last of Espellier's Symbol, Stun spells. Soon he is dead. The only fights left in Dorn's Deep are with the Idol and Poquelin. Then we will be back in Easthaven to face Belhifet.
Our sorcerers hit level 18. Although I originally planned on having Poppy and Espellier strike Belhifet with Black Blades of Disaster during Time Stop, I decide that Wish would be the safer option in the long run. Projected Images should help keep us alive in the long fight with the final boss.
The fight with the Idol isn't too special, save for one detail: the Voice of Durdel Anatha reappears, but this time, we're able to reason with it. Apparently you don't need to keep Nym alive to complete the quest. Merely speaking to him lets you tell the Voice of Durdel Anatha the information necessary to put him to rest. So killing Nym didn't prevent me from completing that quest (though it could have, if I killed Nym before talking to him). A scorcher loop fails to destroy the Idol and Valos makes a save against Flesh to Stone (I forgot the Idol even cast that spell), but it goes down with a few Death Fog spells, taking the Zombie Lord and Greater Mummies along with it.
I neglect to look up how to complete the Durdel Anatha quest. You're supposed to take his remains somewhere, but I never did. I just fight Poquelin instead. I could kill Poquelin with a scorcher loop had I lowered his fire resistance using Protection from Fire, but after suffering a bit of damage from melee attacks, he teleported us to Easthaven.
Pomab's fight was buggy. Typical. All that's left is Belhifet.
Belhifet was a nightmare. I thought the Dispel Magic effects in this fight were limited to the traps, which I hoped to avoid using the Detect Traps cleric spell (you can't disarm them and our thief is blind anyway, so he couldn't detect them on his own), but apparently the fight begins with Remove Magic. I forgot to buff with SI: Abjuration, so we lose all of our buffs, from the potions we drank to our normal buffs to the extra stuff like universal Chaotic Commands, Death Ward, Protection from Cold, Protection from Fire (mage version), Protection from Lightning, Protection from Acid, and Free Action, which I put on everybody on the grounds that Wish-resting could let me cast however many buffs I wanted.
Espellier panicked and wandered off, getting crushed moments later. Valos held the fort in Water Elemental form with Armor of Faith to boost his damage resistances to 100, but apparently shapeshifting removes a druid's immunity to poison and poison damage, making him vulnerable to Belhifet's disease effects.
More than once, I've criticized the idiocy of the fight with Belhifet. The guy has more immunities than Kangaxx and Demilich put together (yes, really) and inflicts a permanent poison or disease effect (50% chance each), with no saving throw, that deals 1 damage per round, forever. This is why I made sure I had 20 Elixirs of Health and 20 Philters of Purification before the fight. He is immune to all spells--seriously, every spell in the game, no matter what it is--and on top of that, he has a roughly 100% chance of disrupting his target's spells. The only way to avoid disruption is to play a Cavalier (who doesn't rely on spells anyway) who has immunity to both disease and poison.
Anyway, Valos clings to life while our remaining sorcerer, Poppy, tries to cast Wish via Project Image. Meanwhile, Fobie runs to the other corners of the battle to set special traps to Maze Belhifet when he teleports around (turns out Belhifet is immune to such traps, though the Cornugons and Iron Golems are not).
I get a Wish-rest early on, which means I can send Valos into Water Elemental form once more later on (the shapeshift lasts forever, but the Armor of Faith does not). To the side, Snowy Tae casts Raise Dead on Espellier and Heals her.
Further attempts to Wish-rest fail. Espellier loses a Project Image clone early on and tries to create a new one, but it turns out that re-casting Project Image is impossible while the duration is still in effect, even if your clone died many rounds ago. Espellier loses two or three castings of Project Image before I realize it's having no effect.
Valos dies. It seems that Cornugon's bleeding effect, which deals slashing damage over time, bypasses immunity to slashing damage. Valos bleeds to death in Water Elemental form.
I bring back Valos with Raise Dead and Heal and attempt to make progress on the enemy. We kill an Iron Golem early on, but the remaining golem and the two Cornugons remain very healthy. We tank them with Espellier using PFMW (who has nothing better to do since she can't cast Project Image yet), Valos using Water Elemental form (the previous Wish-rest let him do so once again), and Snowy Tae, by stacking Armor of Faith with Defensive Harmony and Entropy Shield and Draw Upon Holy Might, which put her AC down to -27. Which still isn't enough to hold off the enemies, as her buffs don't last long and Belhifet has a habit of landing critical hits.
Knowing that re-casting Project Image early is impossible, I keep Poppy's clone alive, using it to Feeblemind a Cornugon (they don't have the demon immunities they have in BG2, and are therefore vulnerable to Feeblemind). Despite many castings of other spells, Poppy's clone has a very small impact on the enemy.
Finally, Poppy's clone vanishes. She can re-cast it and try to cast Wish four more times. But a Cornugon attacks the original Poppy, and the slashing damage, which apparently can bypass Stoneskin sometimes, disrupts her Project Image spell while still preventing her from re-casting it.
Espellier re-casts Project Image. It fails to get any Wish-rests. We got one such rest early on, but every time since then, we've failed to get much of anything useful besides party-wide Improved Haste. Then her clone gets killed. And not only does this mean we lose access to some spells--it also means that we don't know when Espellier can re-cast Project Image, because our only indication of it is the clone running out its duration. We have to guess when she can cast it again. And if we guess wrong, we lose another 4 castings of Wish.
Fobie runs out of traps. By now, I know that his Maze traps have no effect on Belhifet, and he already used up the others on Belhifet's goons. Then he gets targeted by both Cornugons and two of Belhifet's three summoned Shadows. Realizing that he is little use to us anymore, I send him off to the west to lure the enemies away.
The Cornugon rolls a 2 and chunks Fobie.
Per the rules of my run, I could reload, but I'd rather not, since I wasn't planning on raising Fobie anyway, and there is no fight after this for which we might need him. I decide to roll with the loss.
Poppy mis-times a Project Image spell and wastes it. Snowy Tae nearly dies (our only source of Raise Dead, though I didn't realize the importance of this at the time), but Valos rescues her with a Heal spell.
Round after round after round, we struggle to get a Wish-rest so Valos can start properly tanking again. Finally, finally, we get our wish.
We gradually take down Belhifet's allies, using every tiny spell we have to try and hasten their fall. The sooner they go down, the less time Belhifet has to destroy us. At last, Belhifet is on his own.
He nearly kills Snowy Tae multiple times, landing hits with 18s, 19s, and 20s. With Valos in Water Elemental form and Snowy Tae stricken by disease and poison, we have nobody to cast Heal on her, so it takes an extra round to down an Elixir of Health before she can get back on her feet.
Eventually, Belhifet gets weaker, while our party maintains its position. By keeping our sorcerers and our bard out of the way and refreshing Snowy Tae's buffs, we avoid getting destroyed. Our many Elixirs of Health prove instrumental in surviving Belhifet's poison and disease. Heavily buffed, Snowy Tae hits hard, albeit with low APR. Valos is the same way. Although we have terrible luck with Project Image and Wish, our tanks are strong enough that Belhifet cannot regain the upper hand. The demon falls.
One no-reload level Heart of Fury run of IWD without summons, complete.
I have to say I find the challenge in both your and @BelgarathMTH runs quite complementary and satisfying. They illustrate how to construct a challenge with a consistent self-imposed ruleset.
Thank you both for sharing your stories.
We have completed the Severed Hand module.
My pure class cleric Charname's Turn Undead made this whole dungeon kind of easy.
Against this room full of elf-ghost archers, I manage to get all of them Turned just in time to save Dynaheir's life. About half of them targeted her as soon as we entered the room, and she had no chance to live, even with Mirror Images and healing potions. (In IWD, enemies have a chance to hit the real mage even with Images still active.) I've found running around rooms of undead mobs with Turn Undead activated to be a great tactic. It forces them to run as far as they can away from me, which allows me to herd them wherever I want them, like a sheepdog herding sheep.
It turns out that wraith spiders have magic resistance in IWD! And, they can't be Turned, or at least I couldn't Turn any. These pesky creatures are *much* more dangerous in IWD than in BG. Imagine if the Cloakwood spiders in BG were of the IWD species! Yikes!
Against the penultimate elf-ghost mage mob, I manage to get the first group Turned before they can do much damage. One of them gets a Slow to land before catching a glimpse of my shining holy symbol and screeching away. In the next room, the most powerful ghost-elf mage gets his Ice Storm off into the center chamber before I can Turn him. The rest of the party, especially Dynaheir, has to scramble out of that chamber. Next round, he's Turned, and we can wait out his Ice Storm. The rest is easy.
A word of caution to cleric-lovers: Do NOT enter the astrolabe room with your Turn Undead ability active. It chunks Larrel and breaks the game. I allowed myself a courtesy reload here. Chunking Larrel means he can't use the Heartstone Gem to trigger the next chapter of the game. He should be immune to Turn Undead to prevent this, but he's not. An oversight by the devs, I rule.
Next up: Upper Dorn's Deep
We went pretty easily through the first level of Dorn's Deep. Jaheira is wearing the armor that makes her immune to most of what the myconids can do to her, that only a neutral or evil character can wear (i.e., only Jaheira in our good party). Once or twice she gets Panicked, but my Exaltations and Remove Fears put a stop to that. I saw a use here for Remove Fear over Exaltation - Exaltation requires a touch, which is very hard to execute on a Panicked character. So, Remove Fear is better, since it has a range of "sight of character". But, even with that, the Panicked character might run out of the range of the epicenter of your cast, which happened to me once.
I discovered for the first time that there IS a way to rest on this level without causing the entire level's worth of myconids and ettins to respawn. There's a cave near Bandoth's home filled with orogs, and if you kill them and rest there, you can rest safely without causing "Mass Respawn". This will be very helpful info for future runs, since any other rest strategy on this level, including the usual "retreat back outside", causes the "Mass Respawn". No other cave on this level permits this, except the one next to Bandoth.
I learned the hard way from my last "easy run" (due to using BG2 kits and maxing the DEX stat on the party), that you need a high charisma character in the lead position in order to complete Bandoth's side quest involving the extract he wants, found in one of the caves southwest of his home. Otherwise, he becomes hostile and attacks you as soon as you give him a "wrong answer". You also have to tread very carefully in his dialogues with your highest charisma character, to get the quest in the first place.
The next great thing about Bandoth is that he has some of the only fifth level scrolls you can get in the pre-expansion game. They're all summoning spells, except for one, Summon Shadows, which is necromantic, meaning Dynaheir with her restriction against summoning can still use this one. (Yay!)
I drink Potions of Clarity and Genius for both witches, and have them scribe bunches of spells. Now, Imoen can summon Fire Elementals, and Dynaheir can summon Greater Shadows. (As a good cleric, I prefer to think of them as "Spirits of the Heroes", so I can look the other way about that "Necromancy" thing.
As we move back to the bridge to the second level, Khalid levels as a fighter, and gains Grandmastery in longbows. He now has Thac0 5 and FIVE attacks per round, using the Longbow of Sseth. I really don't understand people who knock Khalid. He has the potential to be the best archer you can get in BG, using his fighter mastery in longbows. I think people who don't like Khalid are actually just prejudiced against him because of his charming, stuttering personality, or else they don't understand the potential of a so-so Strength fighter who uses his fighter perks to master archery. (And Khalid has a pretty good Dex to support his focus on archery, to boot.) As you can see from the "Information" screen, Khalid has a solid 33% kill rate in our party of six, over the whole game so far.
As we move into the level two kill zone, Dynaheir's Greater Shadows come in very handy. Somehow, I get most enemy aggression onto myself, and I have to fall back to heal myself. Khalid and Imoen concentrate on the orc archers we can't get to, while Jaheira and Minsc tank the spiders and elf Stoneskinned fighters. All and all, this was not as hard as usual, thanks to Dynaheir's Greater Shadows. That's going to be a *quite* useful spell.
Next up: Level Two of Dorn's Deep