Sycamirage's Ultimate Guide to Baldurize Your Portrait
 lolien
Member, Moderator, Translator (NDA) Posts: 3,108
lolien
Member, Moderator, Translator (NDA) Posts: 3,108
Hello folks.
Let me introduce for you my familiar Sycamirage. She will show you a tutorial about baldurizing a portrait picture.
Before you start into modifying other people's work, keep in mind this.
 Sycamirage Posts: 1
Note, this is not a thread about how to use custom portraits (one which is already available for You) in the game. For that there are discussions here: https://forums.beamdog.com/discussion/36241/heres-how-to-use-custom-portraits-in-iwdee/p1
The purpose of this thread is something different, something more.
You ever wondered about how to make those fancy custom portraits, what You find on professional artist's site like Isandir or Artastrophe?
You would like to baldurize your own portrait?
You are in the right place! I will show You, how to do this magic!
If You search for custom portraits on the web you can find many. And i mean MANY. You can spend your remaining life browsing for portraits on the web for your next character.
There are many artists, who are making custom portraits. Some are trying to follow the original style of the BG portraits, like @Isandir (link above), others follow their own style like @jakaminski for example.
Oh, i hope you know the original artist of the BG portraits? He is Mark Sass, and here is his site: http://sassart.com/
Trent tell us here , how Mike did the original portraits. Also here You can see, who is who on the BG1 portraits.
@AndreaColombo and @Isandir even contact Mike and ask him how he did the vanilla pics:
https://forums.beamdog.com/discussion/comment/533742#Comment_533742
https://forums.beamdog.com/discussion/comment/72226/#Comment_72226
But You would like to make your own portrait.
Yes?
Of course yes, this is what You were looking for, this is why You came here for the first place...
And i will show You!
Now if I would truly lazy
Ok, i promised to show You myself. I'll do it, just for You. Here:
There are persons for whom it's harder, and there are for whom it's easier.
If You don't have the time, You are hungry or thirsty, distracted by RL stuff or just tired, it's possible, that You should postpone the portrait making for another time.
It's a good idea to listen to your favourite music, while You work.
I provide some example for the various quality, to help deciding if yours is good enough.
Too much light:
Too much darkness:
Too few color:

Too much writing:
Maybe it's possible to baldurize the above pictures too, but You can make your work a lot easier, when you get one with better quality. Sometimes You can be so fortunate, that You have available a pic with full details, and You just have to make a few touch to make it fit into the game!
The key properties of a good starting base picture for the portrait (let it call the BG rules):
Big resolution
Good lightning
What character would You like your portrait to be?
A mage?
A sorcerer?
A bard?
A rogue?
A ranger?
A cleric?
Also, You must decide in what style would You like to make your picture.
BG1, BG2 and IWD all use different portrait style.
I usually go for BG2 style.
Two of my attempts to reach something like IWD style:
You can choose another, totally different style too, of course.
I use Photoshop, and only have (limited) knowledge from that program, so if You use other method, You can't learn much more from this tutorial.
I know.
Lame.
So You have the good quality picture to work with, and You have a concept what You would like to do with it.
This tutorial is already long wided, so i will not explain all the details of using Photoshop, there are plenty of good help on the web.
First we will create the arrangement of the portrait.
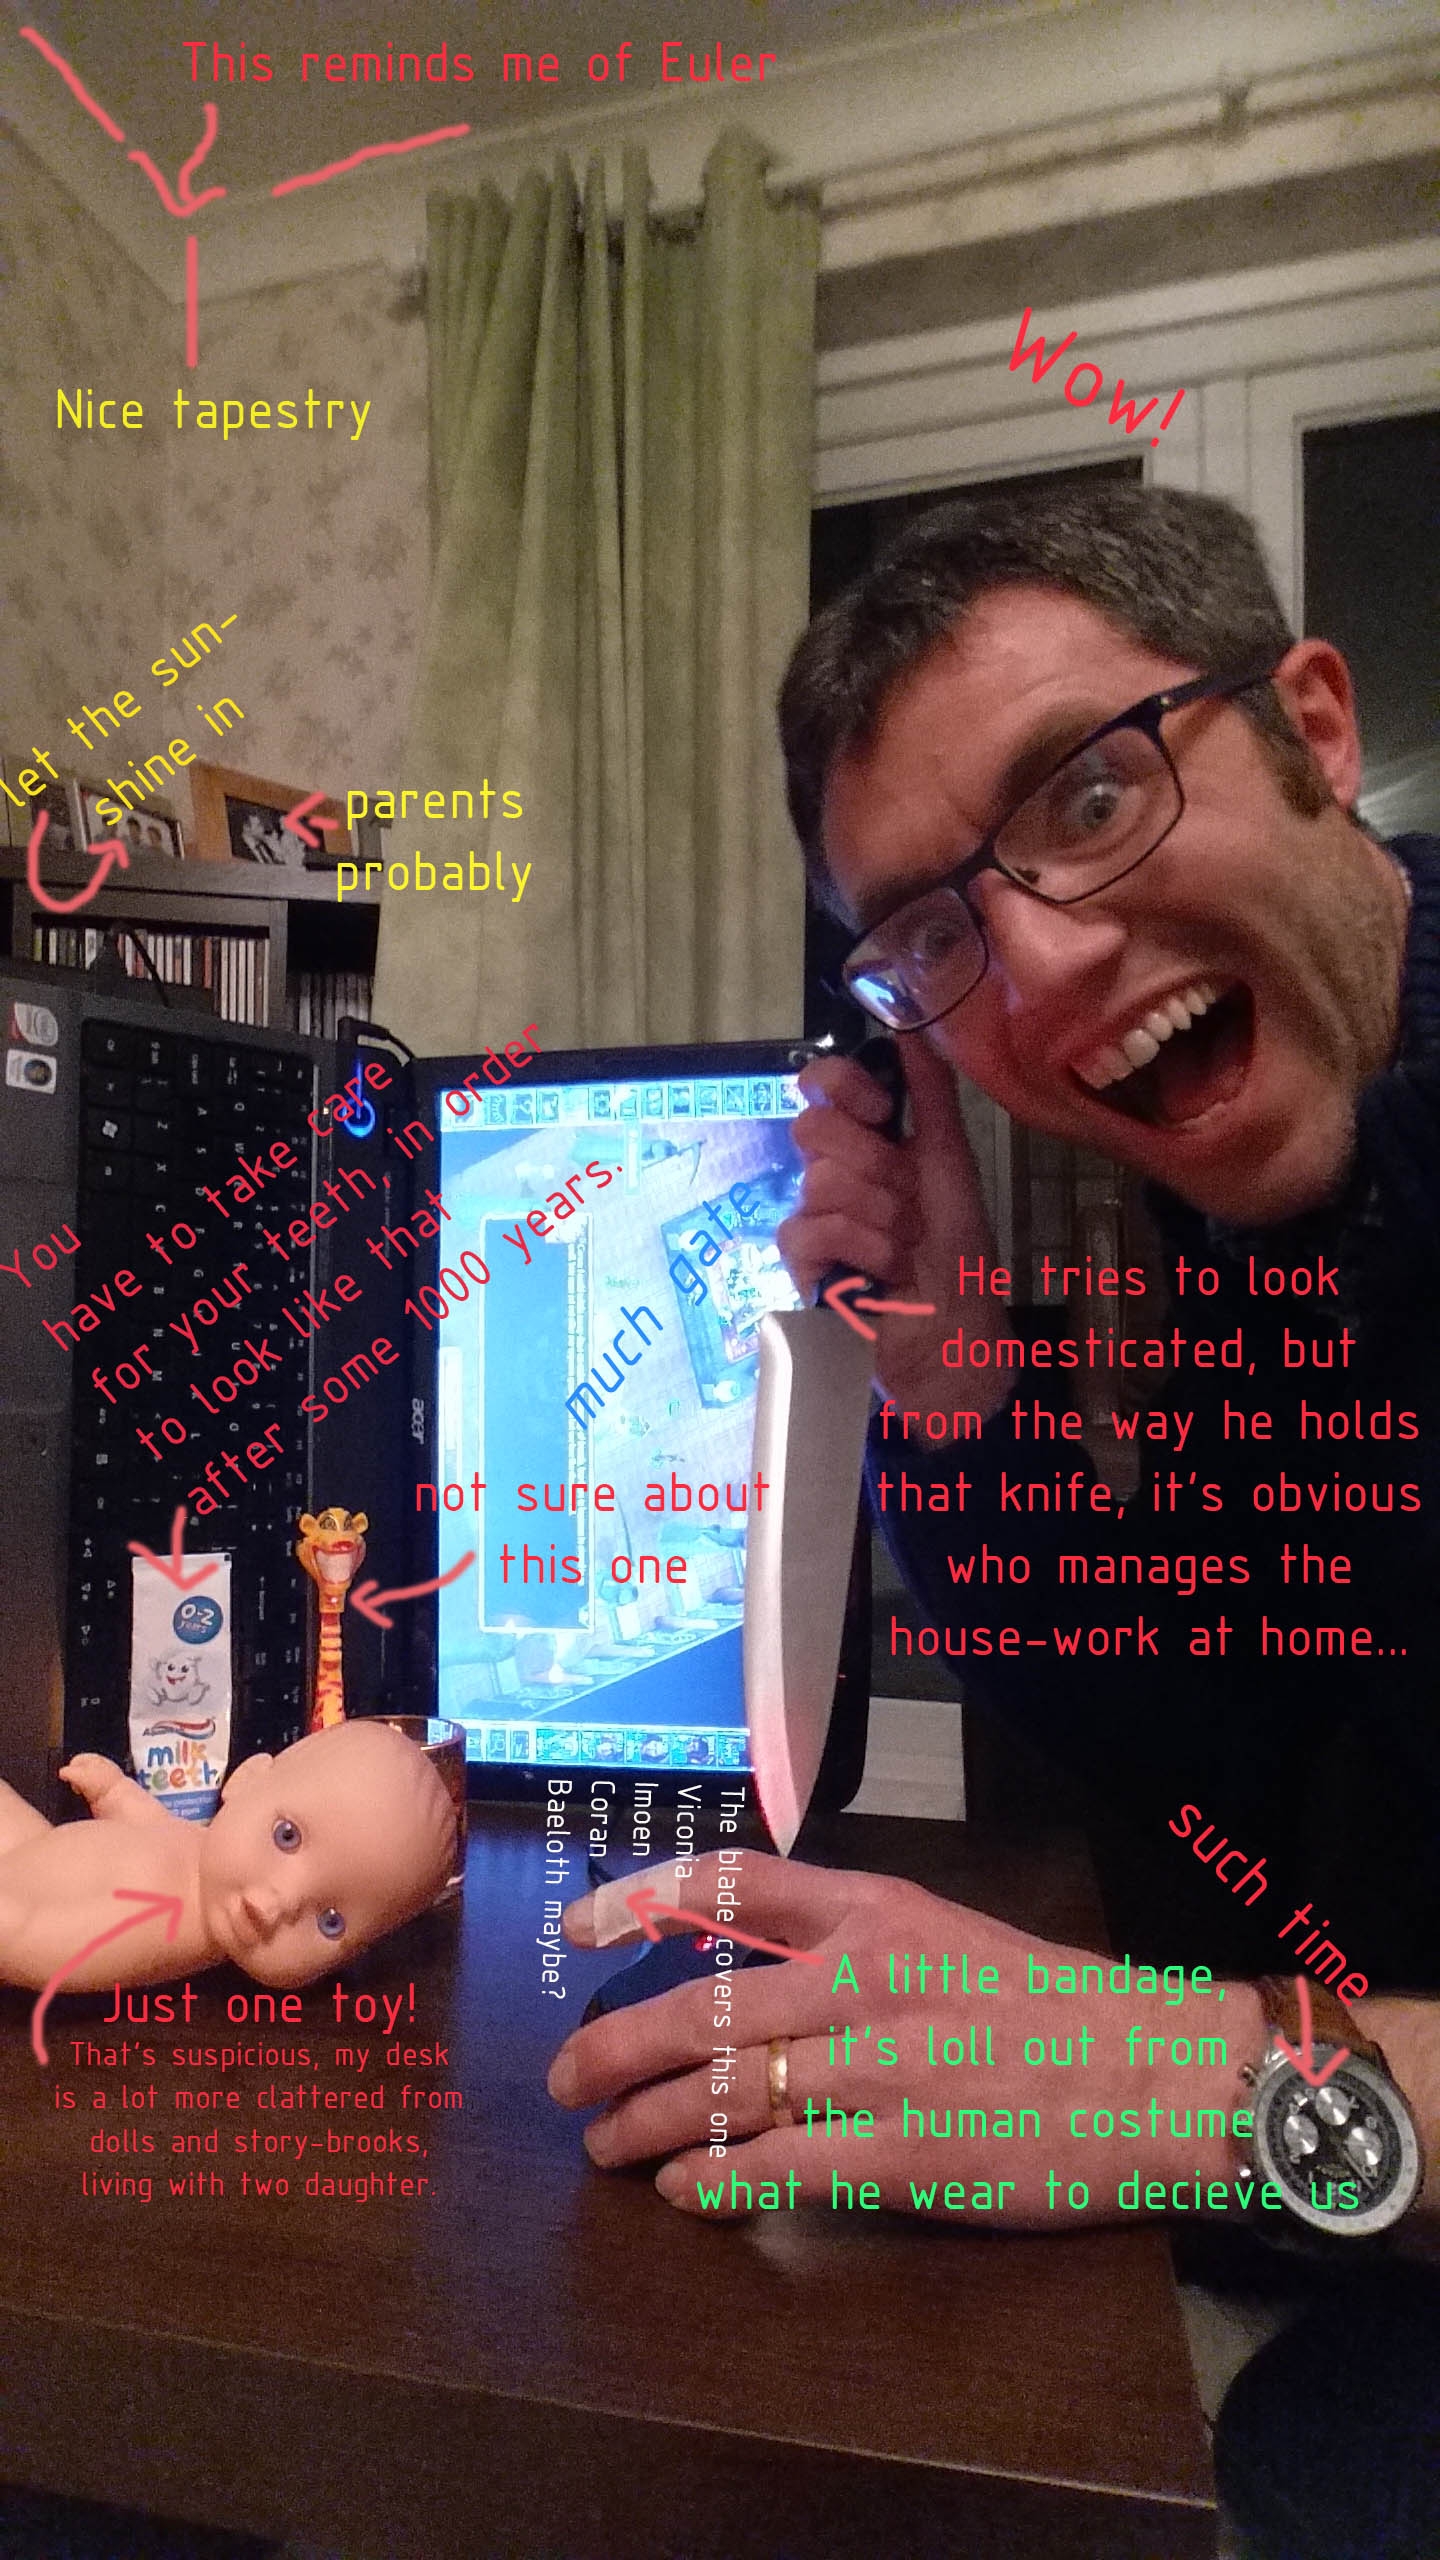
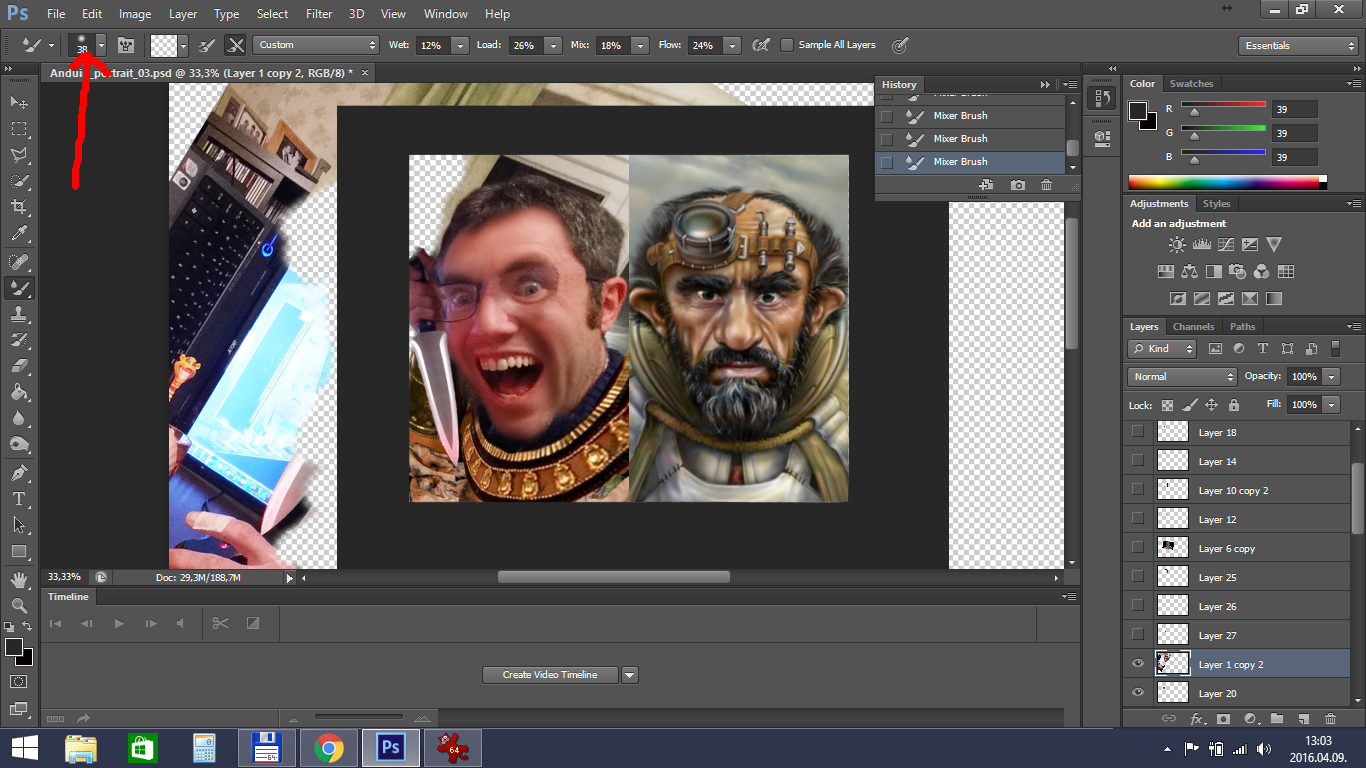
Put the original picture in PS, and duplicate it's layer already. I use to make a copy from the layer i work with, when i reach another work phase. Also save your progression in multiple files. (Or save not, if You are a hardcore player, and want to do a no-reload run.)
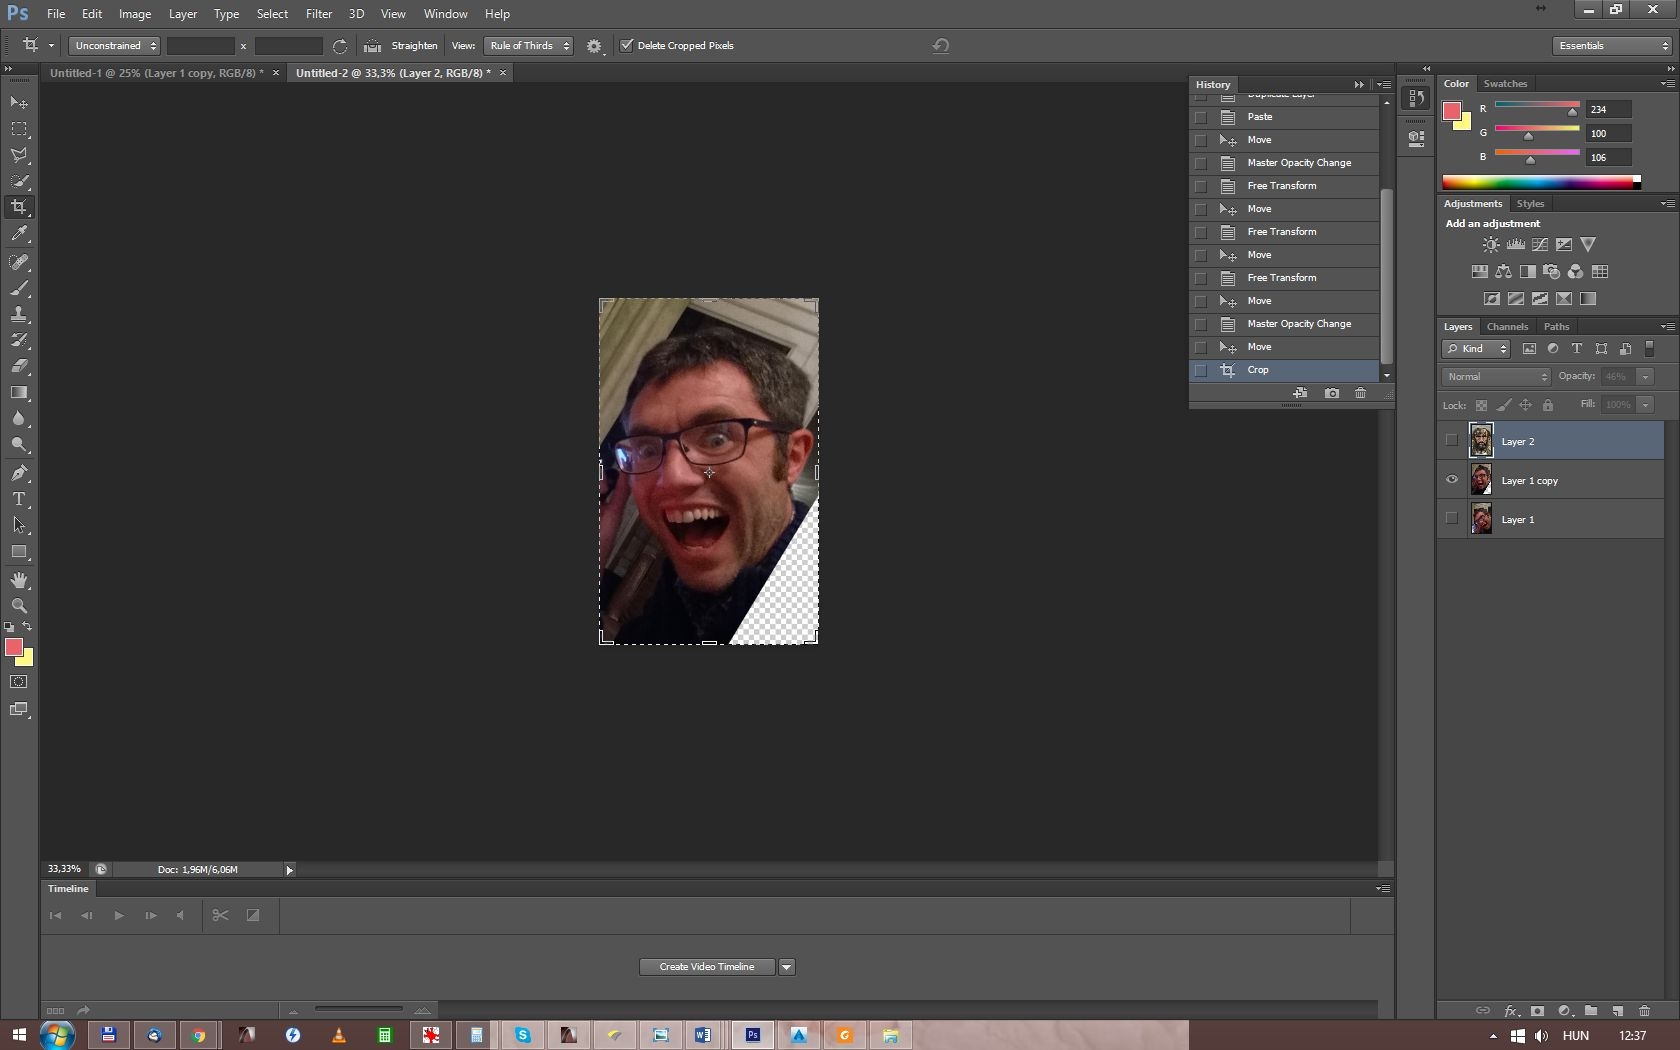
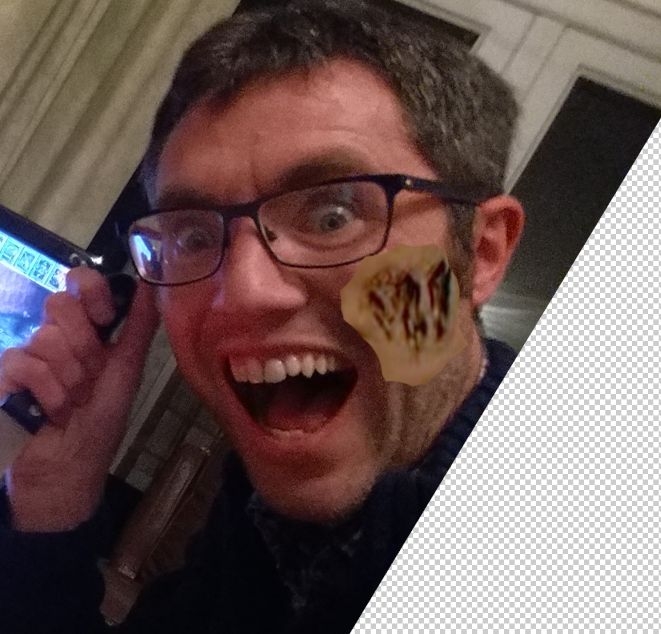
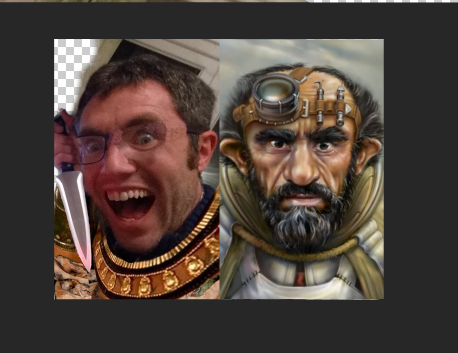
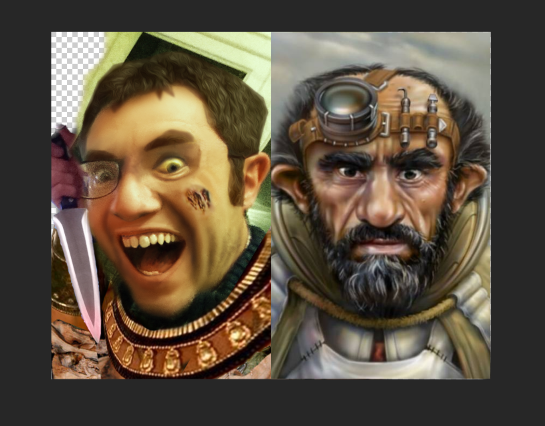
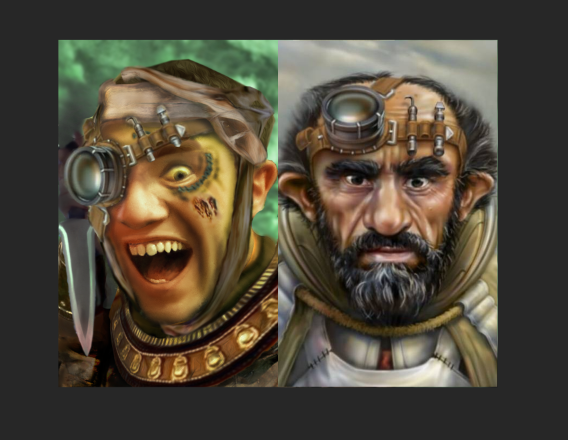
We picked the pic:
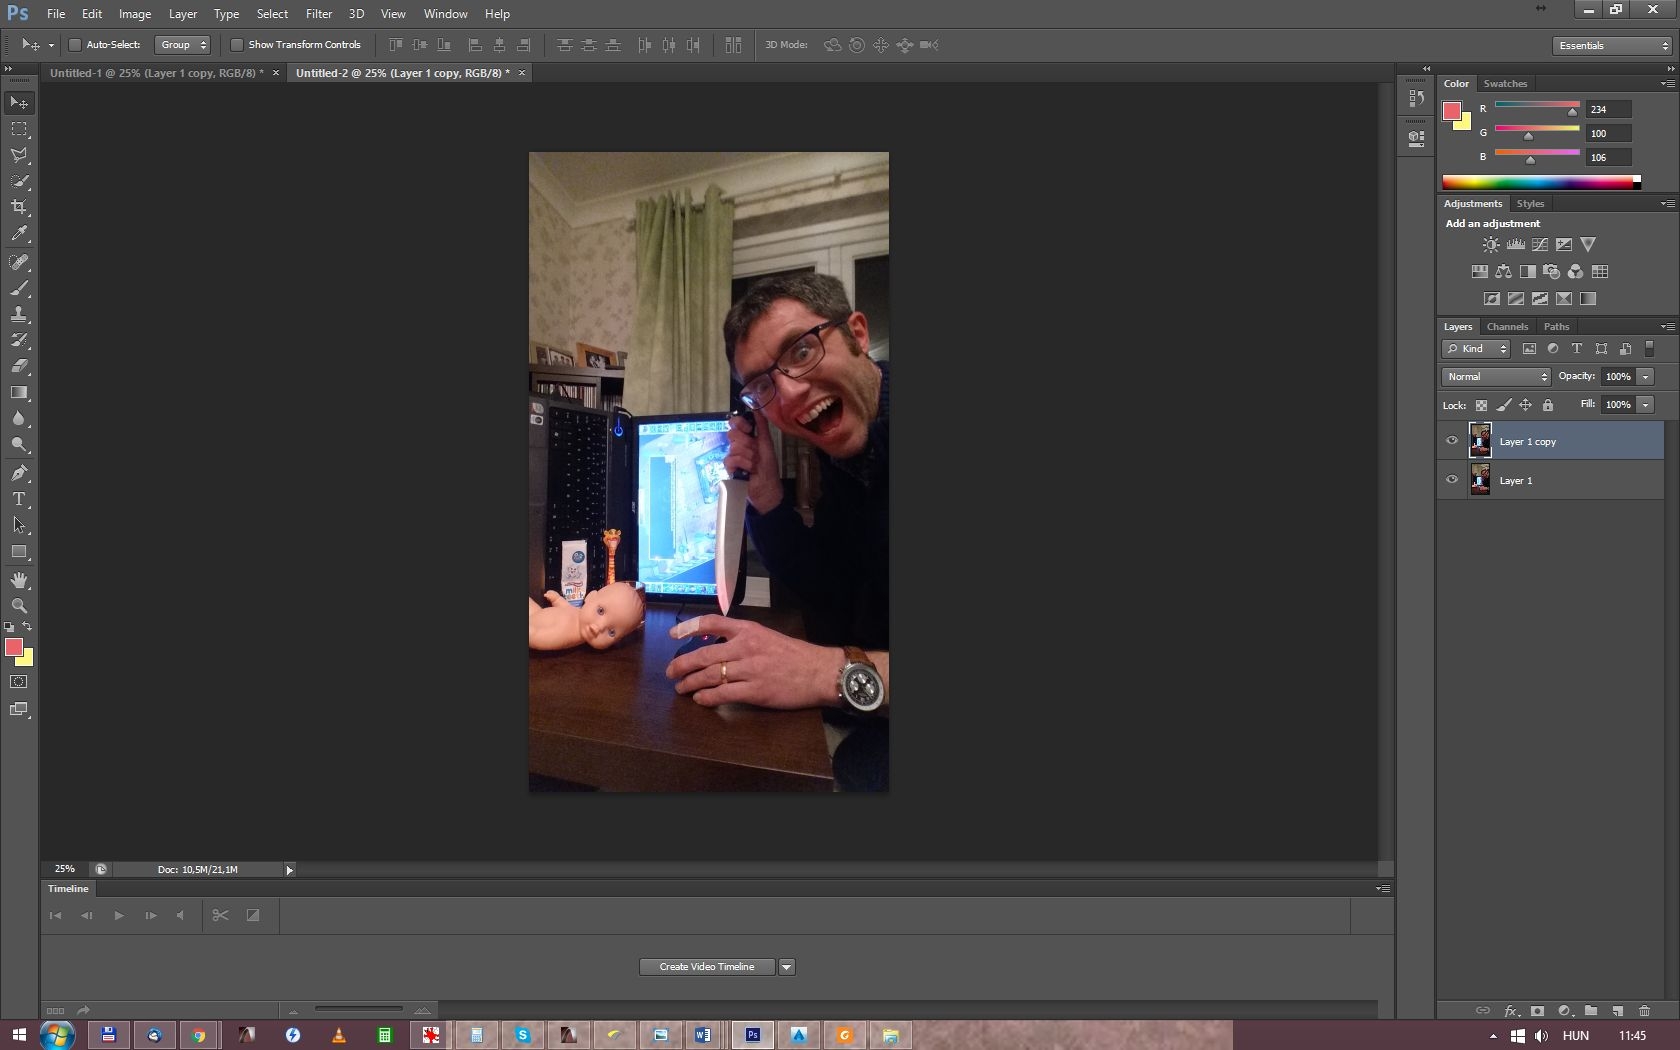
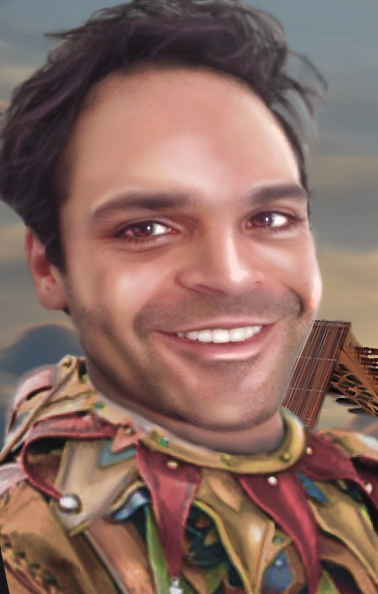
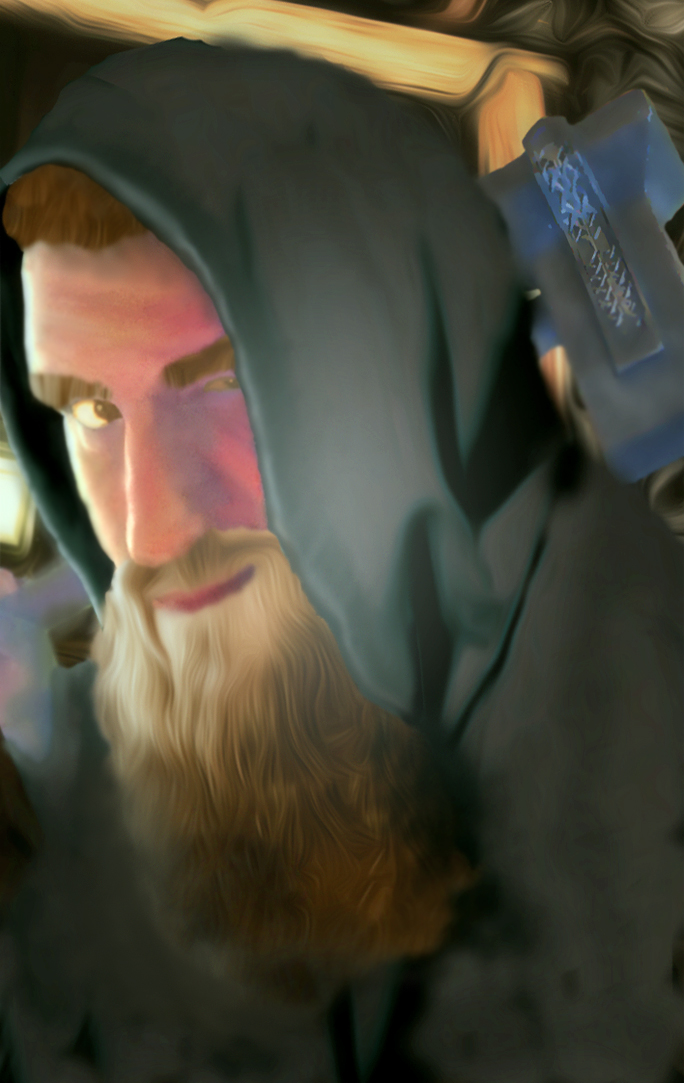
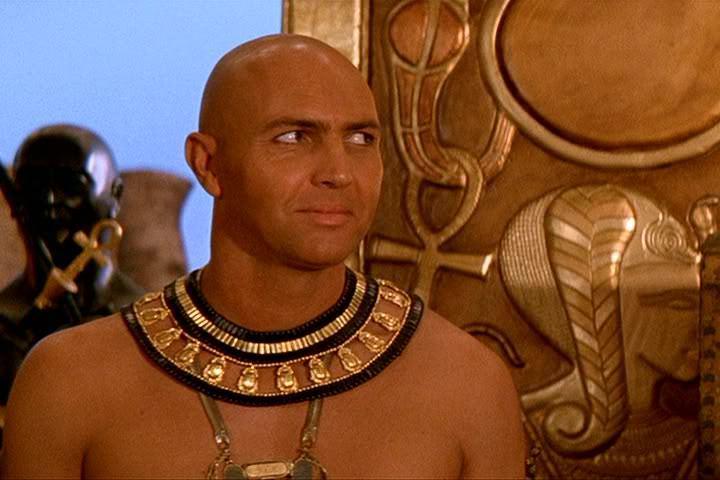
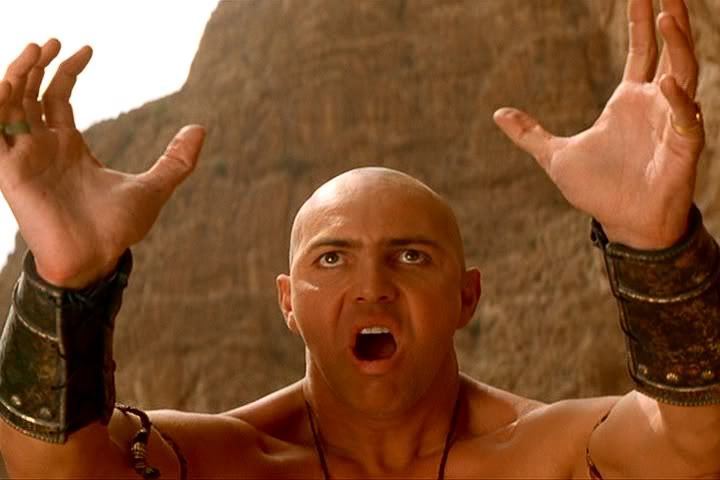
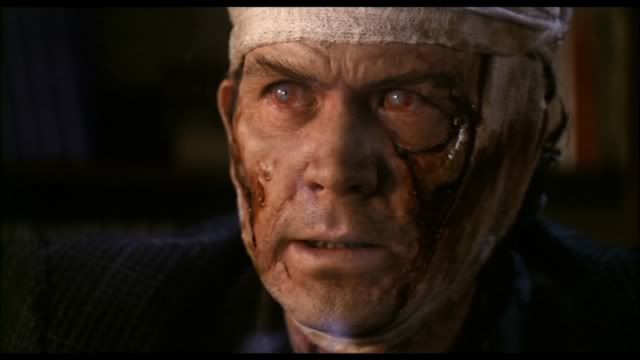
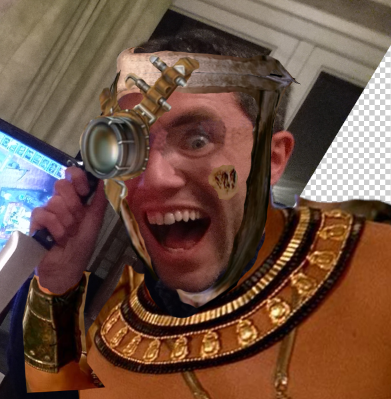
The coception is to make a gnome mummy from this one. I totally have no idea at this time, how i'll manage this, so yay! Exciting!
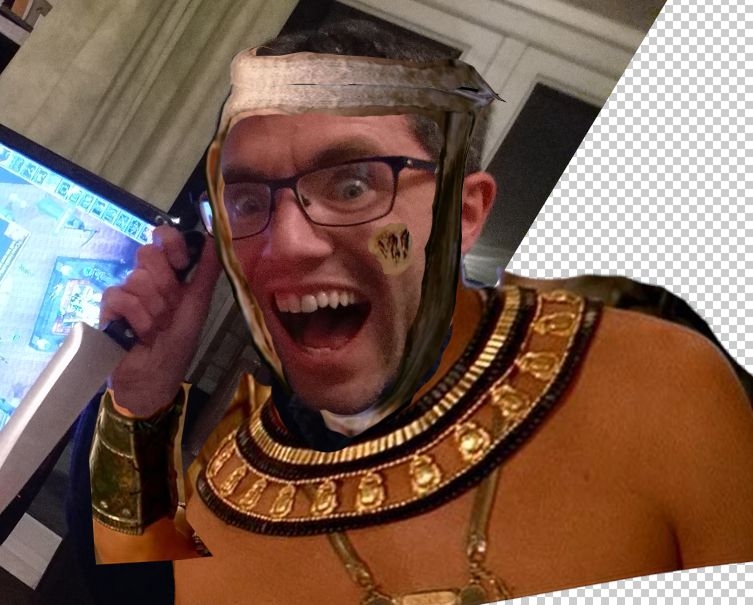
I always insert one vanilla portrait beside mine, to have an idea, what i would like to reach, what will be the area, what on i will work.
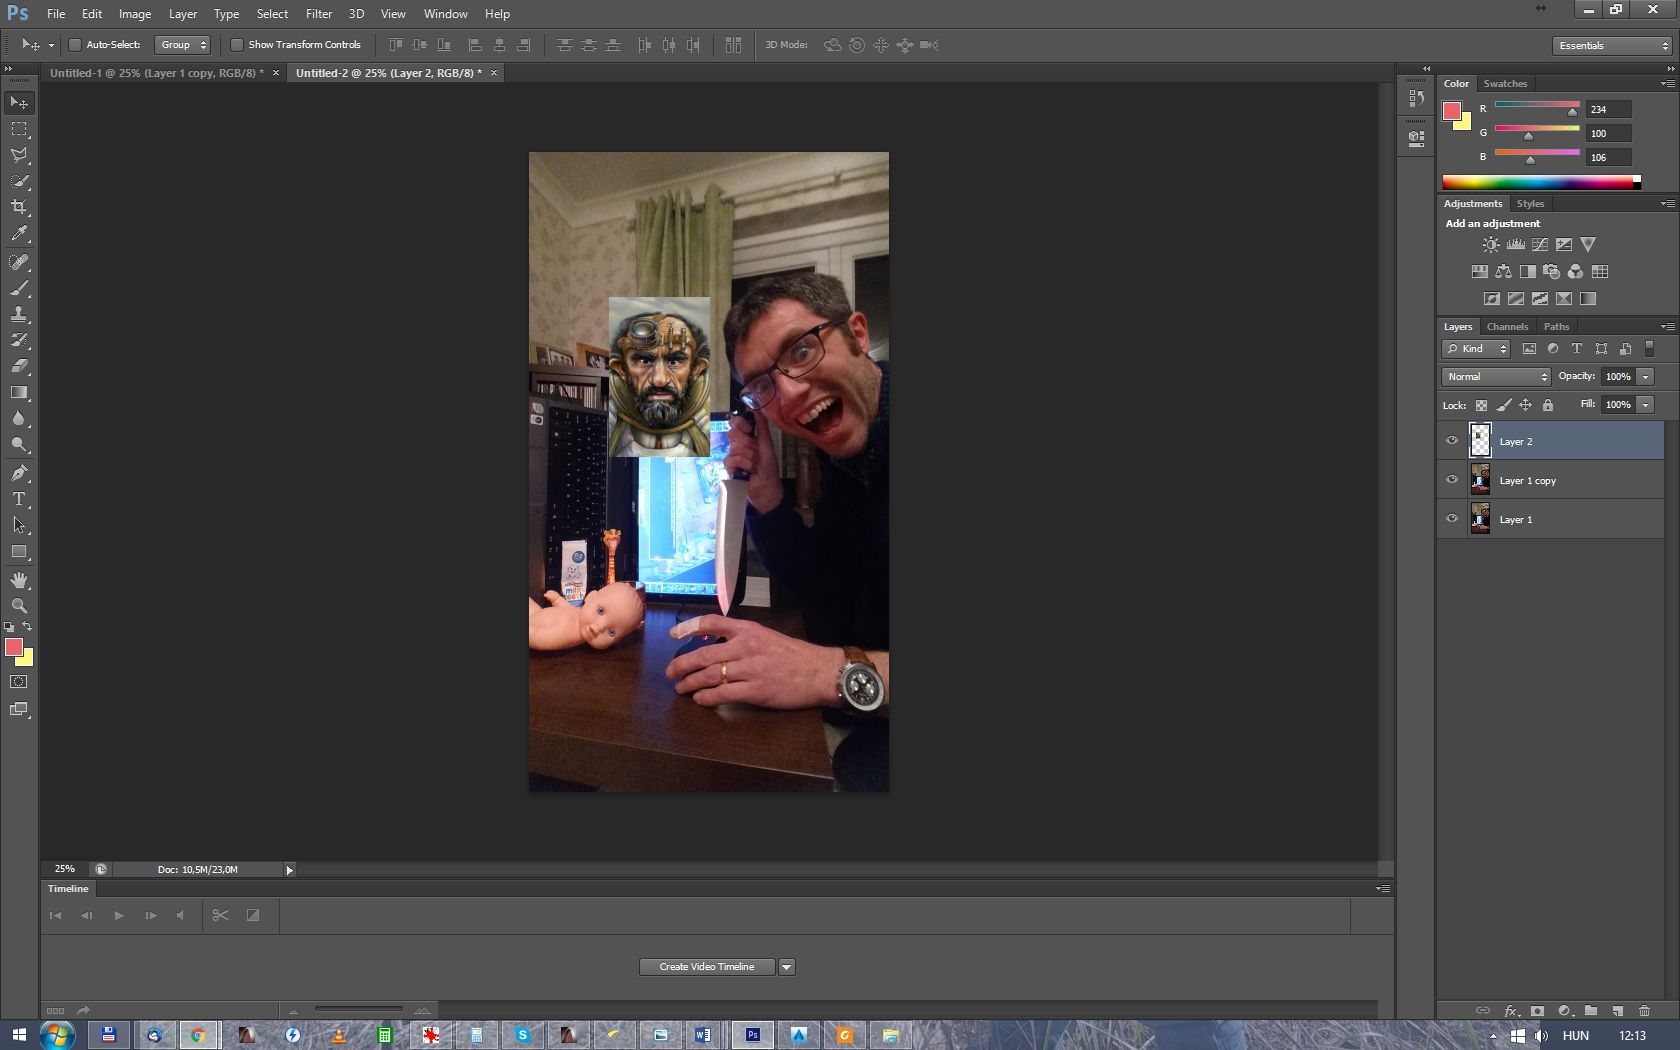
I give it some transparency:
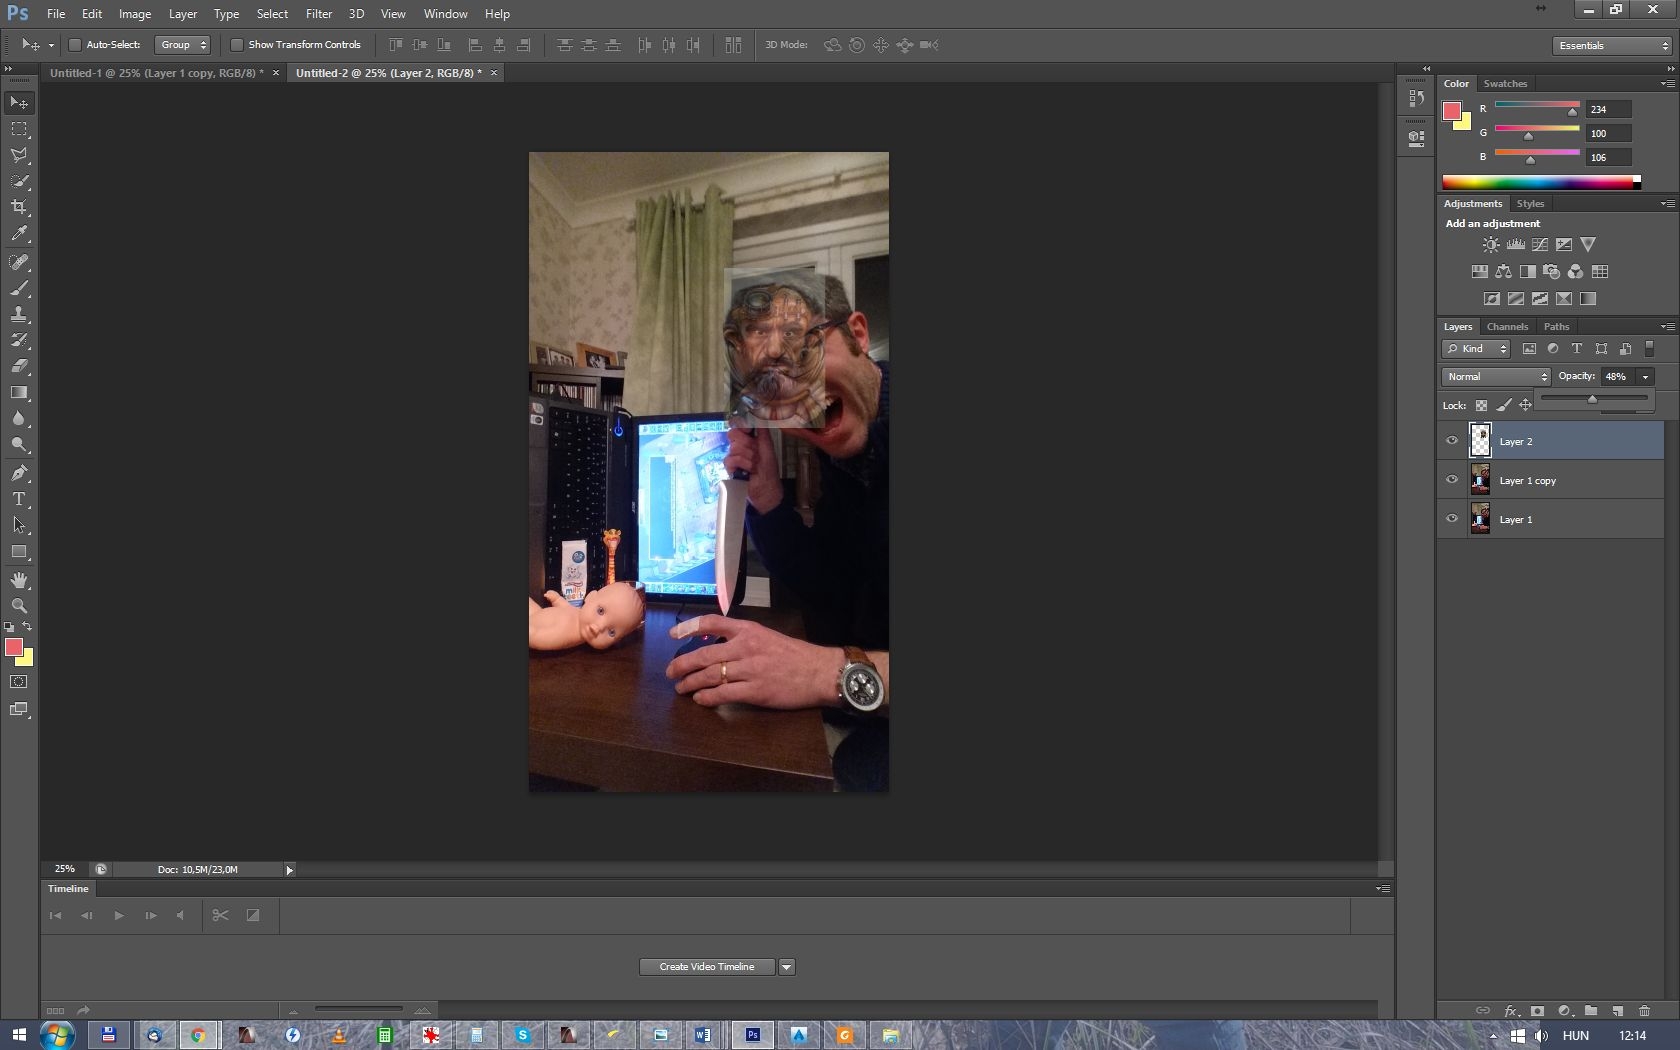
and resize the vanilla bg portrait for my selected picture size (will downsize the finished picture at the end). You may have to rotate and warp the selected portrait for better fit the BG portrait style. Head size, the distance of the eyes and mouth eye distance are good reference points.
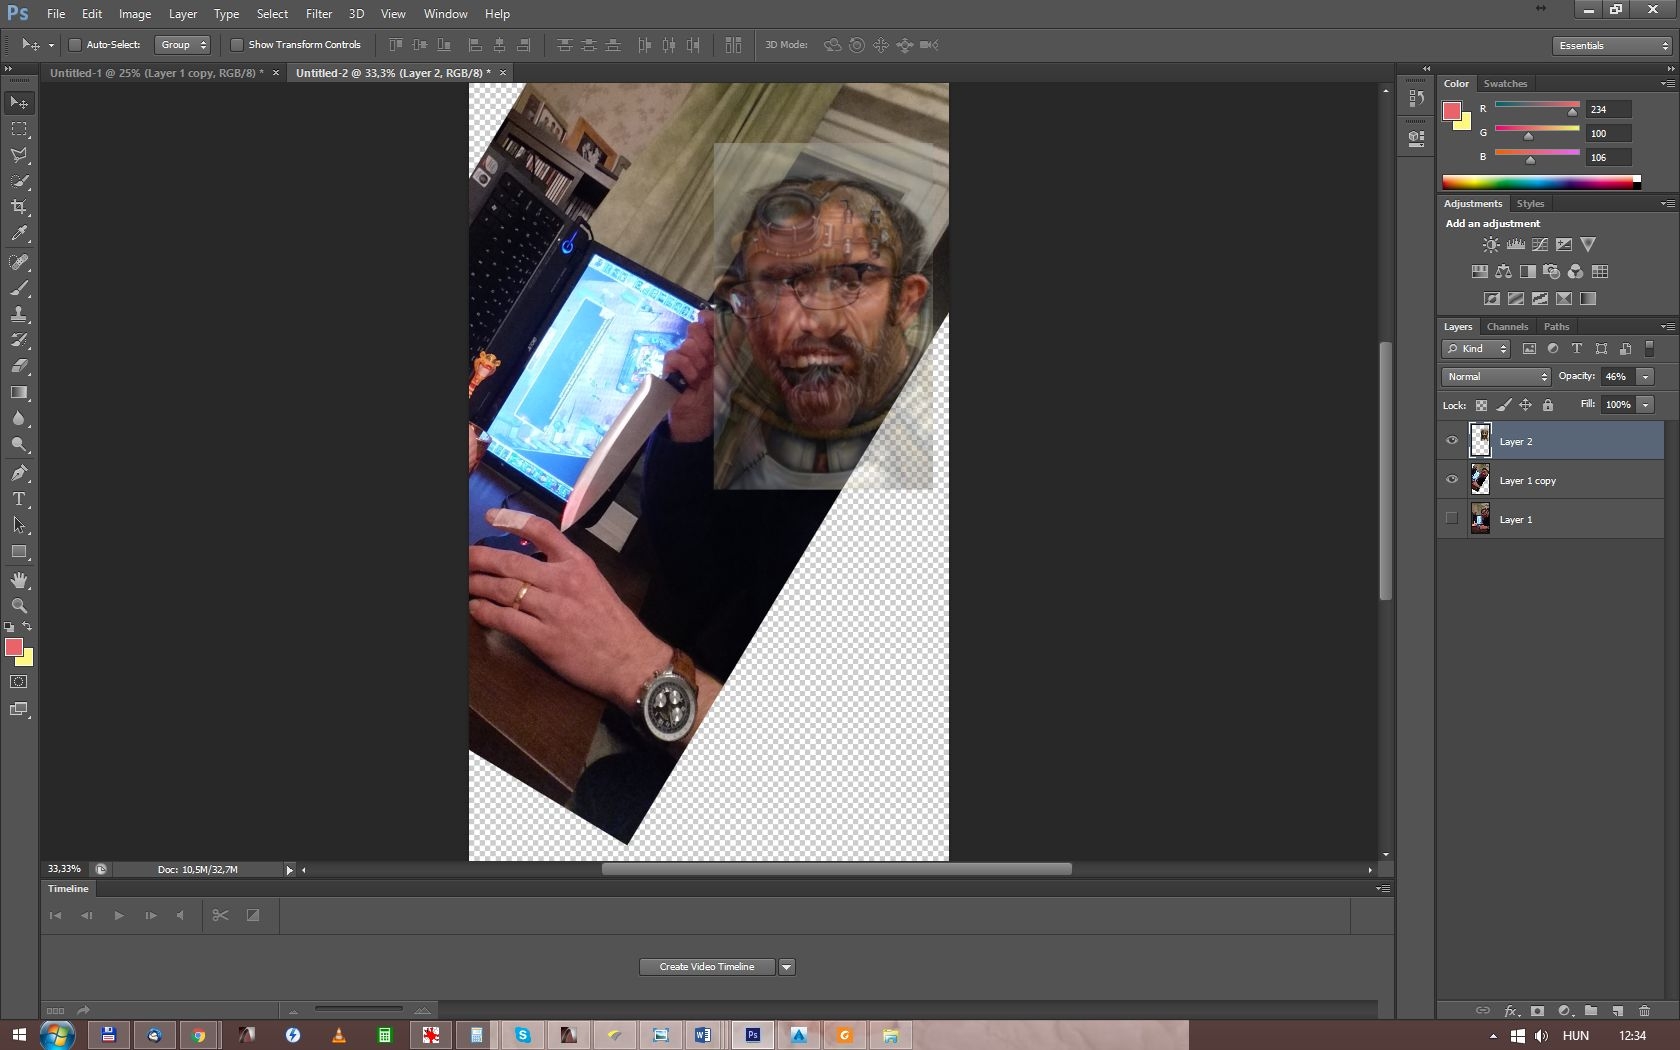
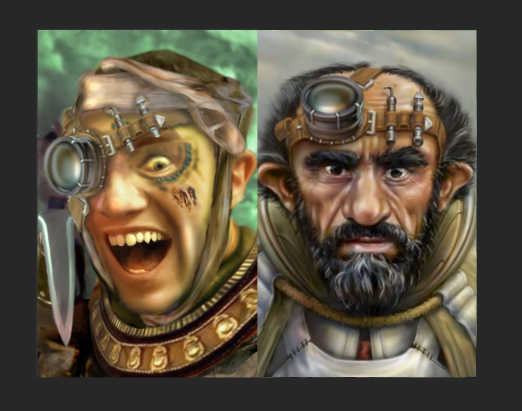
Let's see, how the cropped image look like!
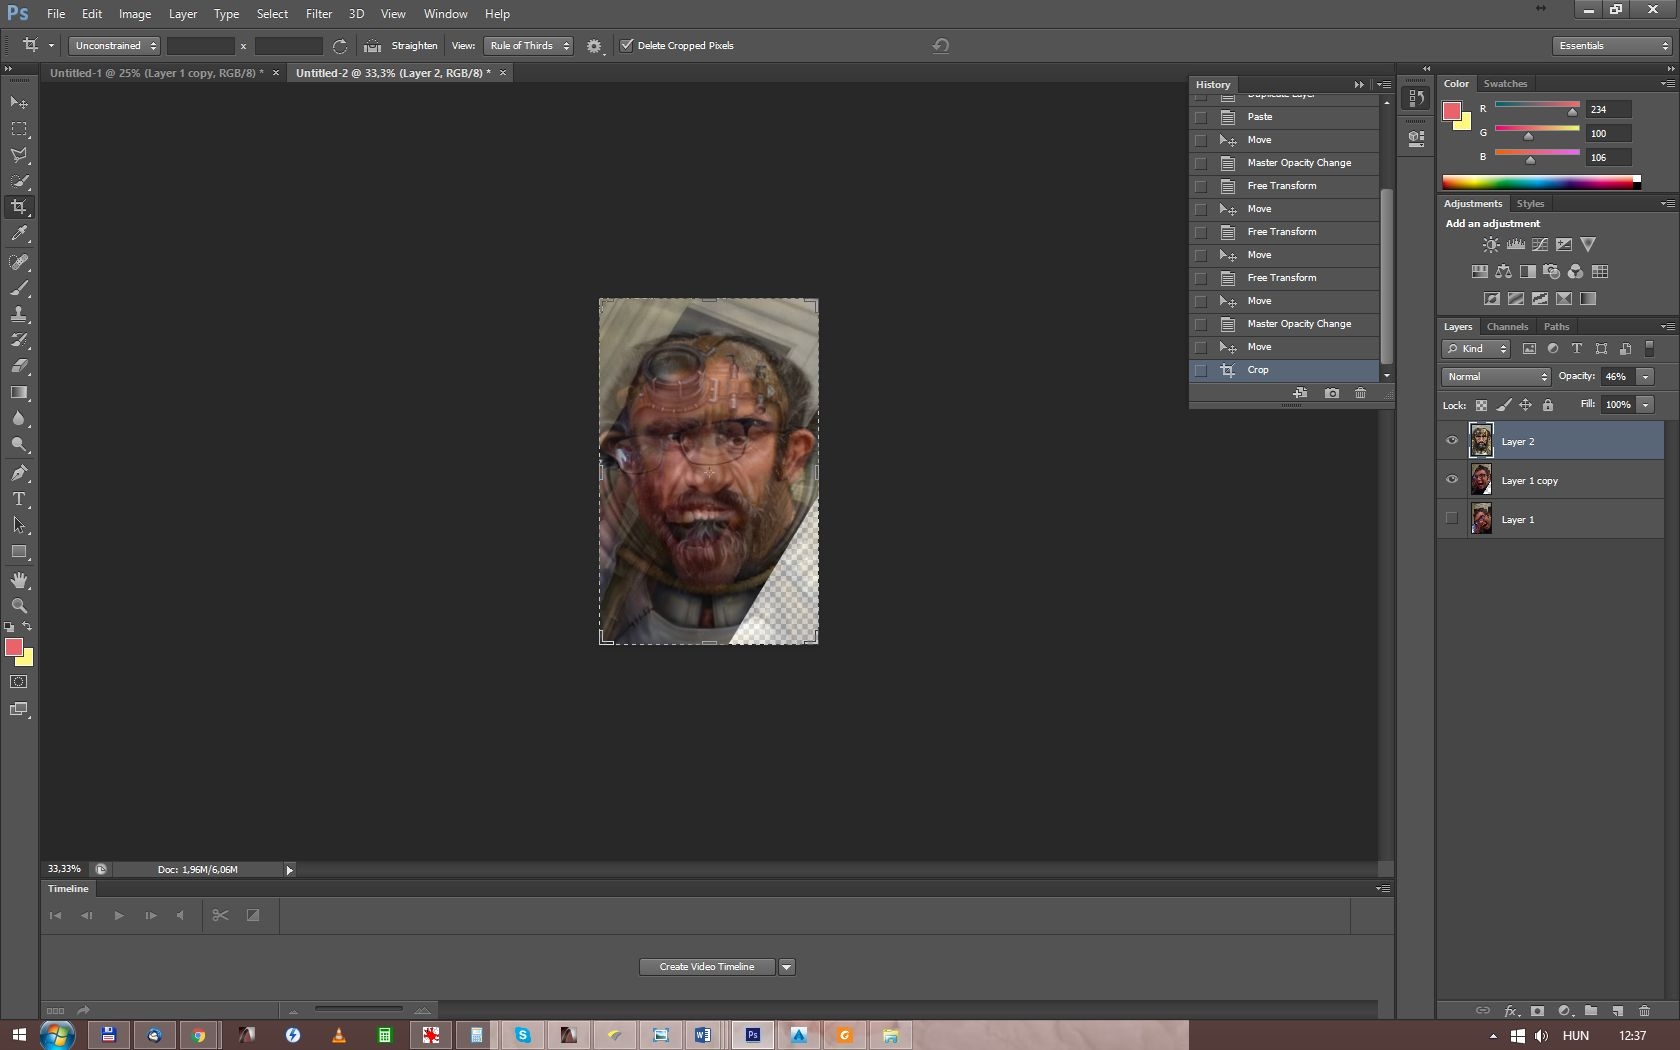
Nice!
You can go back to a previous state in the history:
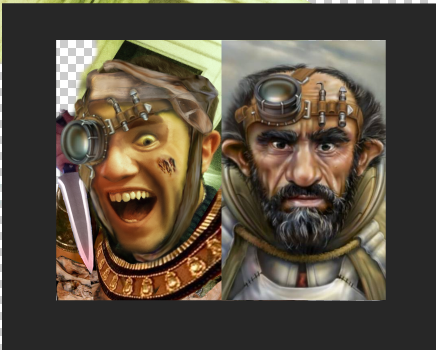
Next we will search for some source material for the mummy part of the character. I think i just try to google "mummy".


Hmmm... Maybe bandaged head? (Note: be careful what you search on google, You may find more than You want)

Ok. What will we actually use from these?
We shall see.
Put the pics in.
After that, i go through the various pictures, cut, scale and warp them, or edit with other way, if neccesary.
You can make your work easier, if you use some elements of the original BG portraits (armors, robes, jewels, other accesories).

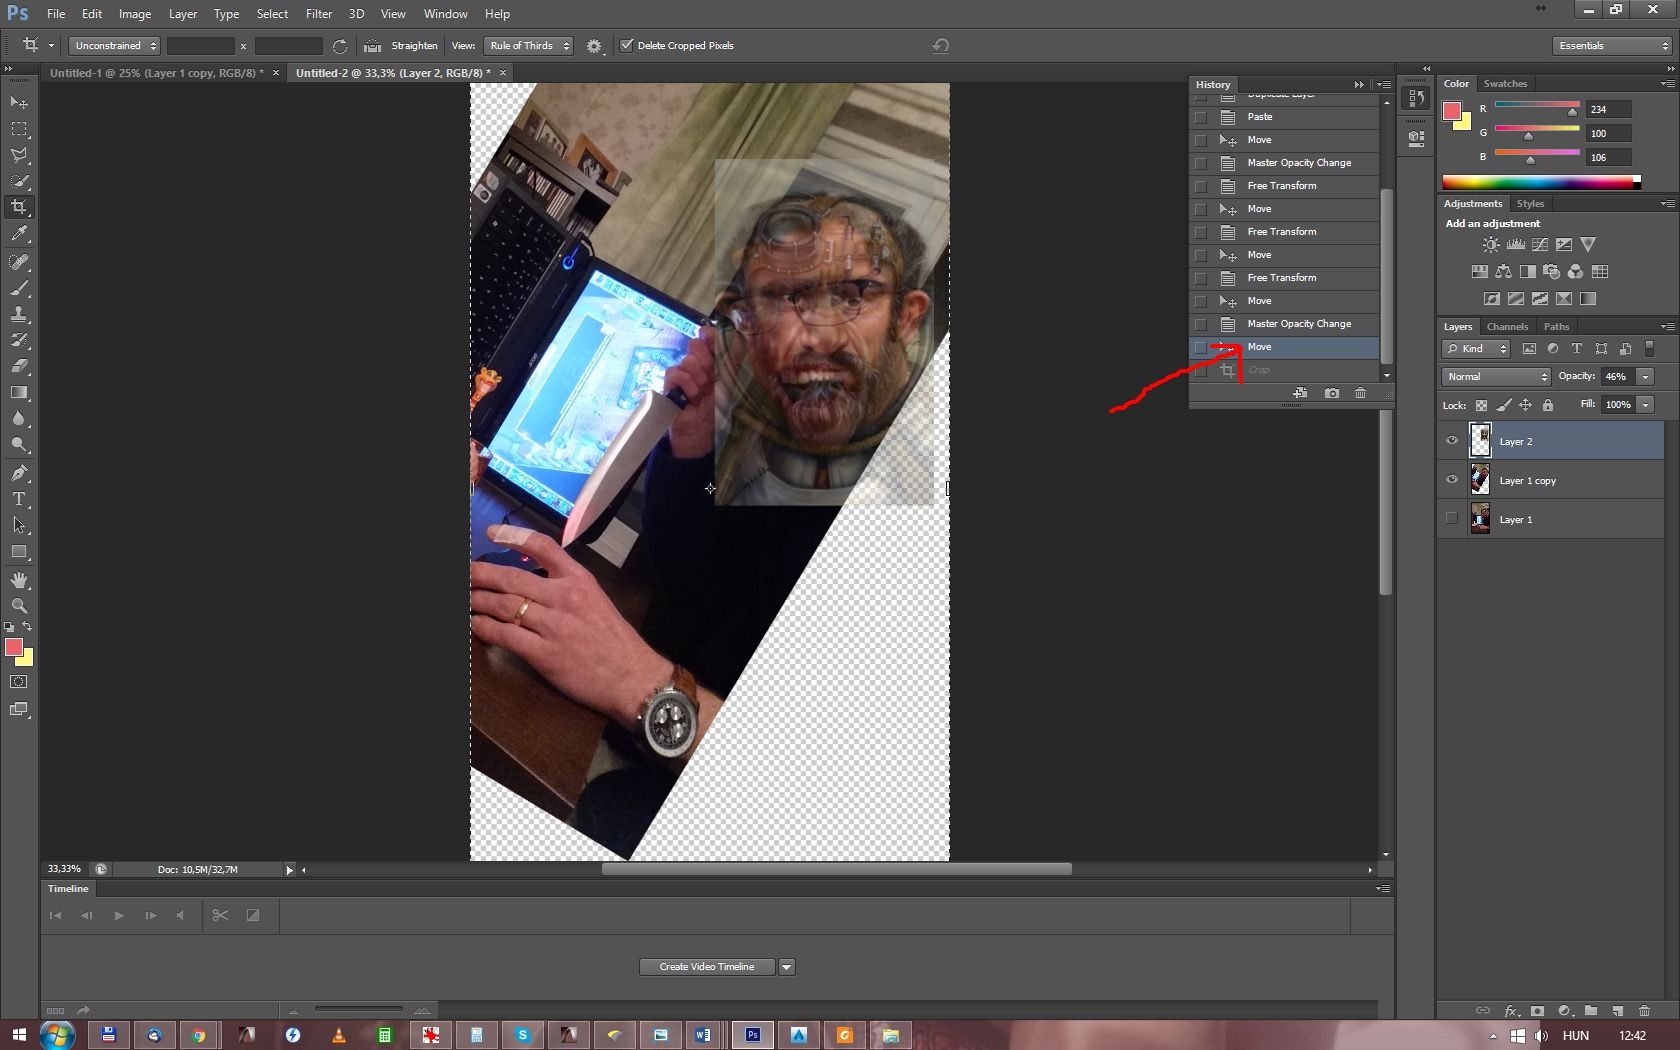
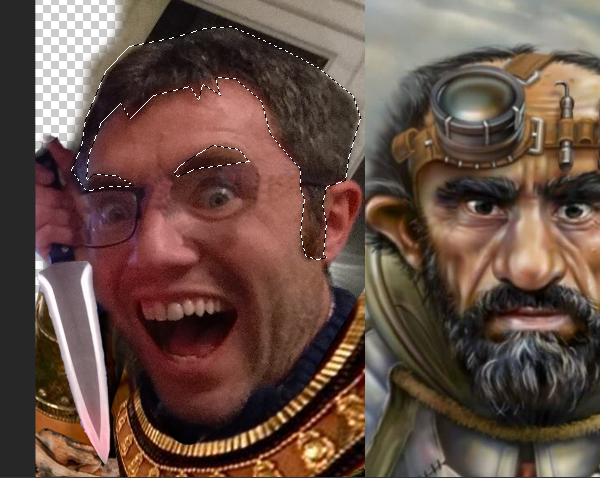
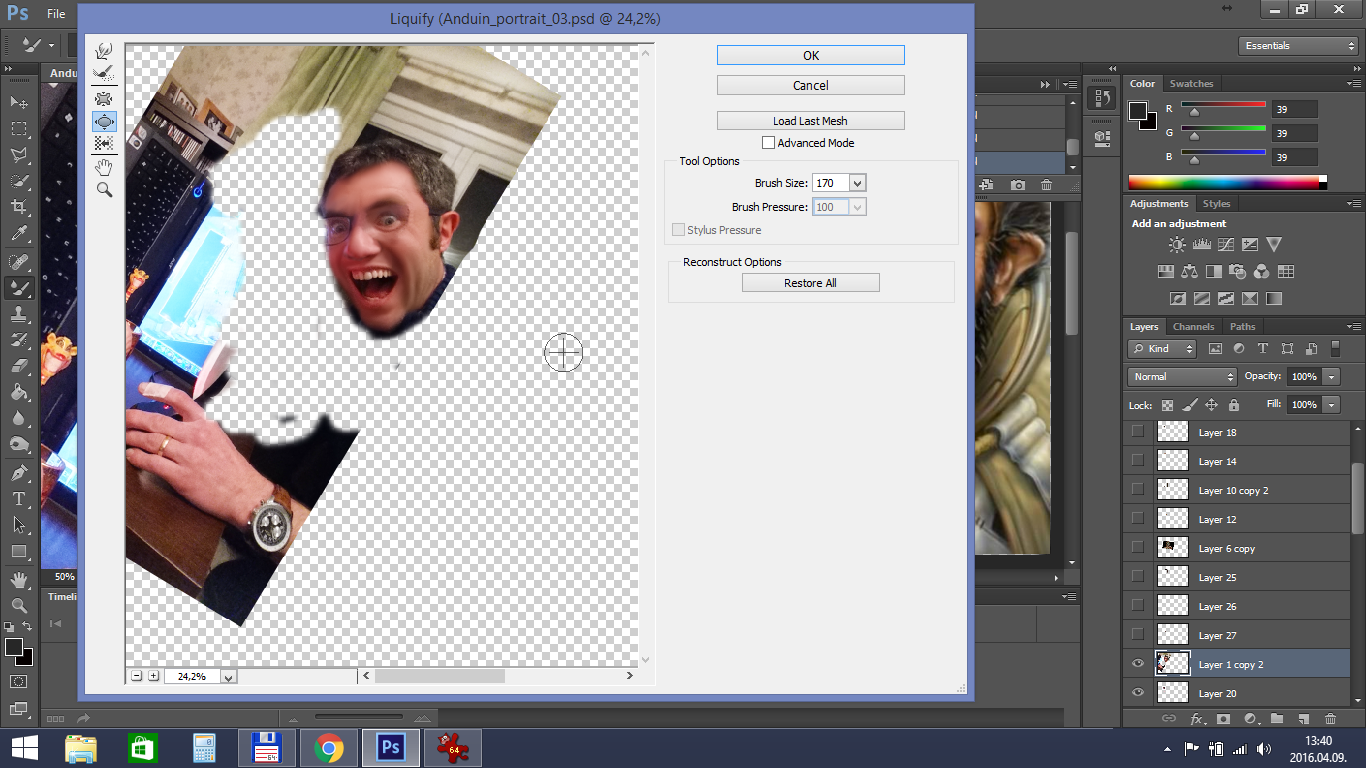
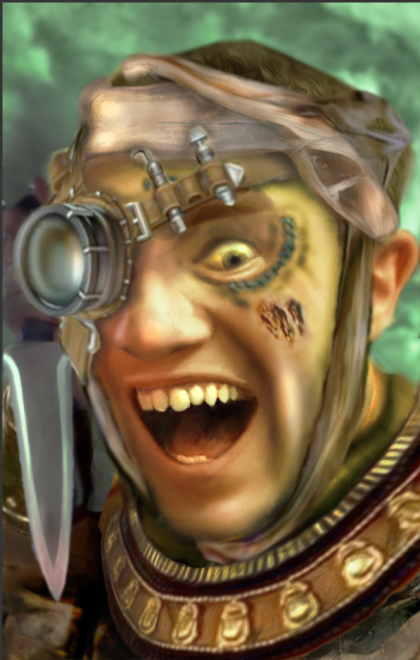
Great. Now we have two problems. (Not counting, that at this point i doubt that there will be an useable portrait from this ever.) One is the glasses: we should get rid of them with clone stamp, or get something more fantasy-like instead of them. Or maybe both?
Nice. Not obviously good, but acceptable.
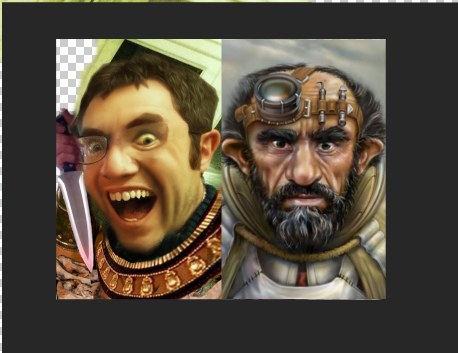
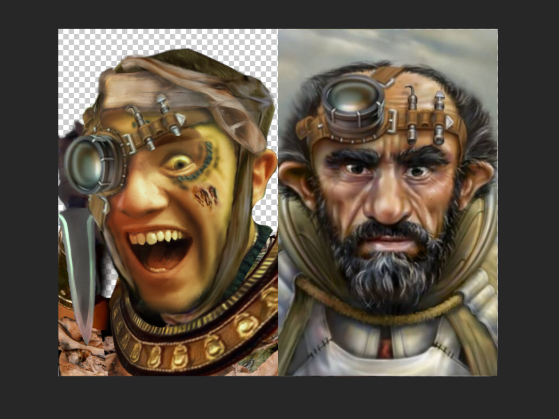
Our next problem is the butterknife. It's lefted out, when we crop the picture to the proper size. We will try to do some magic, and conjure the knife in the frame.
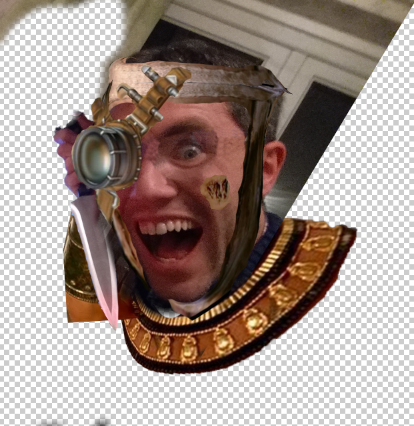
Let's see, how it looks cropped:
Crazy! Which is good in case of a gnome mummy. Yes?
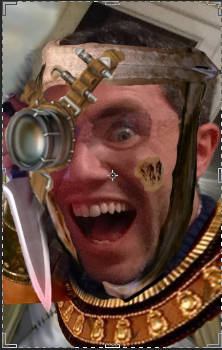
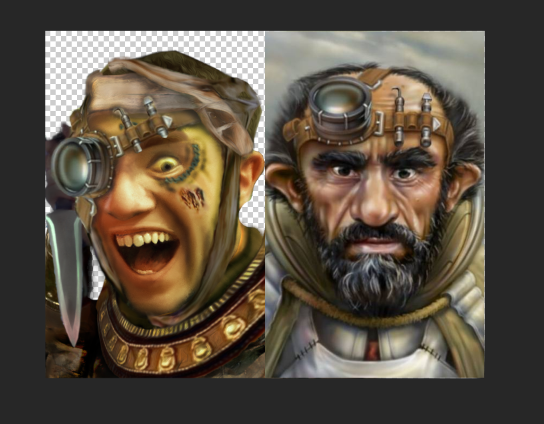
Some final additional details to fill out the empty spaces:
And we finished the arrangement with this. We can go foreward to:
But first i make a frame for this, containing Jan's original, and the would be mummy gnome portrait.

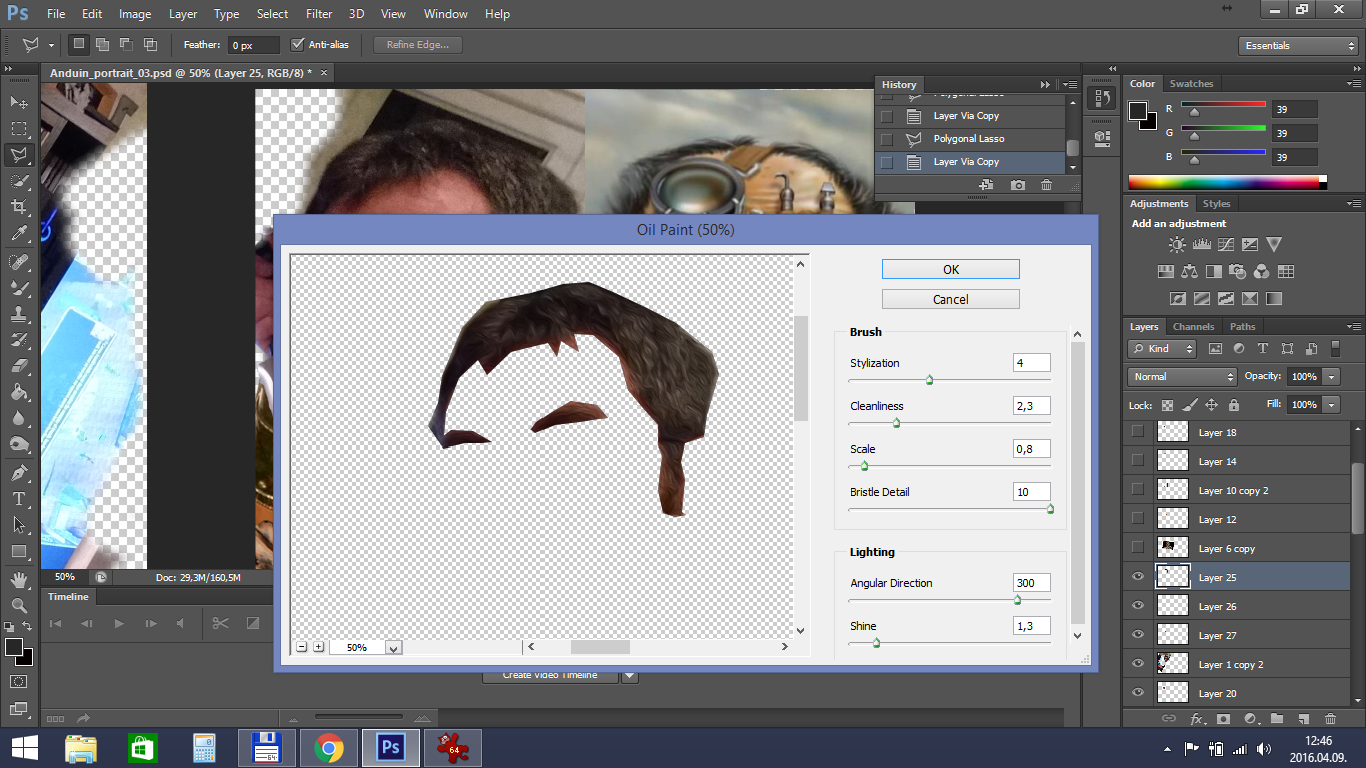
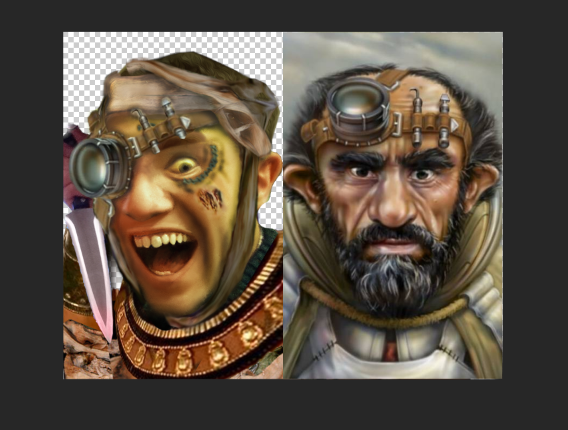
Oh, i forgot to scatter him face! I recommend to make own layers for the eyes, hair, mouth facial hair and for what what else You want. We not necessarily need them later, but better if we have them.
For hair i just use some oil paint filter, and some shading, if needed.
For the face make it more lighter first, then do the tiresome work of smoothing it with mixer brush. This is one of the most important step to reach the "baldurized feeling". First with bigger size:
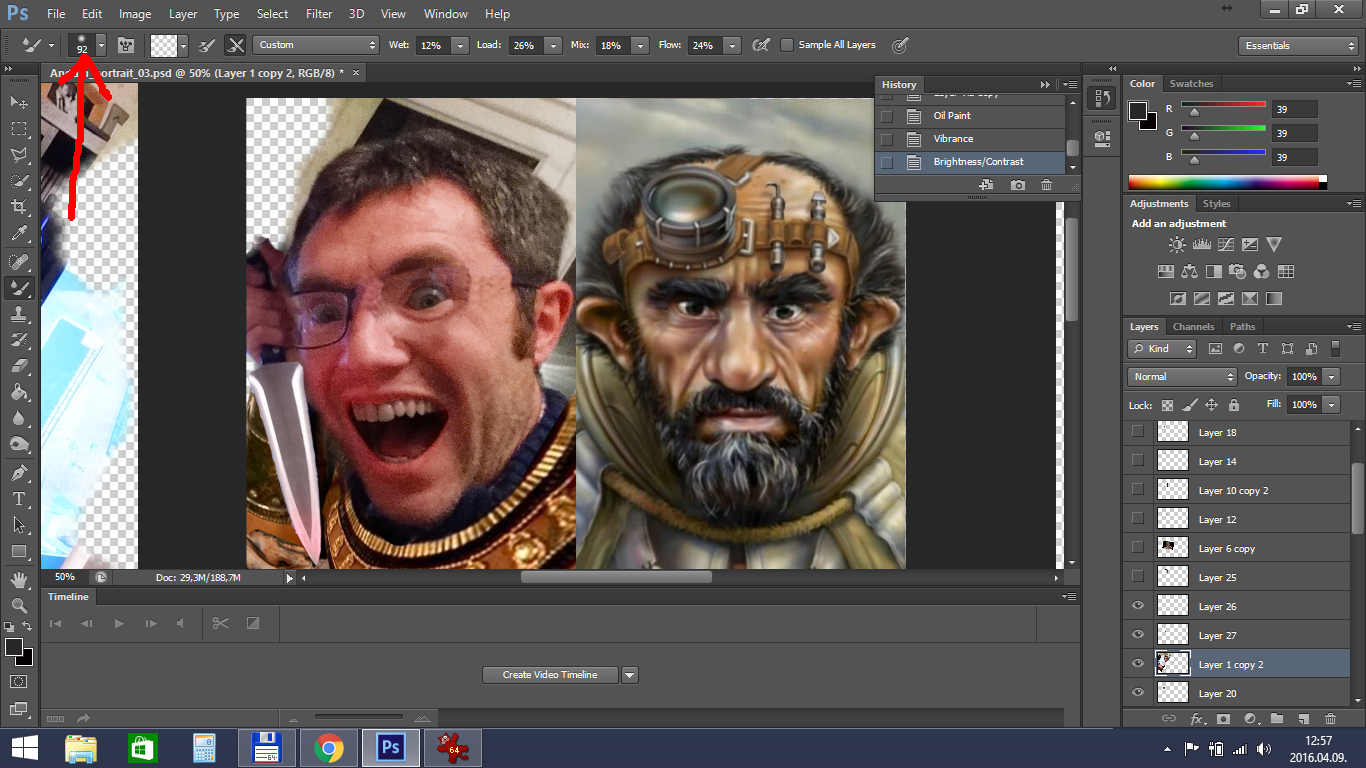
Then with smaller and smaller:
(I must mention here, that this picture is pretty blurry and low resolution, i highly recommend to pick a better one than this. I hope it will just doable.)
Also: where is his nose, a gnome must have a nose!
Better. After the face:
We go through on the other layers with one of the above methods, or with the combination of them (oil paint filter, mixer brush, yada-yada...)
And here comes the next step:
I start with the easiest part, with the background. BG2 portraits mostly have some cloudy background. On my picture turns out the green to be the dominant hue, so i'll choose some green clouds. Let's google green sky!

Fine. Put it in the background.
Now i'll merge the layers, and smooth the edges.

We are near the end, but here comes the trickiest part. Adding those tiny shining and multicolored shadowy effects, what for the BG portraits are so unique and why it's hard to copy their style. Honestly, i never can do this part right. I use mixer brush, dodge and burn tools for this too.
 Huh, i don't have much patient for this. Just grab the picture and put in the portrait folder!
Let's see my progression:
The summary is: with enough practice even someone with a lack of skill like me can make acceptable portraits.
And here ends this tutorial. Have fun!
Let me introduce for you my familiar Sycamirage. She will show you a tutorial about baldurizing a portrait picture.
Before you start into modifying other people's work, keep in mind this.
Sycamirage Posts: 1Note, this is not a thread about how to use custom portraits (one which is already available for You) in the game. For that there are discussions here: https://forums.beamdog.com/discussion/36241/heres-how-to-use-custom-portraits-in-iwdee/p1
The purpose of this thread is something different, something more.
You ever wondered about how to make those fancy custom portraits, what You find on professional artist's site like Isandir or Artastrophe?
You would like to baldurize your own portrait?
You are in the right place! I will show You, how to do this magic!
If You search for custom portraits on the web you can find many. And i mean MANY. You can spend your remaining life browsing for portraits on the web for your next character.
https://forums.beamdog.com/discussion/13507/paintbg-for-all-bg-platforms/p1
https://forums.beamdog.com/discussion/44895/custom-npc-portraits-masterthread-spoilers-obviously#latest
https://forums.beamdog.com/discussion/49653/know-thy-selfie-updated-with-new-portraits/p1
https://forums.beamdog.com/discussion/38652/your-favourite-portrait/p1
https://forums.beamdog.com/discussion/39151/portraits-for-baldurs-gate-from-might-magic-heroes-vi-and-now-from-might-magic-heroes-vii-too#latest
https://forums.beamdog.com/discussion/43813/asian-portraits-for-bg-the-nobunagas-ambition-sphere-of-influence-pack#latest
https://forums.beamdog.com/discussion/31633/beards#latest
http://portraitcity.blackwyrmlair.net/
https://forums.beamdog.com/discussion/41704/custom-pc-npc-portraits#latest
https://forums.beamdog.com/discussion/5339/alternate-npc-and-pc-portraits-just-because-p/p1
http://www.karwal.dk/portraitportal/
https://forums.beamdog.com/discussion/32948/search-for-the-karwal-portraits
http://www.shsforums.net/topic/57831-phaeres-npc-portrait-pack-v4-a-mod-from-phaere-and-rastor/
http://modlist.pocketplane.net/index.php?ax=list&cat_id=72
https://forums.beamdog.com/discussion/21387/by-far-the-best-baldurized-portraits-ive-seen-so-far-can-you-top-it
https://forums.beamdog.com/discussion/comment/428404/#Comment_428404
http://portraits.chosenofmystra.net/index2.html
There are many artists, who are making custom portraits. Some are trying to follow the original style of the BG portraits, like @Isandir (link above), others follow their own style like @jakaminski for example.
Other artists:
http://enkida.deviantart.com/gallery/33798575/Baldur-s-Gate-Portraits
http://neunerx.deviantart.com/gallery/
http://nixxical.deviantart.com/
http://peachplums.deviantart.com/gallery/26839256/Baldur-s-Gate-Style-Portraits
http://syntia13.deviantart.com/gallery/39769184/Baldur-s-Gate
http://sqwid.deviantart.com/gallery/
@LadyEibhilinRhett : https://forums.beamdog.com/discussion/11112/baldurs-gate-adorable-edition-alt-style-portrait-pack-wip-of-portraits-complete-5-94/p1
@Tola_Zagniy : https://forums.beamdog.com/discussion/comment/499447/#Comment_499447
@Astafas : https://forums.beamdog.com/discussion/39651/new-portrait-for-neera/p1 and https://forums.beamdog.com/discussion/15991/you-and-your-pc#latest
@EntropyXII : https://forums.beamdog.com/discussion/19032/exii-baldurs-gate-portrait-pack#latest
Oh, i hope you know the original artist of the BG portraits? He is Mark Sass, and here is his site: http://sassart.com/
and here is his deviantart profile:
http://mike-sass.deviantart.com/
And an interview with him: http://gamerati.com/interview-mike-sass-balders-gate/
http://mike-sass.deviantart.com/
And an interview with him: http://gamerati.com/interview-mike-sass-balders-gate/
Trent tell us here , how Mike did the original portraits. Also here You can see, who is who on the BG1 portraits.
@AndreaColombo and @Isandir even contact Mike and ask him how he did the vanilla pics:
https://forums.beamdog.com/discussion/comment/533742#Comment_533742
https://forums.beamdog.com/discussion/comment/72226/#Comment_72226
But You would like to make your own portrait.
Yes?
Of course yes, this is what You were looking for, this is why You came here for the first place...
And i will show You!
How to baldurize your portrait!
If You are truly lazy , and You just would like to crop/resize a picture You can use @NoTra 's CUSTOM PORTRAIT GENERATOR: http://www.notra.fr/portrait.phpNow if I would truly lazy
I am
I would just link other tutorials, what other persons made with greater skill, than what i posess.Tutorial by Karwal:
http://www.karwal.dk/portraitportal/tutorial_frame.htm
Tutorial by @Enkida:
http://enkida.deviantart.com/art/WIP-Ellesime-process-tutorial-1-279968917
Painting tutorial by @EntropyXII
https://forums.beamdog.com/discussion/19473/tutorial-painting-a-bg-style-portrait/p1
Instructions by @Isandir
https://forums.beamdog.com/discussion/comment/445183/#Comment_445183
https://forums.beamdog.com/discussion/comment/427756/#Comment_427756
Instructions from @Astafas
https://forums.beamdog.com/discussion/comment/445152/#Comment_445152
This two for completionists sake:
https://www.docdroid.net/DmQ1gMz/how-to-baldurize-portraits-pdf-.pdf.html
http://www.shsforums.net/topic/15603-fw-art-competition-tutorial-thread/ (this one lack's the pictures sadly)
Ok, i promised to show You myself. I'll do it, just for You. Here:
Six Easy Step to Baldurize your Picture!
Step Zero: Get in the Mood!
An important step, mostly forgotten.There are persons for whom it's harder, and there are for whom it's easier.
If You don't have the time, You are hungry or thirsty, distracted by RL stuff or just tired, it's possible, that You should postpone the portrait making for another time.
It's a good idea to listen to your favourite music, while You work.
First step: Choose Well!
One of the most important thing, what You have to do if You would like to make a baldurized picture of someone, is to obtain a good quality picture.I provide some example for the various quality, to help deciding if yours is good enough.
Too much light:
Too much darkness:
Too few color:
Too much writing:
Maybe it's possible to baldurize the above pictures too, but You can make your work a lot easier, when you get one with better quality. Sometimes You can be so fortunate, that You have available a pic with full details, and You just have to make a few touch to make it fit into the game!
The key properties of a good starting base picture for the portrait (let it call the BG rules):
Big resolution
Good lightning
Step two: Class and Style
The next question is:What character would You like your portrait to be?
A mage?
A sorcerer?
A bard?
A rogue?
A ranger?
A cleric?
Also, You must decide in what style would You like to make your picture.
BG1, BG2 and IWD all use different portrait style.
I usually go for BG2 style.
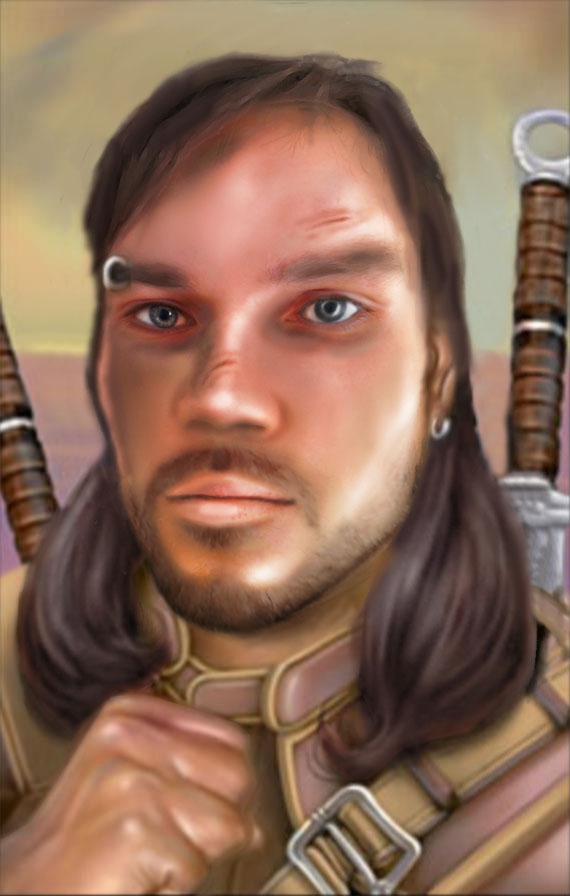
Two of my attempts to reach something like IWD style:
You can choose another, totally different style too, of course.
Step Three: Pick Your Method!
You will need a program, or some other tools to do the actual job.I use Photoshop, and only have (limited) knowledge from that program, so if You use other method, You can't learn much more from this tutorial.
I know.
Lame.
Step Four: Start the Real Work!
Huh. It was exhausting to reach this point, congratulation, if You managed it with intact sanity!So You have the good quality picture to work with, and You have a concept what You would like to do with it.
This tutorial is already long wided, so i will not explain all the details of using Photoshop, there are plenty of good help on the web.
just google it.
First we will create the arrangement of the portrait.
Put the original picture in PS, and duplicate it's layer already. I use to make a copy from the layer i work with, when i reach another work phase. Also save your progression in multiple files. (Or save not, if You are a hardcore player, and want to do a no-reload run.)
We picked the pic:
The coception is to make a gnome mummy from this one. I totally have no idea at this time, how i'll manage this, so yay! Exciting!
I always insert one vanilla portrait beside mine, to have an idea, what i would like to reach, what will be the area, what on i will work.
I give it some transparency:
and resize the vanilla bg portrait for my selected picture size (will downsize the finished picture at the end). You may have to rotate and warp the selected portrait for better fit the BG portrait style. Head size, the distance of the eyes and mouth eye distance are good reference points.
Let's see, how the cropped image look like!
Nice!
You can go back to a previous state in the history:
Next we will search for some source material for the mummy part of the character. I think i just try to google "mummy".
Hmmm... Maybe bandaged head? (Note: be careful what you search on google, You may find more than You want)
Ok. What will we actually use from these?
We shall see.
Put the pics in.
After that, i go through the various pictures, cut, scale and warp them, or edit with other way, if neccesary.
You can make your work easier, if you use some elements of the original BG portraits (armors, robes, jewels, other accesories).
Great. Now we have two problems. (Not counting, that at this point i doubt that there will be an useable portrait from this ever.) One is the glasses: we should get rid of them with clone stamp, or get something more fantasy-like instead of them. Or maybe both?
Nice. Not obviously good, but acceptable.
Our next problem is the butterknife. It's lefted out, when we crop the picture to the proper size. We will try to do some magic, and conjure the knife in the frame.
Let's see, how it looks cropped:
Crazy! Which is good in case of a gnome mummy. Yes?
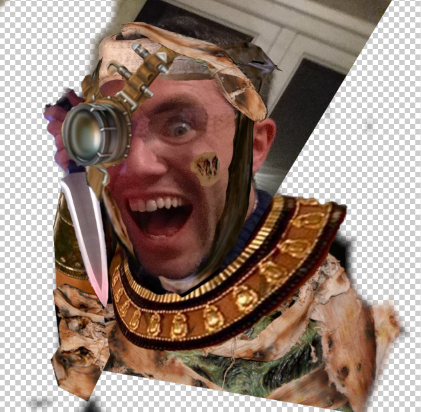
Some final additional details to fill out the empty spaces:
And we finished the arrangement with this. We can go foreward to:
Step Five: Fine tuning
We have some layers and we would like to blend them together. For this we edit their brightness/contrast, vibrance, hue/saturation, color balance and shadow/highlight adjustments. I'll also use the burn and dodge tool, and the mixer brush tool for local editing.But first i make a frame for this, containing Jan's original, and the would be mummy gnome portrait.
Oh, i forgot to scatter him face! I recommend to make own layers for the eyes, hair, mouth facial hair and for what what else You want. We not necessarily need them later, but better if we have them.
For hair i just use some oil paint filter, and some shading, if needed.
For the face make it more lighter first, then do the tiresome work of smoothing it with mixer brush. This is one of the most important step to reach the "baldurized feeling". First with bigger size:
Then with smaller and smaller:
(I must mention here, that this picture is pretty blurry and low resolution, i highly recommend to pick a better one than this. I hope it will just doable.)
Also: where is his nose, a gnome must have a nose!
Better. After the face:
We go through on the other layers with one of the above methods, or with the combination of them (oil paint filter, mixer brush, yada-yada...)
And here comes the next step:
Step Six: Lightning
In the sixth step we will merge all the layers together, add some background and give additional shadows and lights to the picture.I start with the easiest part, with the background. BG2 portraits mostly have some cloudy background. On my picture turns out the green to be the dominant hue, so i'll choose some green clouds. Let's google green sky!
Fine. Put it in the background.
Now i'll merge the layers, and smooth the edges.
We are near the end, but here comes the trickiest part. Adding those tiny shining and multicolored shadowy effects, what for the BG portraits are so unique and why it's hard to copy their style. Honestly, i never can do this part right. I use mixer brush, dodge and burn tools for this too.
Final Step: Учиться, учиться и учиться.
And if you want to learn something, you have to practice it. Maybe i had to say practice make perfect, but the above quote from Lenin is just cooler.Let's see my progression:
The summary is: with enough practice even someone with a lack of skill like me can make acceptable portraits.
And here ends this tutorial. Have fun!
Post edited by lolien on
30
Comments
I knew i should go for a blue familiar, but they are so hard to come by.
I suppose I could also roll a Mage with a Toad familiar...
Hair was on a white background, but I like the style...just need to figure out how to deal with those glowing tips, and find a transferrable outfit...maybe some raindrop earrings.
[Edit: Looks like I'm playing dress-up now... Space Cadets, Samurais... the outfit is actually pretty easy to swap it... Its just finding the right one...]
And I completely agree that your progress on baldurizing images is phenomenal. The latest work on @Anduin is brilliant.
Friend suggested the frog is a wizard and the girl its familiar... so maybe a tiny wizard hat for him?
[I feel a backstory coming on... Girl was wild mage (or got into a duel with one) with frog familiar. Wild Surge -> Mind swap. Frog is now girl, intelligent because it was a familiar, but odd-personality because it was a frog. Becomes a jester to best explain abilities and personality. Girl is now frog, casts the spells, but lacks finger waggling abilities to properly cast the somatic component necessary to switch back or cover more complex magics? Intriguing. Funny tongue might make pronunciation more difficult as well. Don't mind me...]
https://forums.beamdog.com/discussion/comment/726794/#Comment_726794
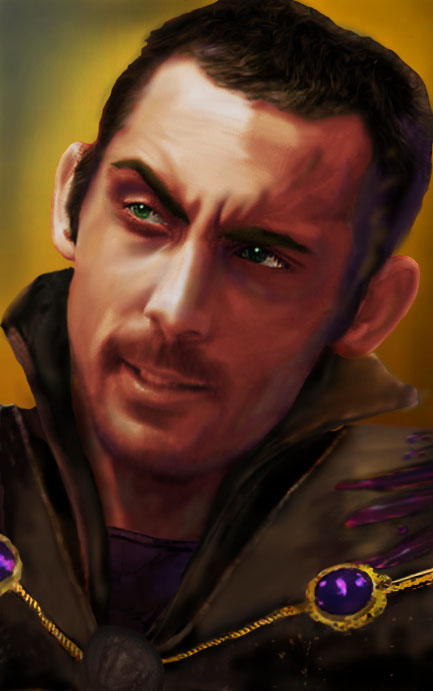
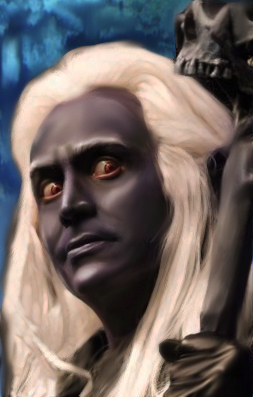
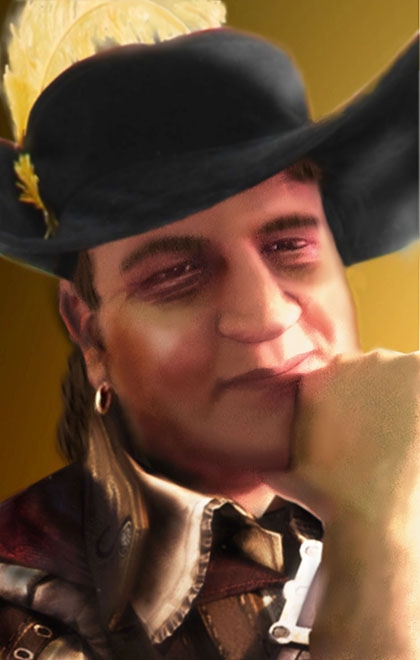
Original to Final Product:
Anyone can use in my opinion, if they want. But Fair Use credits:
Armor: Guild Wars 2
Base: Emma Watson (was unable to discover the original photographer.)
Background: Skyrim, Sovngarde sky
Hair: Hand-Modified
@Astafas : that leather jacket is good find, i struggled with finding one decent robe with a collar in the past.
It really does need darker, more contrasting shadows though to look like the other portraits. I seem to go too gently with each change, and then slowly compound them. Probably why it took so long to get there.
Maybe I'l just slather some black on there and blur it...see what happens.
(As always, suggestions welcome. Mostly winging this, so i may not be aware of the tools I may have at my disposal through GIMP. If people want to draw all over my images to highlight a suggestion or point, please do!)
[Edit: Okay, so I added some more shadows: around the eyes and accented the sockets, darkened the left cheek for wabi-sabi, 3D'd the hair a bit with drop shadows, and then darkened some frog joints a tad. I also severely lowered the general face glow and tried to add some more localized highlights, though they could still be even more focused.]
Its funny, every time I make a small change, I love it. then compare it to a previous one I thought was perfect, and like it even more.
Armor: http://www.swordsandarmor.com/mall/suit-of-armor-Black-Knight.htm
Background: http://weknowyourdreamz.com/sunset.html
There's more work to do. It still looks a bit like a photograph rather than oil painting but when I try to darken it looks bad. But I'm pretty happy so far.
I have an NPC in mind for this portrait. But until then, it could make a decent Keldorn.
I agree, the biggest difficulty I've had is making the portrait look painted. (Shame you can't just slap on a "Painting" filter and be good to go. There are tools for it, but you really need to know them well I think, and Oilify just doesn't cut it for the face, imo.)
I found that my largest "jump" in progress happened when I upped the contrast by ~25-30 (though i'd adjust each layer a little differently)... Then I'd change the brightness and saturation to mellow it back out to a more normal look.
(I think it was like.. Color [Auto-Normalize] > Levels [Auto] > Contrast [+30] > Brightness [+20] > Saturation [-25] > Color [Auto-Enhance] I wish I wrote it down in case I wanted to make another one.)
The Progress + The Original Armor:
I am flabbergasted by how far it came. The last time I thought it was done was at Stage 4, clearly not!
The *Final* Portrait:
..I'd swear posting it to the forums actually lightened the shadows slightly..may be a compression thing.
I usually would have gotten a bit more out of that hair using Manga Studio, but I'm waiting on a replacement battery to come in the mail for my Surface Pro 3's pen.
some tips (my original way); I'll isolate my clothing/armour layers, duplicate them and use a lot of smart blur and lower the opacity, then on a separate layer smooth out the jagged edges you can still see with the paint brush tool, sampling the colours with eyedropper tool; this tends to give that blurred look on the armour that you see in BG! Then mess around with clipping masks and put some blues on darker colour or overlay / multiply (try anything really and see what looks good) lower the opacity (this is for shadows)--really, clipping masks are your friends--and then put some exposure, curves, vibrance saturation and see how it looks! Its much more complicated but thats the shortened version of it.